How To Set One Wallpaper For All OS X Desktop Spaces At Once
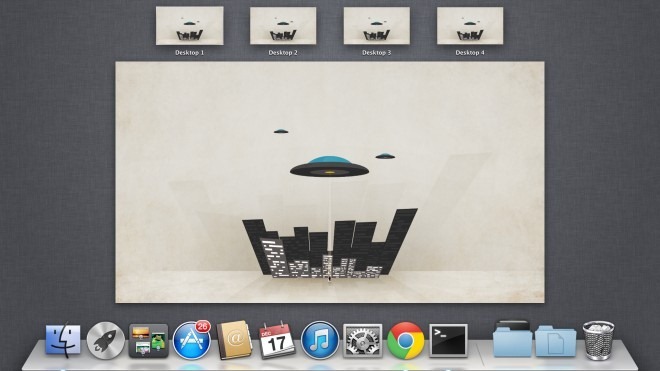
First introduced in OS X Lion, Desktop Spaces provide an excellent platform for window management. Since then, the feature has become one of the most popular additions in OS X, though it is considerably limited in some areas. It’s the closest you get to a virtual desktop available system wide, so you won’t see too many complaints. At present, each desktop space operates somewhat independent of the other. You get the same desktop icons no matter which space you’re on, but you can keep windows and apps separate. You can also, by default, make the wallpaper for each space different. This might seem useful, but a fair number of users would prefer the same background across all desktops, and that isn’t possible in two clicks or less in OS X. It lacks any way to change the background for all desktop spaces at once, which is why you might need an app or script for that. We haven’t yet found an app that does so, but a simple script does the trick fairly well. The process of creating the script is simple, but a little lengthy, so we’ll break it down as best as we can to make it easier to follow.
Apps You Will Work With
You will be working with:
- TextEdit
- Terminal
You will also need to access the Library folder at the root of your hard drive and create a shortcut for the script you make on Finder sidebar.
Folder Permissions
Head over to /Library/Desktop Pictures and add Desktop Pictures to the Finder sidebar. Doing this will let you save a file more easily to this folder from TextEdit’s Save As dialog. Next, right-click this folder, go to Get Info, and make sure you have permissions set to Read & write.
Writing The Script In TextEdit
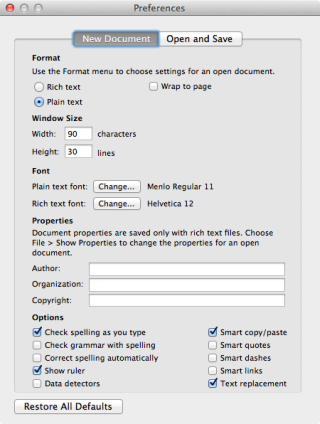
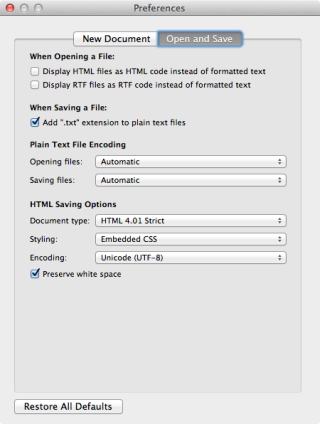
Open TextEdit’s preferences and make two changes: in the ‘New Document’ tab, select the ‘Plain Text’ option under ‘Format’, and in the ‘Open and Save’ tab, uncheck the option labeled ‘Add “.txt” extension to plain text files’.
Open a new TextEdit document and paste the following script in it:
#! /bin/bash
 #script to change all desktop backgrounds
echo -n “Drag and drop an image file here then press ‘return’ or
 press ‘control-c’ to cancel…”
 read -e WLPR;
function change_wallpaper
 {
 defaults write com.apple.desktop Background “{default = {ImageFilePath=’$WLPR’; };}”; killall Dock
 }
 change_wallpaper
Save this file to the Desktop Pictures folder you added to the Finder sidebar. If it tells you that you don’t have permission to save to this folder, revisit the folder’s options to recheck if permissions are set to Read & write. Save this file with the name ChangeAllDesktops; it should NOT have a TXT extension.
Making Your Script Executable
It’s now time to tell your OS that this file you just made is going to be making changes to the desktop. Open a Terminal window, run the following command and enter your password when prompted to do so.
sudo chmod a+x /Library/Desktop\ Pictures/ChangeAllDesktops
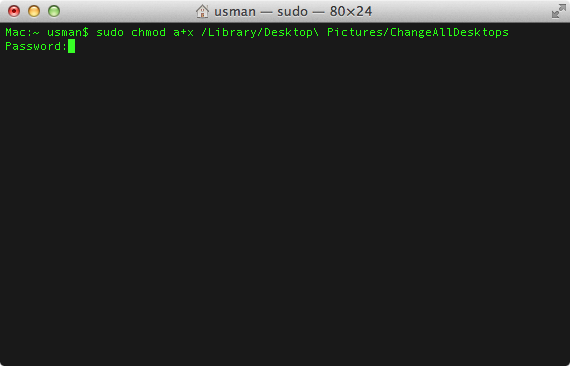
Head over to your file now and open it with Terminal. Note that you shouldn’t set OS X to always open these types of files with Terminal. Just open it once, so that it knows which app to default to when you open the file.
Changing Desktop Backgrounds
The ChangeAllDesktops file will open in the Terminal asking you to drag & drop the image you want to set as the desktop background.
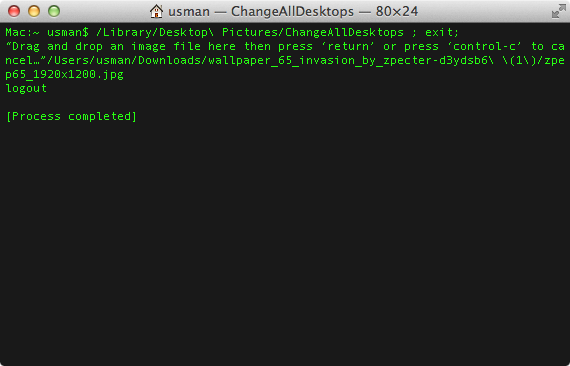
Drag an image from the Finder onto the Terminal window and hit Enter. The background across all desktops will change to the selected image.
It is interesting to note that if you don’t drag & drop an image to the Terminal when you run the file and simply hit enter, the background for all desktops will be reset to the default galaxy wallpaper.
Have I Broken Anything?
After having to alter permissions of the Library folder and running a few Terminal commands, you might wonder if what you’ve done is permanent, or if it is reversible. Advanced users will know right away that this is not a permanent change, but to set your mind at ease, here’s why.
You’ve only run a script that changes the desktop background. It runs once and makes whatever change it is meant to make without leaving any permanent traces. In this case, it’s changed the desktop backgrounds, which is easily reversible from your System Preferences. The script file, on it’s own, does absolutely nothing unless you add an image to it or hit enter, and after you do run it, you will still be able to change the background of each desktop space individually.
Why Isn’t It Working?
This will work on both Lion and Mountain Lion with no glitches whatsoever. Should you face any problems, make sure you didn’t reset the folder permissions of the Desktop Pictures directory after saving the file to it. Additionally, make sure you saved the script file directly to the Desktop Pictures folder and didn’t copy the file to it. When we copied the file to the folder, the script wouldn’t run. Other than this, there isn’t much that could go wrong with this simple procedure. It won’t work for multiple displays, though. You can disconnect the second or third display, change the backgrounds and then reconnect them to ensure the same background on all desktops, which we admit is a tad inconvenient.
[via Phil Stokes]

This is sick. I will stick to solid color.
there is no need for sudo
Hello. Hola
What are the changes needed in order to change the background to a solid color?
I guess this two peaces of code should be changed
read -e WLPR;
{ImageFilePath=’$WLPR’; }
Thank you
Rodolfo
Please fix your textarea code to not use “fancy quotes”, but use normal ” and ‘ characters.
The script works well if you have one screen, but on a multi-monitor Lion (10.7.5) setup it sets the background on the primary one and resets the secondary screen to the default 🙁
Hey, where did you get that wallpaper?
” If it tells you that you don’t have permission to save to this folder, revisit the folder’s options to recheck if permissions are set to Read & write.”
Yes, Phil is right! If you’er logged in as admin, you don’t have to revisit the folder options and mess with the access permissions. Just enter the admin password when prompted to make the changes.
I also didn’t get this part:
“After having to alter permissions of the Library folder and running a few Terminal commands, you might wonder if what you’ve done is permanent, or if it is reversible. Advanced users will know right away that this is not a permanent change, but to set your mind at ease, here’s why”
I don’t see any file permission changing steps in the article.
O.o?
Even if you are not logged in as admin, so long as you have admin username and password, you can do it. (Just one extra field-username)
Saving files in TextEdit has changed a bit in Mountain Lion. You can’t navigate to a specific folder in your hard drive to save a file to it.
Now I see why you’re talking about file permissions, but this is simply not true. Just make sure you have your HDD checked as showing under ‘Devices’ in Finder’s sidebar preferences, and you can navigate from there inside all ‘Save..’ dialogues. No need to be messing with permissions!!
(You might want to edit your post to fix that misunderstanding; feel free to delete my comments once you do!)
Thanks for taking out the time to point these mistakes out, Phil. We’re on it!
Thanks for taking out the time to point these mistakes out, Phil. We’re on it!
No worries. I don’t mind you re-using my content since you gave the credit. But if you’re going to change the instructions because you think something “doesn’t work”, you might want to run a draft of your post by me first. 😉
Best
“If it tells you that you don’t have permission to save to this folder, revisit the folder’s options to recheck if permissions are set to Read & write.”
No. If you’re and Admin user you just authenticate when asked. If you’re not an Admin user, you can’t do it. You do not want to be messing with the permissions on this folder. See my original post for the correct instructions.