XBian: Another Way to Run Kodi on the Raspberry Pi
The Raspberry Pi, a $35 single-board computer from the UK, has become more and more popular as a platform for running a TV-attached media center. XBian is one of many operating systems dedicated to accomplishing just that. With its powerful processor and graphics chipset, a decent amount of memory and all the necessary interfaces to connect it to a TV and to the rest of the world, The Raspberry Pi is one of the cheapest–and arguably one of the best–solutions for a full-featured media player. And with XBian, the Raspberry Pi does not only play your media collection, it can also help build it.
We’ll start our discussion by talking about the Raspberry Pi, what it is, and what makes it tick. Then we’ll talk about what’s needed to use it as a TV-attached media player. Once you’re familiar with the device, we’ll introduce XBian. Next, we’ll tell you how to get XBian up and running on your Raspberry Pi and take you through a quick tour of its user interface. And to conclude, we will compare XBian to other similar operating systems.
For Added Privacy When Streaming Online, Use a VPN
Before we continue, we’d like to take a moment to discuss your privacy when using one XBian’s most popular pre-installed programs: Kodi. Your ISP may be monitoring your Internet activity, as they want to ensure no one is violating their terms and conditions. While Kodi is legal to use, its third-party add-ons may grant access to restricted content, causing ISPs to take a dim view of the service and its users regardless of what they do with it. You may experience throttled speeds, receive copyright infringement notices, or even have your internet service interrupted altogether.
A VPN protects your privacy by encrypting your data using strong algorithms that make it almost impossible to crack. Neither your ISP nor anyone else, for that matter will be able to see what you’re doing. Furthermore, A VPN can let you bypass geographic restrictions by connecting to an appropriately-located server.
Choosing a VPN can be a daunting task due to the number of suppliers available. Important factors to consider when selecting one are a fast connection speed to avoid buffering, a no-logging policy to further protect your privacy, no usage restrictions to access any content at full speed and software that is available for your device.
The VPN We Recommend for Kodi – IPVanish
We’ve tested all major VPNs against our criteria and the one we recommend for Kodi users is IPVanish. With servers worldwide, no speed cap or throttling, unlimited bandwidth, unrestricted traffic, a strict no-logging policy and client software available for most platforms, IPVanish delivers impressive performance and value.
IPVanish offers a 7-day money back guarantee which means you have a week to test it risk-free. Please note that Addictive Tips readers can save a massive 60% here on the IPVanish annual plan, taking the monthly price down to only $4.87/mo.
Introducing the Raspberry Pi
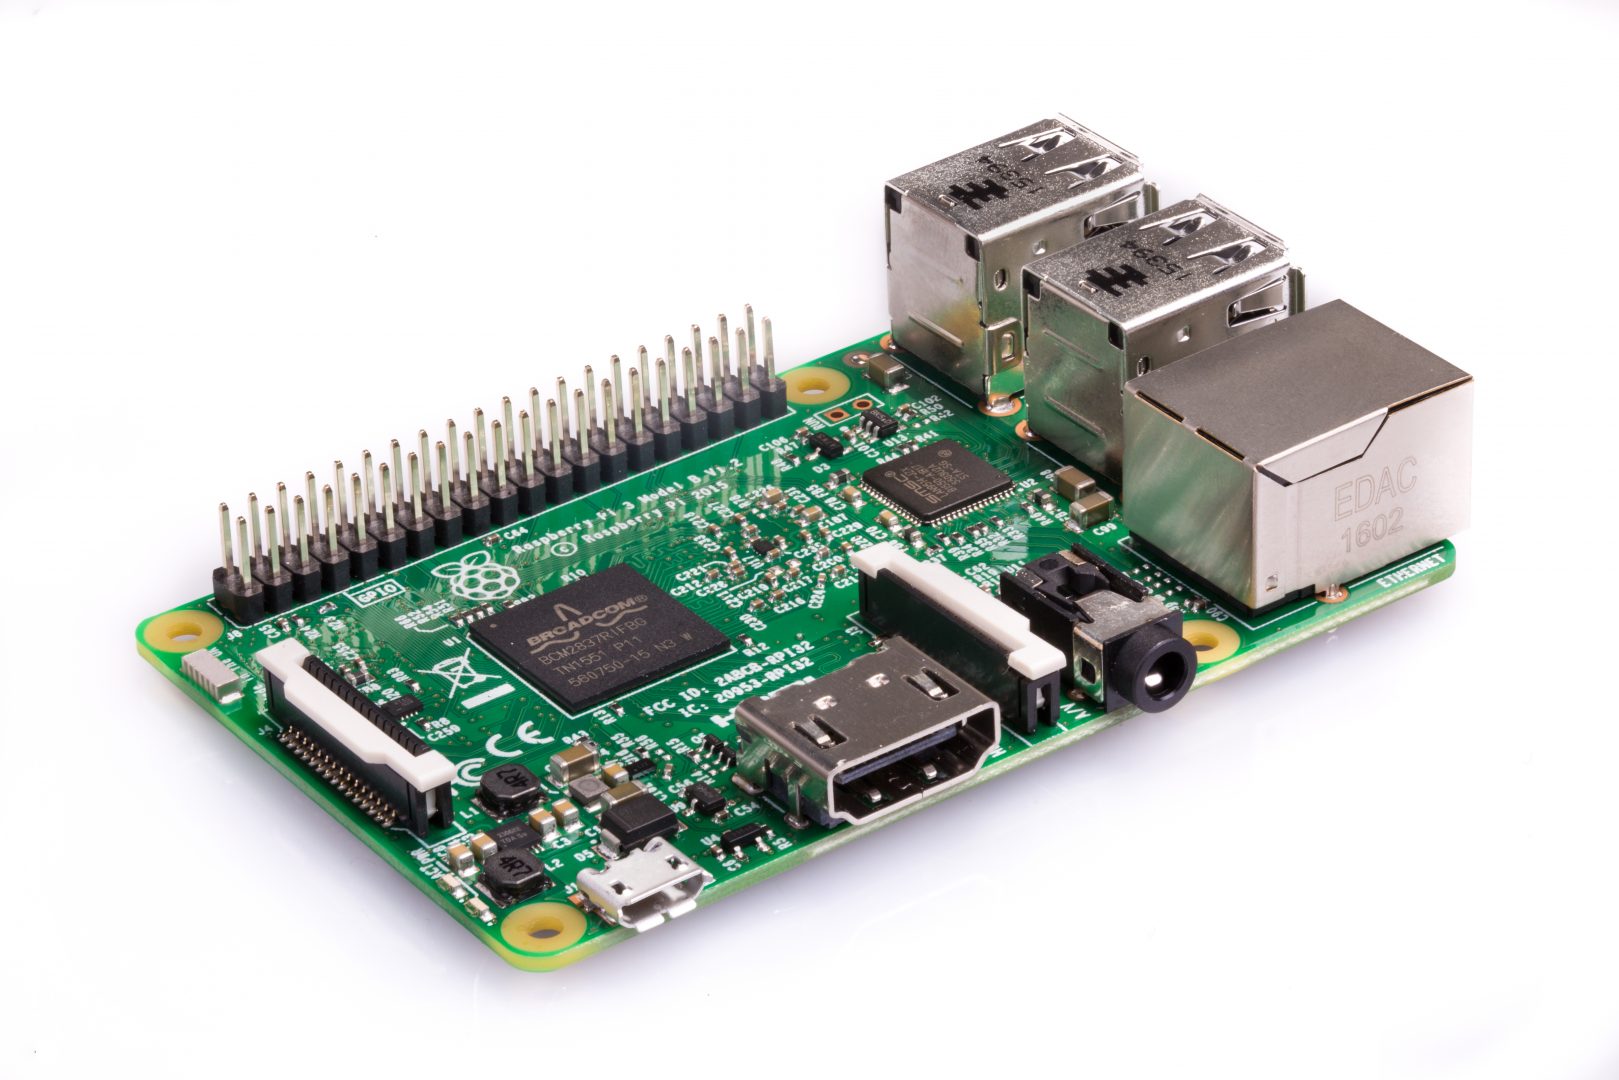
We want everyone to be on the same page, so let’s start by having a look at the Raspberry Pi itself, what it is, where it comes from and what its main features are. The Raspberry Pi (or RPi for short) is a single-board computer. It is only slightly larger than a credit card, yet it includes all the basic components of a typical computer.
Launched some 5 years ago, the objective of the project was to produce a computer that was cheap enough to be widely used throughout schools and in developing countries to teach programming. Right from the start, it became much more popular than anticipated, reaching unexpected targets. The maker community quickly “adopted” it as a choice platform for many projects. Today–and twelve million units later–it is at the core of various robots, 3d printers and pretty much any computer-based device one could think of.
The Raspberry Pi is commonly available for around $35 with complete kits including case, memory card, power supply, and HDMI cable available for about twice as much, making it very attractive for many.
Using the Raspberry Pi as a Media Player
One of the most common uses for the RPi outside the maker community is as a media player. It’s almost a perfect platform for that, too. Let’s see what its main features of the Raspberry Pi 3, Model B (the most recent one) are:
- 1.2 GHz, 64-bit, quad-core ARM Cortex-A53 processor
- High-performance Broadcom VideoCore IV graphic processor
- 1 GB of RAM
- HDMI interface
- 4 USB 2.0 ports
This is all that’s needed for a media player computer! Additionally, it will run Kodi (one of the most popular media player applications) with great ease.
The RPi doesn’t run Windows or other “usual” operating systems. But for a media player, who needs that? Instead, with a basic operating system such as XBian which includes a built-in Kodi installation, you can have all you need using free and open-source software.
The XBian Operating System
XBian is a small media center operating system built specifically for the Raspberry Pi, the CuBox-i or the Hummingboard. It is based on the Debian Linux distribution. It is lightweight and runs well on limited hardware while still offering much of the freedom of a full Debian installation. XBian’s main focus is “delivering the fastest Kodi solution for various small form factor computers“.
The designers of XBian found the right balance between being lightweight and offering as much customization options as possible. Concretely, XBian’s default configuration will fit on a 2GB SD card, will use little RAM and CPU and will have Kodi preinstalled.
XBian offers a full kernel which includes all important drivers for networking (wired and wireless) and various inputs and outputs. But XBian also allows you to turn it into a full-featured download box, a music box, and a handful of other uses.
Despite its small footprint, XBian offers a great variety of pre-installed packages, giving you one of the best out-of-the-box experiences.
Among the most important included packages are:
- Kodi – The most popular full-featured media center software
- Samba – To make file sharing with Windows easy
- CEC and LIRC – To enable controlling XBian from your regular remote control
- AutoFS – To automatically connect network shares and USB drives
- AirPlay – To send video to and from Apple devices
- VNC Server – To remotely control XBian with video sharing
Installing XBian on a Raspberry Pi
What’s Needed
Before we start installing XBian, we need to make sure we have all the required elements. Here’s what you’ll need:
- A Raspberry Pi (Not all models are supported, especially older ones. We’ll be using the Raspberry Pi 3 Model B)
- A 2 GB (or bigger) SD card
- A power adapter for the Raspberry Pi (Make sure it has sufficient power. Ideally, use the one that came with the Raspberry Pi)
- A media source (USB disk or network share)
- A remote control (It could be your TV remote if it supports CEC. It could also be your smartphone using the Kodi Remote app or an infrared or RF remote with USB receiver. It could even be a keyboard and mouse)
- A computer with an SD card reader for installing XBian on the SD card
- A network connection (Ethernet or Wi-Fi)
Note: If you’re planning on using USB devices, we recommend using self-powered devices or to connect them using a powered USB hub. The Raspberry Pi has limited power available to its USB ports.
Installation Process
Xbian includes an installer that will take care of creating an SD card with all the required files.
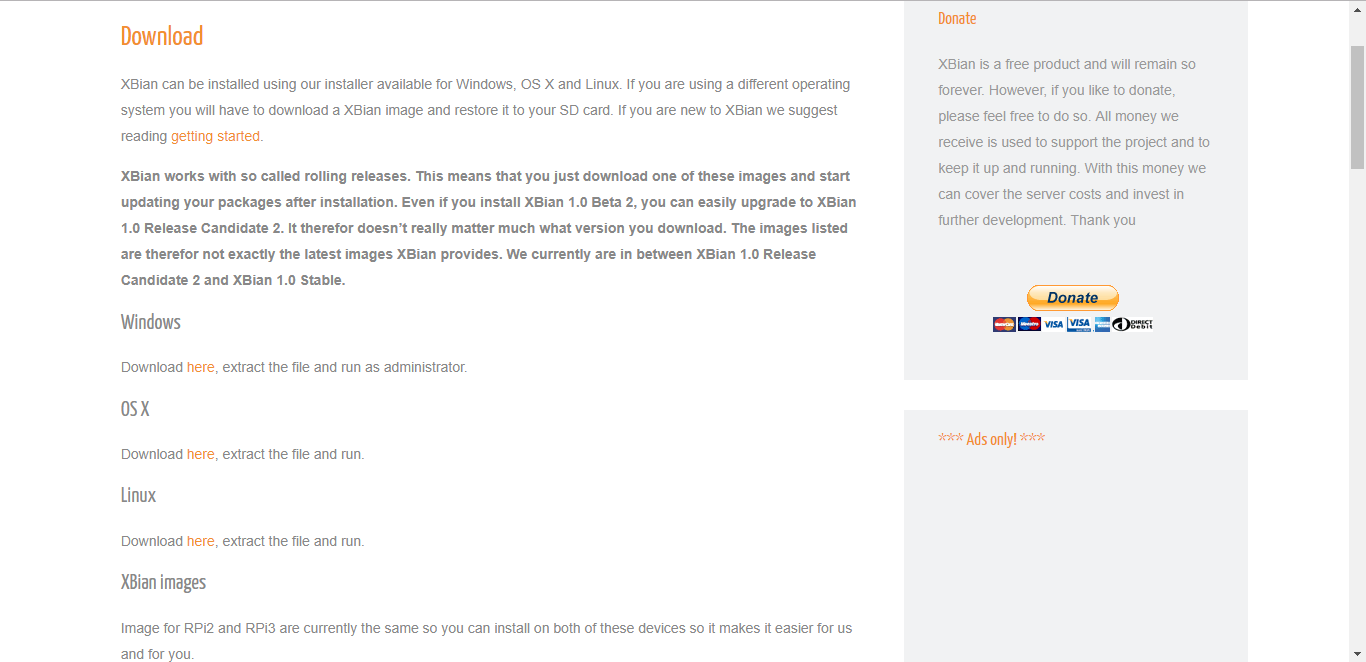
First, you need to go to the XBian download page at https://www.xbian.org/getxbian/
Depending on the platform you’ll be using, Windows, MacOS or Linux to create the SD card, click the appropriate download link. You’ll be taken to the Sourceforge website where the actual files are located and the download should start within seconds. We’re using Windows for this demonstration. If you’re using another platform, the exact steps may be slightly different. Save the file to your computer. The file is a zip file. You’ll need to extract the installer from the zip file.
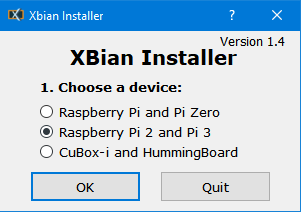
Once this is done, just start the installer. It requires no installation and will start right away. Furthermore, it is essentially identical, no matter what platform you’re running.
You need to specify the platform where you’ll be running XBian then click OK.
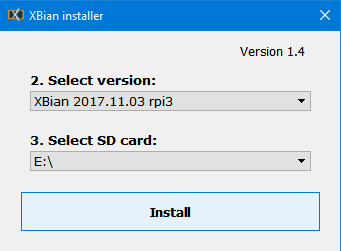
Next, you need to select the XBian version you want to install. We suggest you use the latest available version. You must also insert your SD card into the computer’s reader and select it in the installer window. Then, you just click Install to start creating the SD card.
The first time you install a new version of XBian, a window will pop up, requesting you to confirm the download of the image. Click OK to proceed. The download could take several minutes, depending on your Internet connection.
Once complete, another message will require you to confirm the erasing of the current SD card contents. Accept it and the SD card writing process will start. It takes less than five minutes.
Initial Configuration
The rest of the setup is done on the Raspberry Pi. Make sure all the components are correctly interconnected, insert the newly created SD card into the Pi and power it up.
Several messages will be successively displayed on the TV screen. After about a minute, you’ll be greeted by the XBian welcome screen. Click Next to start the initial configuration.
Next is the network configuration screen. Click Manage Network to configure your Wi-Fi or wired LAN.
To configure a Wi-Fi connection, select wlan0 on the top line. The status on the second line should be Down. Click the third line, SSID, and select your Wi-Fi network in the box that opens. Another box will pop up where you’ll enter the Wi-Fi password and click ok.
The Raspberry Pi will connect to the network and bring you back to the previous screen. Note that the status should now be UP. Click Close at the bottom left then Next at the right.
For now, you can skip the license key section and just click Next once more. The same goes with the Restore configuration. You’ll be able to configure it later. For now, click Next again.
The next section is about XBian updates. Click Manage update to configure it. Towards the bottom of the screen click Check for updates. There shouldn’t be any if you just downloaded the latest image when creating the SD card. Click Close at the bottom left then Next at the right once more.
The next screen is where you’d install optional packages. For now, we’re just concerned with the default ones so just click Next. We’re almost done. Just click Finish to complete the initial setup.
A Quick Tour of XBian
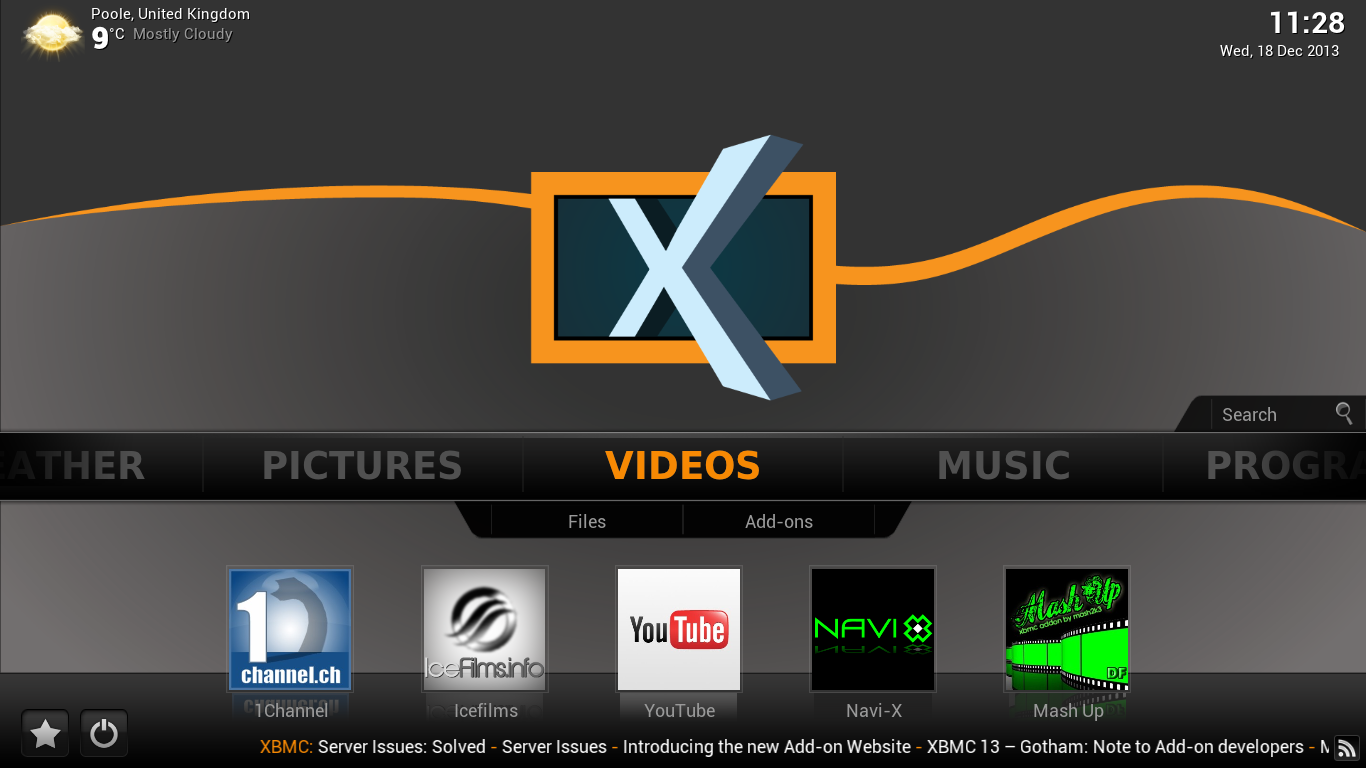
Depending on what your expectations were, upon entering XBian you’ll either be utterly disappointed or completely happy. You see, until you dig into the pre-installed XBian configuration add-on, using XBian is exactly like using Kodi.
Basically, you’re in Kodi. You have barely any knowledge of the underlying operating system. Everything you know and love about Kodi is there. And it’s in exactly the same place and works exactly the same way. It’s clear that XBian was built mainly to run Kodi. And to be totally honest, it does it very well. I’ve been running Kodi on a powerful PC for a while and it runs just as well on a Raspberry Pi running XBian.
As for extending Kodi’s functionality, you’re covered as well. Any Kodi Repository, any Kodi add-on can be installed under XBian just as it can on any Kodi. And with everything in the same place as a standalone Kodi setup, any installation procedure will also work with no change.
How XBian Compares to Others
As unique as it may be, XBian is not the only operating system for running Kodi on a Raspberry Pi. LibreELEC and its parent OpenELEC are two operating systems build specifically to run Kodi. And both look and feel almost identical to XBian. OSMC is another such OS for running Kodi. Its look is slightly different thanks to a custom skin but functionality-wise, all three are relatively equivalent.
For more information on these three alternatives, read our recent article: LibreELEC, OpenELEC or OSMC – What’s The Best OS for Me?
XBian tries to set itself apart from the alternatives by including some unique features. One of them is rolling releases. This refers to the process of keeping the OS up to date. With XBians alternatives, this is done through global images that include all the OS packages. With XBian, the individual packages are all upgraded independently. The advantage for users is that they always have the most recent of each package. In contrast, Libre ELEC will only release a new image whenever Kodi launches a new version.
Another place where XBian stands out if with its additional packages. With XBian, you’re not limited to just running Kodi. Optionally, the following software packages can also be installed and run alongside Kodi
- Couchpotato – To search and automatically download movies from Usenet
- Headphones – To download your Music CD as a digital archive
- NZBGet – A headless Usenet downloader
- Sickbeard – Same as Couchpotato but for TV shows
- Transmission – A headless torrent downloader
- ZFS – The most advanced filesystem in the world
- TV Headend – To watch TV using Kodi
Getting these optional packages installed and using them is beyond the scope of this article but its good to know that with XBian, your RPi is not limited to just Kodi.
Conclusion
XBian is most definitely a great option for running Kodi on a Raspberry Pi. The installation is super simple and so is the initial configuration. And once its up and running, it does so without a hitch. Setting it apart from other similar operating systems, XBian has the ability to run additional related software. Its still a very limited system that will only do a handful of specific things but what it does, it does very well.
Have you tried installing XBian? How was your experience? Are you an XBian user? What do you like the most about it? And are there anything you don’t like or would change? Share your comments and questions below! We love hearing from our readers.



Doesn’t actually explain how to the get a VPN client working on Xbian, justy an advertisement for IPVANISH.
Of course it does 🙂 IPVanish is the best VPN for Kodi. That’s how you get VPN to work on Xbian. It’s the easiest, safest way. We’ve tested dozens of VPNs, we really think IPV is the best one. We’re not recommending them just for the sake of recommending one. We do it because it works so well – and so easy.