Change Carrier Name On Android Phone Easily [How To Guide]
When it comes to modifying Android devices, then users with extended modification / flashing experience tend to customize each and every feature of their Android devices. And perhaps this hackability of Android OS is the main reason for it’s speedy growth. The first task of many jailbreakers on iOS is to change their device’s carrier name and until now, this mod was missing from Android devices. But Holabalola, XDA member and Android app developer, has recently released an app that allows you to change carrier name with a single click and without the need to know any thing about rooting or flashing. The app requires you have to a rooted Android devices because the functionality of this app is directly linked with tinkering System files.

The developer is consistently in the process of updating this app and there are already 3 releases. The app won’t work on HTC EVO 4G with stock Sense ROMs and will not be compatible with any ROM on any Android device that only displays the network you’re connected to. The app is potentially non dangerous as it simply changes the carrier name which is taken from your phone’s SIM Card.
Here is how you can use this Carrier Name Android App to change the carrier name of your Android device:
Please note that this app won’t work if you don’t have root privileges on your Android phone. Please use our search features to find out if root for your phone is available.
- The first step is to download and install Carrier Name APK from Android Market. If you are unable to find this app in Android Market, then head to the XDA ROM thread link provided in the end to download and install it manually. If you have downloaded and installed the app from Market, then skip steps 2 and 3.
- Once you’ve down load the app manually, connect your phone to the computer, mount SD Card and copy the app to SD Card root.
- After this, use any file manager, such as Astro or Linda, to install this app on your phone.
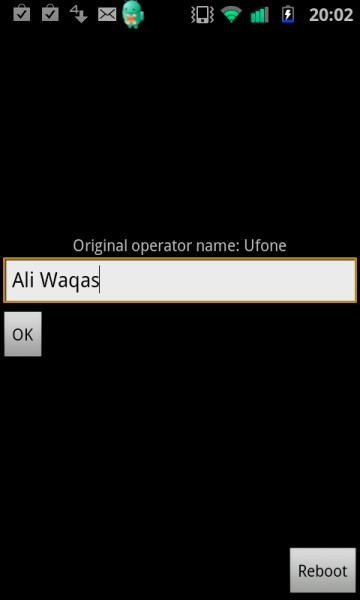
- After the installation is complete, tap to launch the app and change the carrier name as per your desires. You can also take reference from the screenshot posted above.
And there you go! Now simply reboot your device for changes to take effect and you are all set with your brand new customized carrier name. In case you are stuck or need more info, please head to the official XDA ROM thread posted here.

It’s been 4 years since this was posted. It works on a Nexus 5 running CM12.
Is there a way to change the “via Facebook for android” signature?? Like to whatever we want?? That would be awesome
You want to do so? I have the app. ;D