How To Root Acer Iconia A100 Tablet [ADB Method]
Acer Iconia A100 is a 7-inch A500 successor Android tablet that was released last month. Although Iconia A100 is the first 7 Inch tablet to come geared with latest Android 3.2 Honeycomb on board, but the screen issue along with bad finishing didn’t help in cultivating a mentionable user base. However there are folks who opted to go for this tablet and the Android development community isn’t ready to desert them altogether. Some industrious hackers have managed to gain root on this device through the standard ADB procedure. However it will be interesting to see if things move in direction of custom ROMs and kernels from this point onwards. So far only root has been achieved and there are no signs of a custom recovery.
Here are the step by step instructions to root Acer Iconia A100 Android tablet: 
Disclaimer: Please follow this guide at your own risk. AddictiveTips will not be liable if your device gets damaged or bricked during the process.
Requirements:
- ADB
- (https://downloads.androidsu.com/superuser/su-2.3.6.3-efgh-signed.zip) SuperUser Binary
- Iconia A100 Drivers For PC
Instructions:
1. The first step is to make sure that you have ADB installed on your computer along with Iconia A100 drivers. Please check the links provided in requirements section for reference and downloads.
2. Once you have drivers and ADB setup on your computer, download SU binary zip file from above, extract the contents of the archive and save them on your desktop.
3. Now copy the SU file available in System sub folder in su-2.3.2-efgh-bin-signed and copy it to your tab’s /mnt/sdcard folder.
4. Once done, disconnect your tab from computer and enable USB debugging by going to Settings > Applications > Development and check mark USB Debugging.
5. Now reconnect your tab to the computer again and open command prompt and type ADB Shell.
6. Once you have a $ sign displayed, type the following commands:
adb shell /system/bin/cmdclient ec_micswitch ‘`mount -o remount,rw /system`’
adb shell /system/bin/cmdclient ec_micswitch ‘`cat /mnt/sdcard/su >/system/xbin/su`’
adb shell /system/bin/cmdclient ec_micswitch ‘`chmod 6755 /system/xbin/su`’
7. After you have executed these commands, download root checker app from Market and verify root on your device.
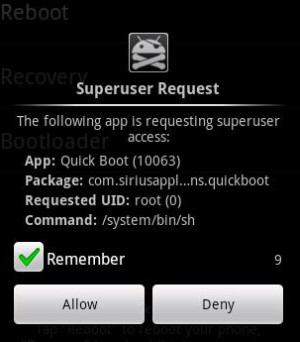
8. Once root is positively verified, download SuperUser app from Market.
And now you are all set to run apps that require root on your phone. In case you are facing any issues or want to discuss more about this rooting method, then head to official XDA root discussion thread posted here.

In Command PromptC:androidadb shell (ADB should be configured already, any path will work)/system/bin/cmdclient ec_micswitch ‘`mount -o remount,rw /system`’ (Enter)/system/bin/cmdclient ec_micswitch ‘`cat /mnt/sdcard/su >/system/xbin/su`’ (Enter)/system/bin/cmdclient ec_micswitch ‘`chmod 6755 /system/xbin/su`’ (Enter)Everything else worked great!
Cannot copy a su file in the tablet at the system folder……
I have been trying to correct this issue for over a week to no avail. Please advise.
I’ve tried rooting my A100 by inputting the proper commands on the a100 itself in a terminal emulator, but have had no success. The
commands cause no obvious response when entered into the terminal, but when I checked xbin for su, it’s there. I’ve installed the superuser apk, but
busybox installation fails due to lack of root. Repeating the process doesn’t change anything.
I’ve also tried rooting via the ADB method. The results are the same. su is in xbin folder; however, I cannot install busybox because I am not rooted.
Every time I execute the aforementioned commands, the su file in my xbin folder gets modified. The size of the su file in my xbin folder is 0.00K, is
this normal?
The last bit of info I can provide about my situation is this. I have root checker installed on my A100. I do not get the same result each time I click “verify root”. Sometimes it tells me that I’m rooted and sometimes it tells me that I’m not rooted????
Please let me know if I can provide any additional information. I need some help please.
Happened the same to me; I have an ICONIA A100 and tried by other methods to root the device. When I try to use a file manager to modify or delete or rename a file like wpa_supplicant inside the system/bin folder, the file manager is unable to complete the operation. However, when I install the superuser app, it says that I have root permisions. Another way to allow adhoc networks detecting?