How To Take Screenshots In Android Using Android SDK
Taking screenshots of those glorious widgets or applications on your Android device has never been quite as we would’ve liked, especially if you compare how easily the iPhone manages to do that by pressing the combination of the right keys. While there are tools like ShootMe that let you easily take screenshots, here’s a little tutorial on how to take screenshots of your phone using the Android SDK. The solution being discussed in this particular guide is purely desktop-based, requires you to have your device’s drivers installed on the computer, and most importantly, requires you to connect your Android device with the computer via USB cable. Hit the break to learn about taking screenshots of your Android’s screen right from your computer with a click.
To start off, you need the Android SDK. See a detailed guide on how to install Android SDK, in case you aren’t familiar with it.
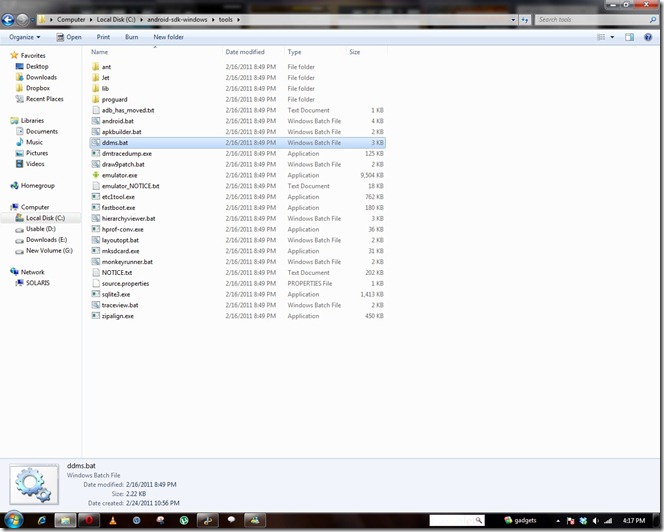
Once, you have the SDK all set to go, connect your phone to the PC (make sure you have USB Debugging mode set to on), navigate to android-sdk-windows > tools > and run ddms.bat. To enable the aforementioned USB Debugging Mode on your Android, navigate to Settings > Applications > Development > Android debugging.
Update: The aforementioned USB Debugging Mode enabling method is for older Android devices. To access said option on Android 4.0 (Ice Cream Sandwich) or higher devices, you’ll need to navigate to Settings > Develop Options > USB debugging.
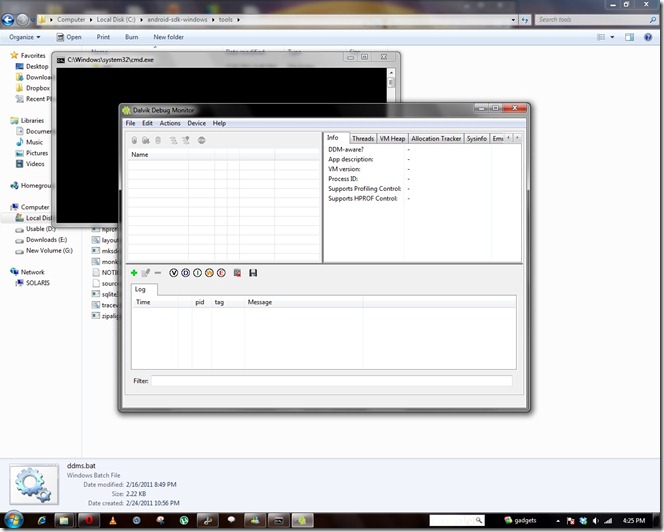
Now when you run ddms.bat, a command prompt form will open. Be patient this will take around 10 seconds and a new window will popup.
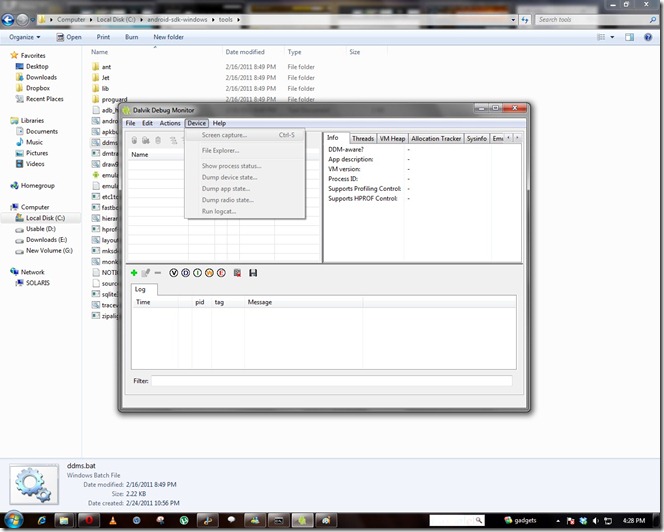
The window that follows will display the detected device (if any). All you need to do is select the required device, click on Device in the menu and then, Screen Capture.
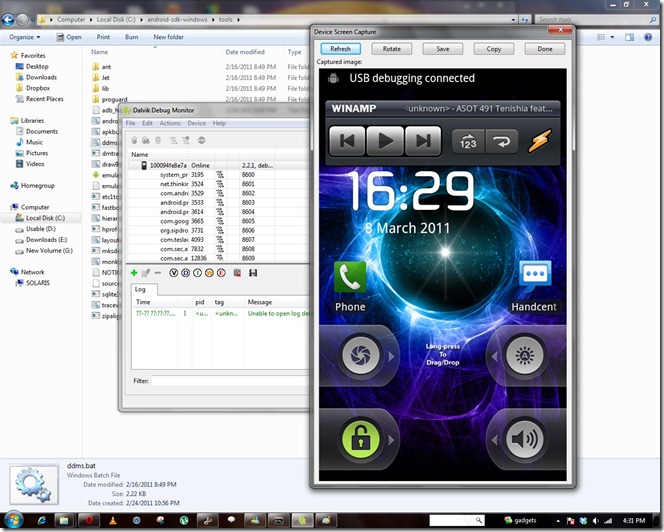
After you click on screen capture, you’ll see the following screen. On your phone, move to the screen you want to be captured and then click Refresh. Then click on Save name your file and you’re all done. Should you opt to capture another screenshot sporting a different view, you’ll need to press the Refresh button whilst screen is displaying whatever you wish to grab.
There you have it, enjoy your screenshots. Easy wasn’t it? Let us know if this worked well for you. Just a reminder that the aforementioned method is pretty simple to use, but works only if you’ve properly installed Android SDK on your computer.


Android Atrix 2 would not show up in the ddms program no matter what i tried… debug was on. changed settings so my screen would stay on, did everything by the book and could not get it to show up in the ddms.
Thank you, worked like a charm.
Thank you so much for this post! It helped a lot.