Install TouchWiz UX Based ROM On Galaxy Tab 10.1 Wi-Fi [How To]

Not just that, he also packed it up in two varying packages, one in a zip format to be installed via ClockworkMod recovery, and one in a .tar format for flashing via ODIN. There are a few bugs however, as the ROM extracted is actually from a 3G version of the Galaxy Tab 10.1 and we’re porting it to the Wi-Fi version.
- Email app doesn’t let you sync (Gmail still works fine).
- Samsung Apps app will not start due to no SIM card.
- And maybe a few more.
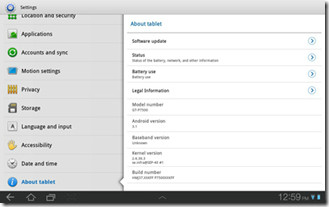
You can catch a few screenshots of the ROM below, courtesy of LevitateJay.
Here’s how to get this ROM up and running your Galaxy Tab 10.1 Wi-Fi.
Disclaimer: Please follow this guide at your own risk. AddictiveTips will not be liable if your device gets damaged or bricked during the process.
Requirements:
For Flashing via ODIN:
- ODIN installed on your system
- Samsung USB Drivers. Download drivers for 32-bit Windows | 64-bit Windows
- TouchWiz UX ROM (.tar)
For flashing via ClockworkMod recovery:
- A rooted Galaxy Tab 10.1. See our guide on rooting the Galaxy Tab 10.1
- ClockworkMod recovery installed. Refer to this page at XDA-Developers to install ClockworkMod recovery on your Galaxy Tab 10.1
- (https://droidbasement.com/galaxy/touchwiz-ux/hc-3.1_touchwiz_ux-full_sam_tab_10.1.zip) TouchWiz UX ROM (update.zip)
Instructions:
The instructions will be split into two parts, via ODIN and via ClockworkMod recovery.
Via ODIN
- To begin, download the .tar version of the ROM from the link above and extract the file to find the TAR file.
- Run ODIN and click on PDA, choosing the .tar file extracted. Make sure Auto-Reboot option and Re-Partition is unchecked.
- Put the tablet into download mode and plug it into the PC.
- Once you see the device connected, hit the Start button in ODIN, thus beginning the flashing process.
- Once the process completes, power off the device and reboot into recovery mode.
- In the recovery, do a Factory Reset/Wipe (if you don’t have Clockwork recovery this will do a SD card wipe as well).
- Then simply reboot your device!
Via ClockWorkMod Recovery
- To begin, download the ROM (zip) from the link above and copy it to the root of your SD card.
- Reboot the device into recovery mode and make a Nandroid backup.
- That done, select Factory Reset/Wipe, wipe cache and then wipe dalvick cache.
- Navigate to install zip from sdcard > choose zip from sdcard and select the ROM copied to your SD card.
- Once the installation completes, simply reboot your device.
That’s it, your device should now boot into the new TouchWiz UX based ROM! For updates and queries, visit the forum thread at XDA-Developers.


