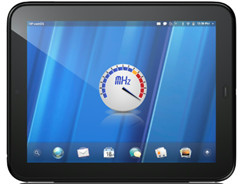
Overclock HP TouchPad WebOS 3.0 Tablet To 1.9Ghz

So if you’re wondering what this overclock will do for you, to simply put it, according to amirborna, your HP TouchPad will feel like it just got modded to the “next generation hardware”, with the tablet becoming incredibly fast and responsive. Now if you want to take your TouchPad up for a spin at 1.9Ghz or well..somewhere close, here’s how you can do that.
Disclaimer: Please follow this guide at your own risk. AddictiveTips will not be liable if your device gets damaged or bricked during the process.
Requirements:
- TouchPad updated to latest OS version.
- Java SDK installed.
- (https://dl.dropbox.com/u/2774158/WebOSQuickInstall-4.2.3.jar) WebOS Quick Install.
Instructions:
- To begin, connect your tablet to the PC via USB and make sure USB Drive mode is not activated.
- In the search box on the top middle of the screen, type the following: webos20090606.
- Now tap On to turn it on. It will now ask you for a password, do not enter anything in the password field.
- Now run WebOS quick install by double clicking it and if you see, HP TouchPad in the the Device tab greyed out, it means the tablet is recognized.
- Now hot the Globe like icon in Web OS Quick Install to bring up a list of applications that you can install. Search for Preware under the application list and install it.
- On the tablet, open up the Applications menu and hit the Download s tab at the top and search for Preware.
- Open Preware and on the drop down menu, choose Manage Feeds > New Feed.
- Now add (type in) the Name and URL exactly as it is.
- Name: webos-testing-all | URL: https://ipkg.preware.org/feeds/webos-internals/testing/all
- Hit Add Feed and it may ask you a disclaimer. Choose what you wisely. Now that the fist feed is added, time to add the second one.
- Name: webos-testing-armv7 | URL: https://ipkg.preware.org/feeds/webos-internals/testing/armv7
- Now that the two feeds are added go back to the main page of the Preware app by hitting the back arrow.
- Select List Everything from the main menu options.
- Now you need to find and install Govanah now. Once installed, restart the tablet.
- Now that the device has rebooted, open Preware again and enter the 3rd feed.
- Name: webos-kernels-testing | URL: https://preware.is.awesome.com/
- Yet again, you need to restart the tablet.
- Once rebooted, open up Preware again and tap Preware on the top left corner of the application. Hit Update Feeds and allow the app to update its feeds.
- Now that the app is done updating the feeds, hit the List of Everything tab in Preware and find F15C Eagle (Touchpad). This is the kernel that will give your TouchPad the overclocking ability.
- Install the kernel, and once its installed, restart the HP Touchpad.
Voila! All done, you should now boot into the TouchPad with the new overclocked kernel. Use the app named Govnah that we installed earlier on to adjust the frequency of your tablets CPU.
For updates and queries visit the forum thread at XDA-Developers.
