How To Customize The LXQt Desktop
When it comes to lightweight desktops, LXQt is the odd man out. This is because when Linux users talk about lightweight desktop environments, they’re almost always talking about desktops built based on the GTK toolkit. Not LXQt. It uses Qt. It’s an incredibly fast, and customizable Linux desktop experience. The operative word here is ‘customizeable’. Here’s how you can customize the LXQt desktop.
Widget Style
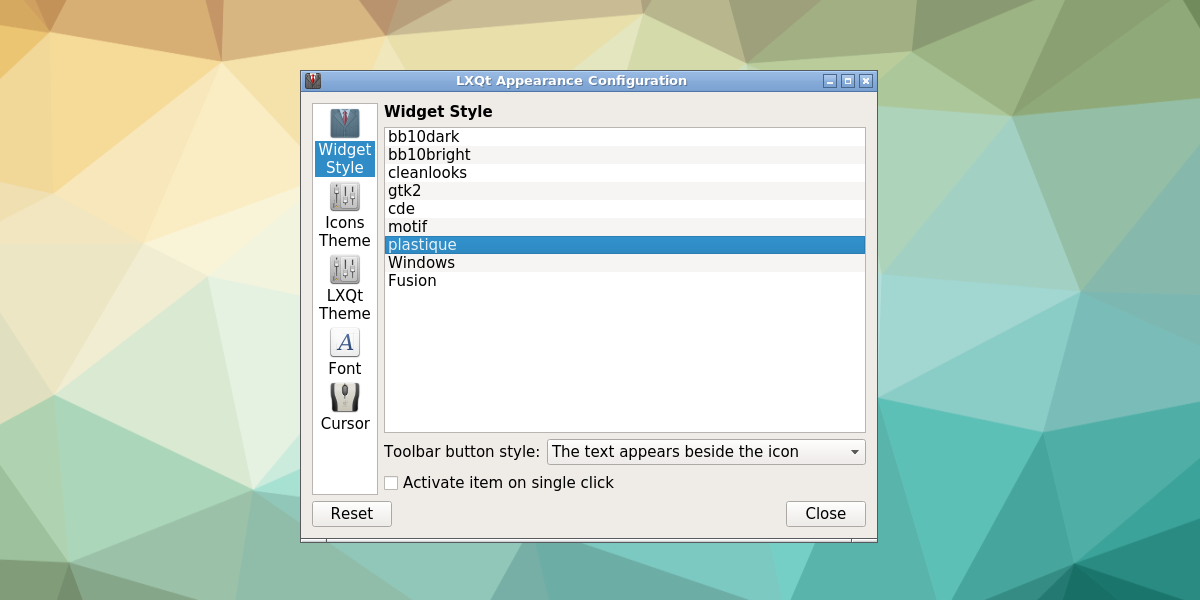
LXQt is a unique desktop. It’s one of the only desktop environments on Linux to make use of Qt, and not GTK. Qt has a lot of themes available much like GTK does. To change the default theme for the LXQt desktop environment, click the application menu, search for “appearance”, and click on it.
Inside the LXQt Appearance app, find “Widget Style”, and click on it. In this area, a list of all the individual Qt themes available are present. Go through the list, and select a theme that you’d like. Keep in mind that this will only change the themes for the programs, not the LXQt panel. Those are separate themes.
Icon Theme
Changing the icon theme in LXQt is a must, as the default theme it comes with is pretty ugly. To change the theme, you’ll (obviously) need to make your way to the LXQt Appearance Configuration tool. Open application launcher, search for “appearance” and click on it. Inside the appearance tool, look for “Icons Theme” and click it.
In this menu, a list of individual icons installed on the system will be displayed, along with a brief description of what the theme is. To change themes, simply click on one, and LXQt will update the icon configuration.
![]()
LXQt Theme
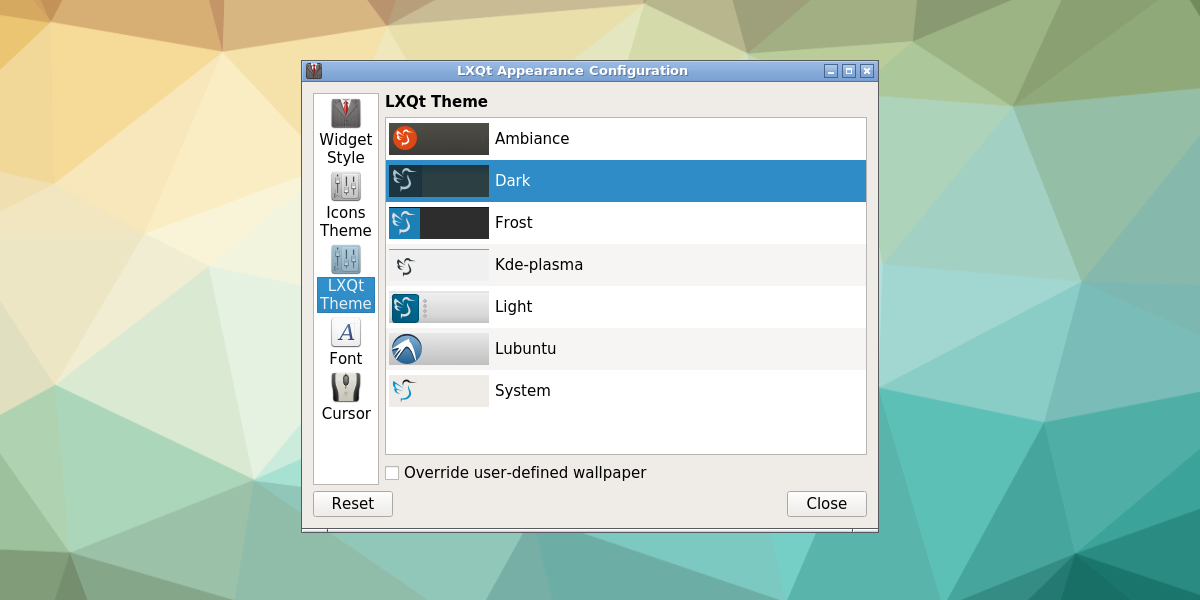
In the LXQt desktop, the theme that programs use (Widget Style theme) and the panel them are not the same. Instead, two themes are used. The theme for the panel is called the “LXQt theme”, and it is responsible for how the panel looks. To change it, simply open up the LXQt Appearance Configuration tool.
Inside the configuration window, select the “LXQt Theme button on the side. This section of the appearance app displays a detailed list of all available panel themes. To switch to any of them, simply click on one in the list. The panel will instantly change themes when you select a different one.
Window Manager Theme
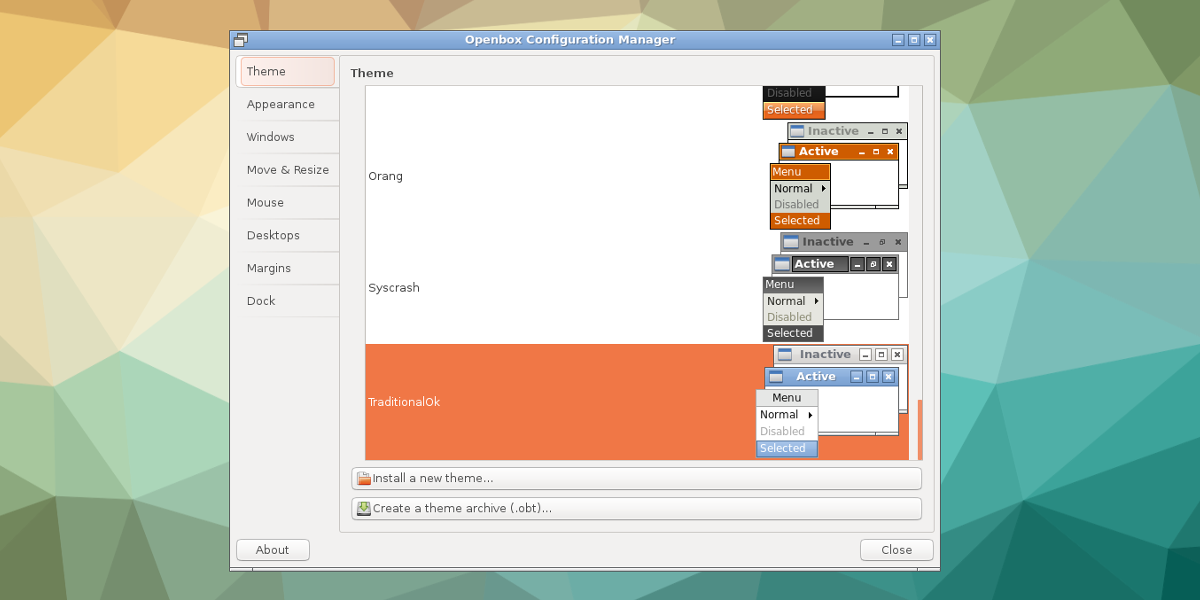
LXQt does not have it’s own window manager. Instead, it makes use of Openbox. As a result, the LXQt desktop can stay relatively light (due to Openbox’s low resource usage).
To change the theme that the window manager uses, open the application launcher. Then, search for “openbox configuration”, and launch it. Inside the Openbox Configuration Manager, it is possible to manipulate what window management themes LXQt uses. Select a theme from the list to instantly change it. Install new themes by clicking the “install” button at the bottom.
Cursor
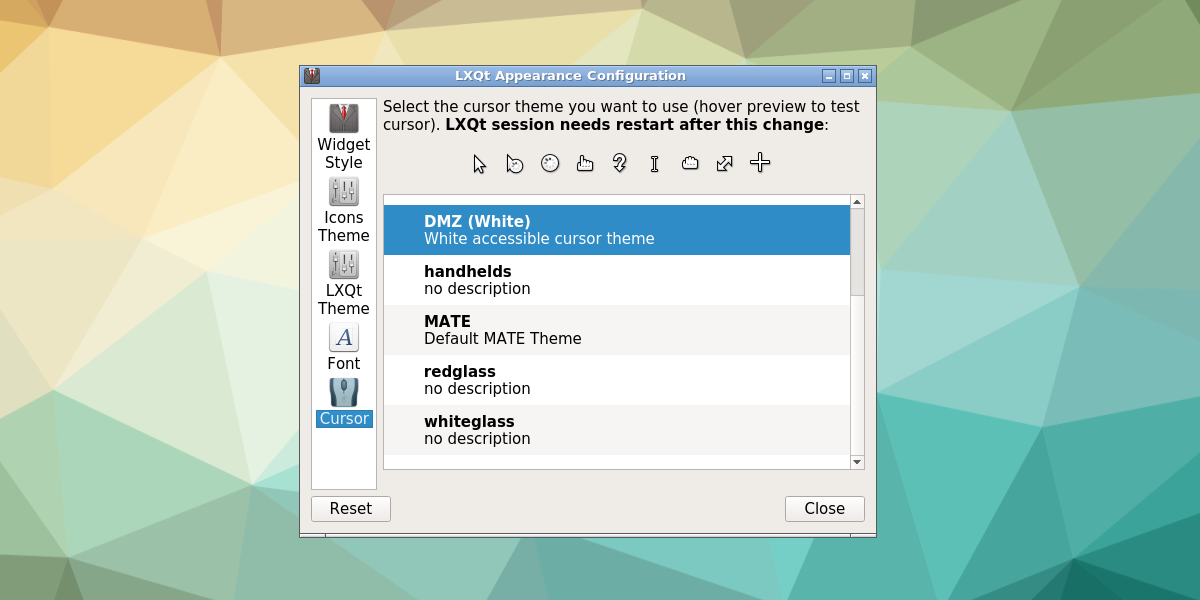
Like all desktops on Linux, it is possible to customize the way the cursor appears on screen. To do this in LXQt, open the Appearance Configuration tool. In the configuration tool, click the cursor button in the left column. This will reveal a list of all installed mouse cursor themes. To switch between different themes, select one from the list. Your mouse theme will change right away after making a selection.
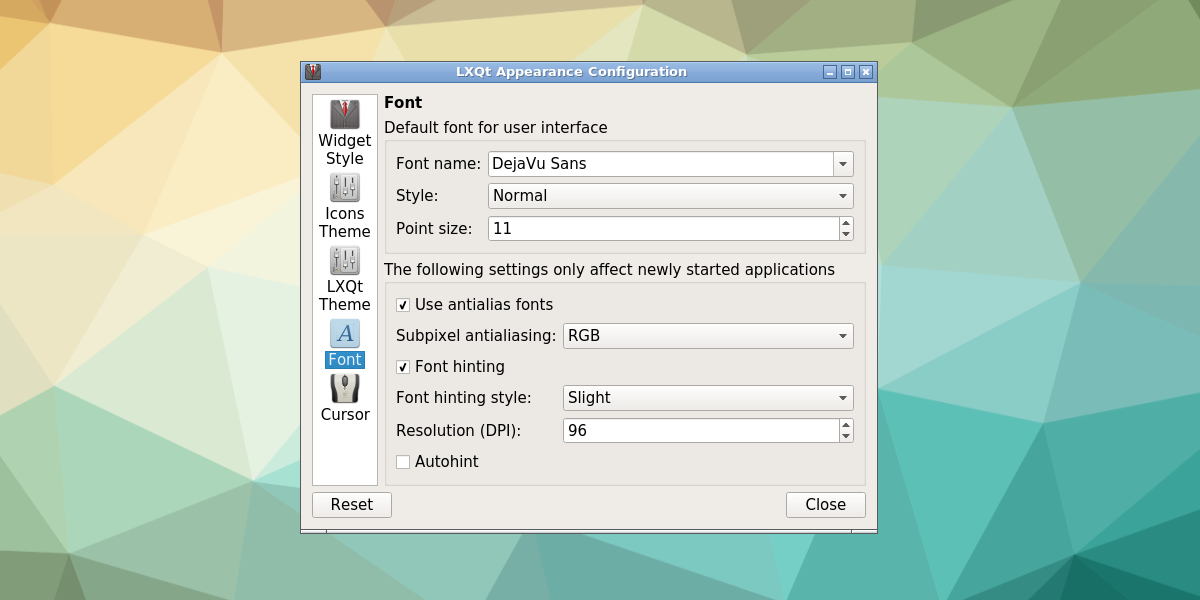
Fonts
Changing font settings in LXQt is a very easy process. It starts in the usual place: the LXQt Appearance Configuration tool. Find the font icon on the side, and click it. Doing so reveals a whole bunch of different font options. In this area, users are able to change the individual font in use on the system, as well as its style and point size. Users can also enable or disable different types of anti-aliasing, and font hinting.
Panel
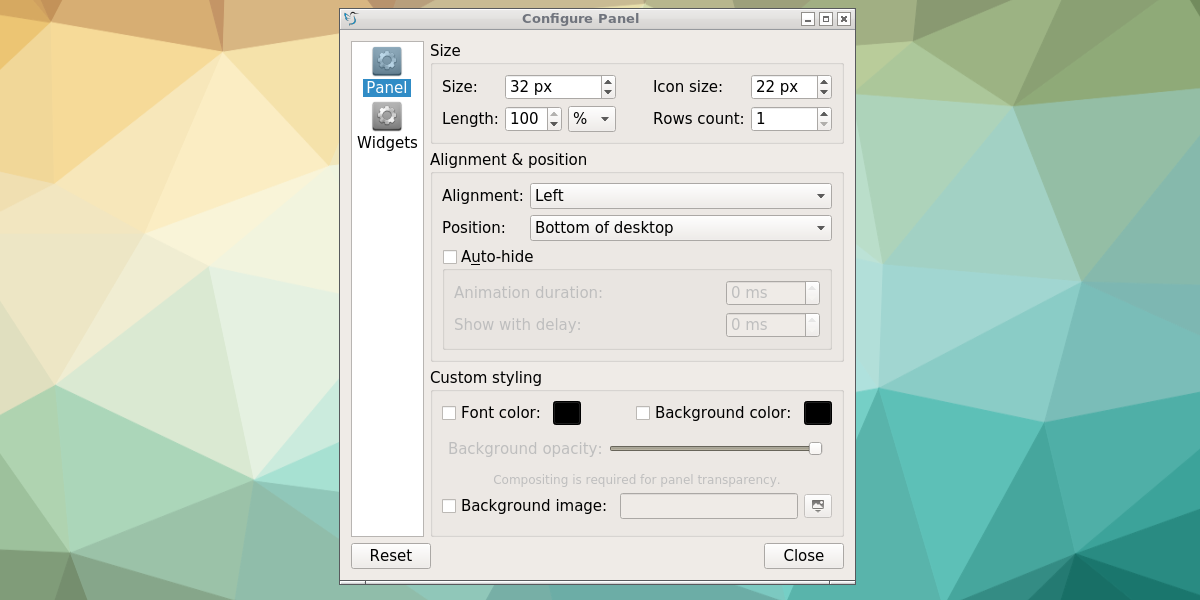
The LXQt panel allows for quite a lot of customization. To customize the panel, right click on it and select the preferences option. This will bring up the “Configure Panel” app. Inside the configuration window, there are two sets of configurable areas; “Panel” and “Widgets”.
The “Panel” area allows users to customize many aspects of the panel itself. Users can increase the size of the panel by going to “size” and messing with the size menu, change the length by changing the percentage next to “Length”, and the size of icons by changing the numbers next to “Icon Size”.
Additionally, users can change things like panel alignment, and the overall position of the panel on the desktop. It is also possible to turn on “Auto-hide”, and change the font and background colors in this area.
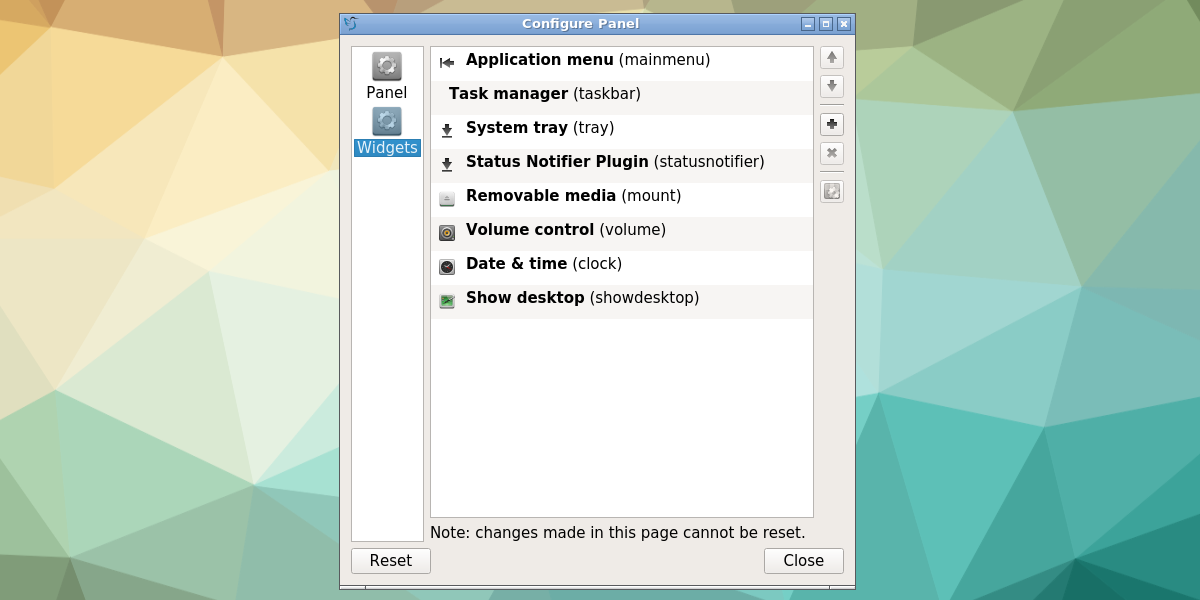
The second aspect of the “Configure Panel” window is the widgets area. This part of the settings allows users to add individual items to the panel. Click the plus icon to add a new item to the LXQt panel. To remove a widget, select it widget from the list, and then click the X button.
Users may change the order of widgets in the panel by selecting a widget, then clicking the up or down arrow. To change individual widget, select a widget, then clicking the “settings” button on the right.
Conclusion
The LXqt desktop is a great environment for those looking for a light experience not based on GTK, with a host of customization options. If you love LXDE (it’s a GTK-based cousin), do give LXQt a shot. You’ll find yourself right at home.

the bug is still here in 2022, but i have a solution, change desktop names in openbox settings.
How to disable the display of desktop icons?
I love LXQT, but needs a font manager to view, install or remove fonts from GUI.
no it doesn’t. There are plenty of font managers that exist, there’s no reason for an lxqt branded one.
Where can I find new widget styles?
I’dont like LXQT, i prefer LXDE or XFCE…
Could you explain why?
Is ugly and not customizable.
Lxqt looks great if you actually understand how to customize it https://uploads.disquscdn.com/images/1b2bcbfc0a2d20e3ca54c7ce2fe95b687176f515737358fca5be07906e8e6f72.jpg
Woah that’s cool! Can you tell me how to customize it?
agree, looking good now, just got the darkness figured out; set to gtk theme for Qt style (lol, Qt’s, like south park, Q-ties i think?) [how to customize? basically read guides like this one]
check this out:
https://i.postimg.cc/6pz4NjPB/scsh11-Sep21.jpg
LxQt needs and deserved a netspeed widget !
There is one, at least in v0.15.0; you just add a widget to a panel called “System Statistics” (sysstat) and under it’s settings select “Type: Network”, and put in the correct source, i.e. “eno1”. From there you can customize it a bit slightly with color and max rate to measure, etc.