A Complete Guide To Photoshop Preferences
Photoshop is a heavy tool, no matter whether you’re running a 32-bit or 64-bit version, it takes up a lot of memory while rendering. To get the best performance out of Photoshop, one must go through the Preferences available in all versions of Photoshop. You can explore the important settings available in Preferences tab like interface, file handling, performance, cursors, transparency, rules, guides & grids, plugins and type. In this complete guide we will review Photoshop Preferences. By making few tweaks you can also improve the overall performance of the software.
This article is part of the complete guide series, which also includes, a complete guide to layers in photoshop and complete guide to type in photoshop.
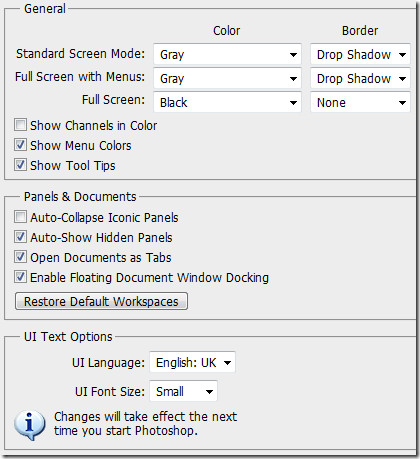
You can open Preferences window by going to Edit > Preferences. Once you scroll down to Preferences, you will be able to see a list of options. But to make it easier, simply click General. All available preferences options will now be visible in a new window.
General
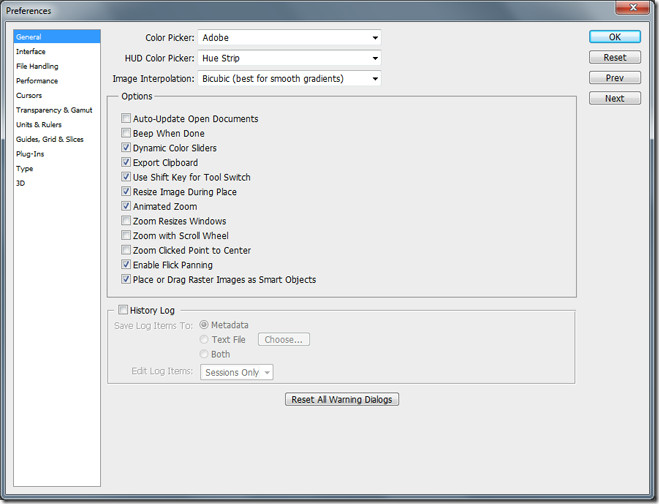
General tab will key out settings like color picker, HUD color picker, image interpolations, a number of general options and history log. Color picker outlines two algorithm options to choose from; either Windows or Adobe. By default it is set as Adobe and would certainly give you maximum colors to play with on your clipboard. HUD color picker option will appear in CS5 version. HUD stands for ‘Heads Up Display’. Options for HUD are set out as, Hue strip and Hue wheel. You can make the selection for your own ease and comfort. This is definitely a great plus for digital artists using Photoshop CS5.
Image Interpolation lets you decide which of the available algorithms to use when resizing images. Nearest Neighbor makes the pixels larger or smaller. Bilinear locates the average of pixels and creates a new pixel based on the acquired results. Bicubic is default setting, creating sharp edges and smooth gradients. Bicubic smoother is recommended for enlarging images and Sharper is optimum for reducing an image. Recommendation would be to leave the image interpolation on bicubic.
In CS5, the options include auto-updating open documents, beeping when done, dynamic color sliders, exporting clipboard, using shift key for tool switch, resizing image during place, animated zoom, zoom resizes windows, zoom with scroll wheel, zoom clicked point to center, enable flick panning, and placing or dragging raster images as smart objects.
History log comes useful in saving all spent its and bits when creating an image on the clipboard. It will give you key details of tools used, filters applied and other changes made while drawing an image. It also comes useful when writing tutorials and defining step by step guides. If you select Metadata, if will save the history log with the image making the file size bigger. It can be viewed in any software which is capable of reading image metadata. While selecting Text file, log will be saved in an external text file. You have the option to save the history log in both metadata and text file forms.
Interface
File Handling
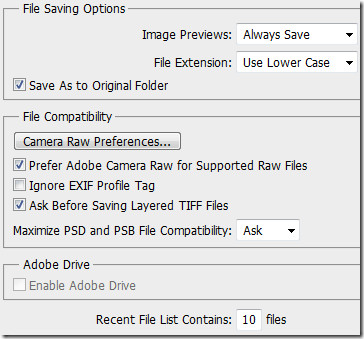
In CS5 version of Photoshop, camera raw utility comes into action. By default, it is preferred to use Adobe Camera Raw extension for supported Raw files. When you’re saving a file, it asks you for maximum file compatibility. You can set it as ask (default), never and always. Lastly the recent file list, visible from the File menu is set to default as 10, you can increase the number provided you’re working with a number of files at the same time. And need a quick referral back to those files.
Performance
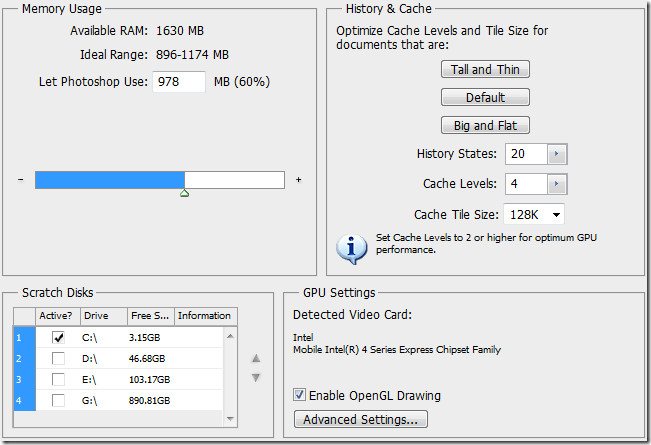
Performance of Photoshop, whether it comes to rendering huge sized files or files with a number of layer with them, plays a key role. You can assign the memory to Photoshop from the Memory Usage tab. By default, it is set to 60%. If you have a higher RAM space, i.e. 8GB DDR 3 then increase it to 70 or 80% to greatly increase the overall performance.
History and Cache takes the optimization of cache levels and till size for documents in account, mainly including your hardware configuration. History states (set as default to 20) are the maximum number of history states defined to retain in the history panel. Number of cached level of image data can be set from Cache Levels. It is used to improve screen redraw and histogram speed. It is recommended by developers and core users to use more cache levels for bigger documents with few layers and choose fewer cache levels for smaller documents with many layers. Cache tile size is the amount of data Photoshop stores and processes at once. Choose bigger tiles for faster processing of documents with large pixel dimensions and choose smaller tiles for documents with small pixel dimensions with many layers.
Set your scratch disk to act with fast drives, be it internal or an external interface but not your boot drive. Users prove that any drive with sufficient available space works.
In GPU settings, enabling OpenGL drawing activates certain features and interface enhancements in Photoshop. Features include rotate view tool, Birdseye zooming, pixel grid, panning preference, scrubby zoom, HUD color picker, sampling ring, on-canvas brush resizing & hardness, bristle tip preview and Adobe Repousse (extended versions only).
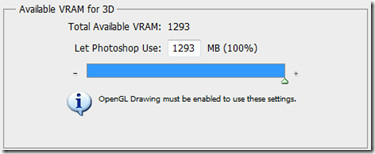
OpenGL enhancements include smooth pan and zoom, drop shadow for canvas border, 3D interaction acceleration, 3D axis widget and 3D overlays. Most 3D preferences are disabled if OpenGL drawing is disabled.
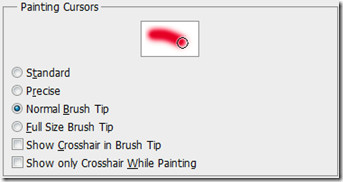
Cursors
Transparency & Gamut
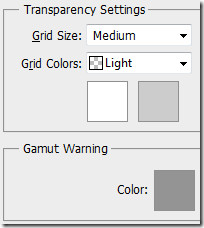
Transparency settings can be changed in terms of grid size and colors. Grid size can be kept as none, small, medium and large. By default it is set to Medium. Grid colors can be customized to light, medium and dark. And in colors; red, orange, green, blue and purple. You can set custom colors for the grid as well. Gamut is a range of colors that a system can display or print. A color that can be displayed in RGB could be out of gamut, and unprintable. All pixels outside the gamut of the current profile space are highlight in gray by default. You can change this gamut warning color from these settings as well.
Units & Rulers
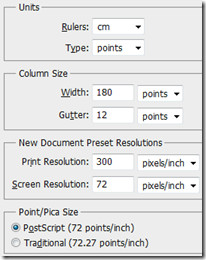
Column size measurement provides information needed to create documents in the column and width of a document. Column width and gutter size can be adjusted in terms of inches, cm, mm, points and picas. It is set to points by default. If working with the same document size again and again, create a document preset resolution, currently set to 300 for print resolution and 72 for screen resolution. 300 pixels/inch is recommended by all designers when printing documents.
Postscript (72points/inch) sets a unit size compatible for printing to a PostScript printer and traditional uses regular points/inch for normal printing.
Guides, Grids & Slices

Guides and grids help you position your shapes and elements. They appear as non printing lines that float over the clipboard. You can set a specific color and style for these guides from this tab.

Smart Guides help you align shapes, slices and selection. The color is set to Magenta by default but just like other preferences, you can always change it.

After you establish the four nodes, and perspective plane is active on the clipboard, you can see a bounding box and a grid (commonly seen when transforming objects, shapes etc.). You can adjust the grid size in terms of color, style, spacing and subdivisions. It will make it easier for you to count elements on the image, if necessary.

Slicing comes in as a key part when you’re design websites in Photoshop. Slice color is set to light blue as default. Customize slicing color and also enable / disable show slice numbers.
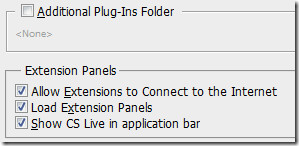
Plug-ins
Type
3D
Adjust your preferences mode properly depending on your Photoshop usage to get key rendering results and faster speed.

HOW TO SAVE AN IMAGE MADE CHANNEL(CYAN) AS JPEG