Create A Free DVD Photo Slideshow With Music In Windows 7/Vista
Windows 7/Vista has a build-in software called Windows DVD Maker, which can burn both videos and photos. It is simple, yet quite powerful. If you want to create a photo slideshow and burn it to a DVD, then I strongly recommend that you do it with this software.
It can not only burn videos and photos to a DVD, it can also customize the looks with professional themes and styles, and has the feature to add Music in Photo Slideshows. This software comes with Windows 7/Vista, but is not included in Windows 7/Vista Basic. Sadly very few people know that this software exists in their version of Windows and they waste their money to buy some DVD Maker software from 3rd Party developers for this purpose.
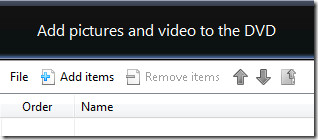
To begin, go to Start and search for Windows DVD Maker, or simply go to All Programs and select Windows DVD Maker. Now start adding your photos by clicking Add Items button.

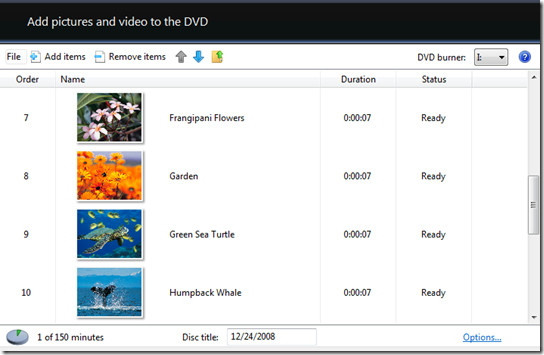
Once you have added the photos, it will look something like this.

You can move the photos up and down by selecting the photo and clicking the arrows given on top. The default DVD title is the date, you can remove it and add some custom name. After you have done adding photos, you can click on Options link given on bottom-right side where you can select the playback settings, aspect ratio, video format, DVD burner speed, etc. Once you have done all the desired settings, you can click Next.
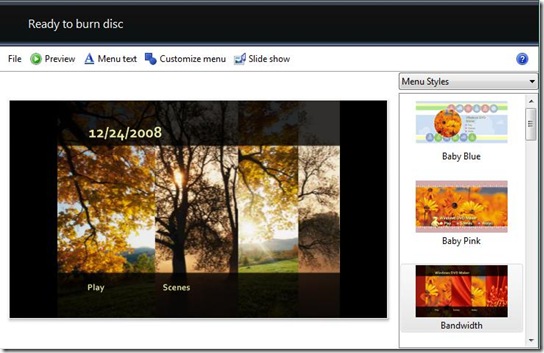
Now from here you can select the DVD Menu style from up to 20 different professional looking styles.

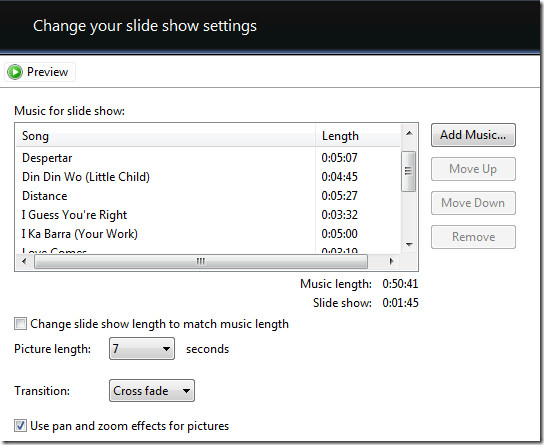
Once you have selected the menu style, you can further customize it by clicking Customize Menu button. If you want to change the Menu title and want to add some notes, you can click on Menu Text button to do it. Lastly if you want to add music to the slideshow, change the photo duration, or change the transition style, you can click on Slide Show button.

All these useful buttons are given on the top side. When you are done with everything, you can click the Preview button, to preview your DVD Photo Slideshow. Once you think everything is in order, you can go ahead and click Burn.
That’s it and your DVD will be ready in a few minutes, which you can than share it with your family or watch it on TV!

do I use DVD WR or DVD R disc?
Really useful man!!! I didn’t even know thanks for sharing!
I was very exited when discovering this, but the quality is very pixelated (definitely sub-480p), or am I missing something?
How do you adjust the saturation?….The color is all wrong!
the program will only play the first song listed then not the other so half of slideshow has no music. dont know why thier the same kind of music file.
Use a mp3 merge tool, there are plenty on the net, thats how i solved it 😉
I love this programme but I have added 4 music files and there is a 1 minute delay between the 3rd and 4th music file in playback which makes the music longer than the slide show. Can you advise?
I have had good success making the DVD, however, I am losing a lot of DVDs. I burn and sometimes it burns, and sometimes it burns up to 98.8 % and then shuts down with a message not able to burn on DVD. Then the DVD is lost and I have to start over. Is there a solution?
Fine. I have Windows 7 64 bit and it will NOT burn iTunes music. Says it does not support the file type. iTunes is Mpeg – 4 Audio. Windows 7 will not work. It will allow you to preview the slideshow with music that you have set up but not burn the dvd. Have even tried it the way you show above and also going through Windows media center – neither way works.
It is good. also Photo DVD Burner is good software to create photo slideshow and burn it to dvd
Thanks
What disk do i need or format???
Im tryin to burn a video clip taken by a camera and then add photos with music in the back while the photos are been shown.
I have try a few disk but the only thing that i can burn is photos but i add video and music and play it on the dvd it can not read it
read my message above. windows 7 – 64 bit will not accept this most file formats for burning dvds. You can view it on your computer but it will not allow you to burn.
I like what I have read and found Windows DVD Maker on my computer. But I have a problem when I try to add music it asks me for a file name and I am not sure what to put there. I am trying to get the music from my mp3 player. Hope someone outthere can help me.
upload mp3 player into computer then you will be able to find the file name
hi im making a slide show dvd, iv added over 200 pictures and when iv put it in my dvd player it works fine at first but then it starts to freeze someone please help ! thanx
hi, how to download windows dvd maker.
how do I add music to a video I can add music to a slide show, I must b thick.
Why can’t I add certain songs to my custom slideshow?? Even if I purchased them online and I also rip it from my own CD?
I have no problem adding music to the pictures in a slide show, but how do you add music to a VIDEO??
When I add more than one song to the slideshow, only the first song actually plays in the preview and when I burn the DVD. What am I doing wrong?????
Ditto
DVD CD Cases and Sleeves, WAllets Laptop Bags China Manufacturer.www.media-packs.com
DVD CD Cases and Sleeves, WAllets Laptop Bags China Manufacturer.Http://www.media-packs.com
how do i add music to my slide show,,,
can someone help please,,,,
I have over 400 pictures…I’d hate having to add one at a time. Also how do I edit the pictures and put some “title” identifying each one so that when the slide show starts people know what the picture is all about.
i want to make a slide show with out downloading any friggen thing help
Here you go, https://www.addictivetips.com/internet-tips/create-a-free-powerpoint-presentation/
Ok I want to know if this program will help me? I need to make a slideshow of pictures and have music playing in the background. Will this program help me with that. If it does, is it hard to make a DVD?
I love windows DVD Maker, but I don’t know if or how to make a desktop
icon. The only short cut I know of is when I send a project to my drive E my burner, then I can choose windows DVD Maker and it makes it like a real DVD with a start and seen option.
To make a shortcut on the Desktop, right-click ‘DVD Maker’ and select Send To > Desktop Create Shortcut. It’s that simple !
very easy. just right click the mouse at the desktop then click the (new) and click the shortcut then browse at the my computer, go to local disc c then find the DVD maker click the dvd maker icon.