How to access SSHfs on Windows Server
SSHfs is a filesystem based on the SSH (Secure Shell) protocol, commonly used on Linux and BSD systems. It allows you to mount any directory over SSH as a file system. This guide will demonstrate how to utilize SSHfs on a Windows system.
We will explain how to get SSHfs operational and even map a network location to your Windows Server using it. However, before we start, make sure you have an SSH server prepared for use with SSHfs on Windows.
How to Install Chocolatey
Chocolatey, the package manager tool for Windows, significantly eases the installation process of SSHfs on Windows Server. It’s particularly advantageous because it simplifies the installation of the Winget tool, which is a prerequisite for installing SSHfs. Without Chocolatey, the setup of SSHfs can become a cumbersome task.
To install Chocolatey on your Windows Server system, you should begin by opening a PowerShell window with Administrator privileges. Once the window is open, you need to input the following PowerShell script. This script will execute a series of commands designed to configure and install Chocolatey on your system:
Set-ExecutionPolicy Bypass -Scope Process -Force; [System.Net.ServicePointManager]::SecurityProtocol = [System.Net.ServicePointManager]::SecurityProtocol -bor 3072; iex ((New-Object System.Net.WebClient).DownloadString('https://community.chocolatey.org/install.ps1'))
Upon the successful installation of Chocolatey, its functionality can be verified by running the choco help command in PowerShell. If executing this command yields no response, it could indicate a need for the reinstallation of Chocolatey.
How to Install Winget
Winget serves as another Windows package manager, functioning like Chocolatey. It provides access to SSHfs for Windows. Installing Winget is essential to mount SSH file systems on your Windows Server system. To proceed with the installation, ensure you have an Administrator-level PowerShell window active. Then, enter the following command to commence the Winget tool’s installation process:
choco install winget
It’s important to attentively follow the prompts on the screen after inputting the command. This ensures that the Winget tool is installed correctly and completely. Post-installation, the functionality of Winget can be confirmed by running the winget help command in PowerShell. Should this command fail to operate as expected, a reinstallation of the Winget tool might be necessary.
Installing SSHfs
With Chocolatey now installed and having been utilized to install Winget, the next step is to use Winget for installing SSHfs-Win on your Windows Server system. Begin this process by opening a PowerShell window with Administrator rights. Then, input the following commands, which are essential for the installation and setup of SSHfs-Win:
winget install -h -e --id "WinFsp.WinFsp"
winget install -h -e --id "SSHFS-Win.SSHFS-Win"
Executing these commands correctly will lead to the successful installation of SSHfs-Win on your Windows Server system. This will enable you to utilize SSH file systems effectively.
How to Access SSHfs Shares on Windows Server
To access your SSHfs shares on Windows Server, do the following. First, open up a Windows Explorer window on the Windows Server desktop. Once it is open, select the address bar in Windows Server.
After you’ve selected the address bar with the mouse, enter \\sshfs\ into the address bar. It should look like:
\\sshfs\
Right after entering \\sshfs\, add in the user account of the SSH server you’re planning to access. For example, my NixOS server uses the “derrik” user, so my address bar should look like:
\\sshfs\derrik
After adding the username, add in the hostname. The hostname is what the SSH server’s computer is known as on the network. As I am connecting my NixOS server over SSHfs, I would add “nixos-server”:
\\sshfs\derrik@nixos-server\
When you’ve specified the hostname, press the Enter key on the keyboard to submit your connection request to the server. Upon pressing Enter, Windows will bring up a login box. Enter the password for the username you’ve specified in the address bar to complete the connection.
How to Map an SSHfs Share on Windows Server
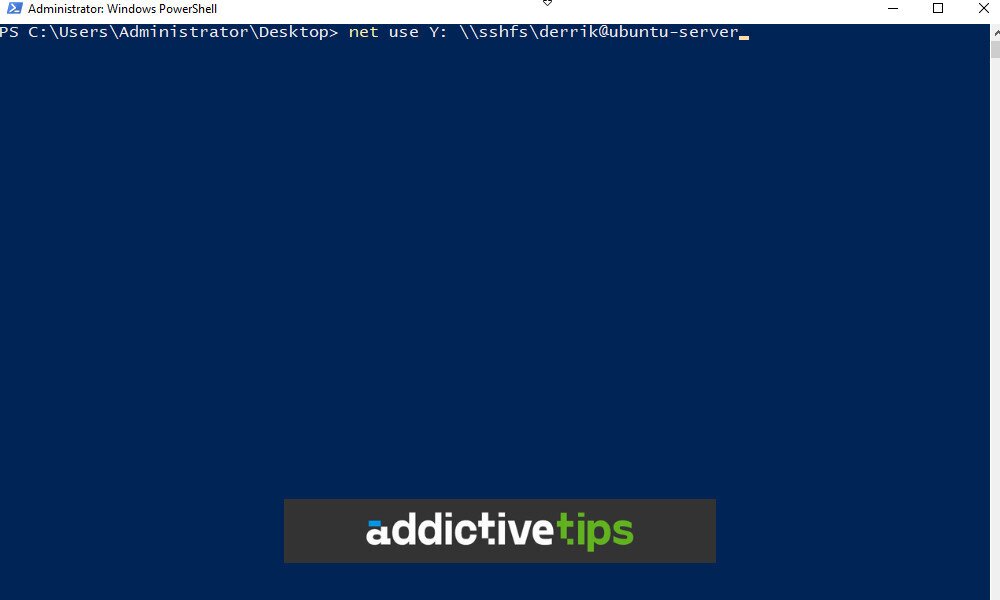
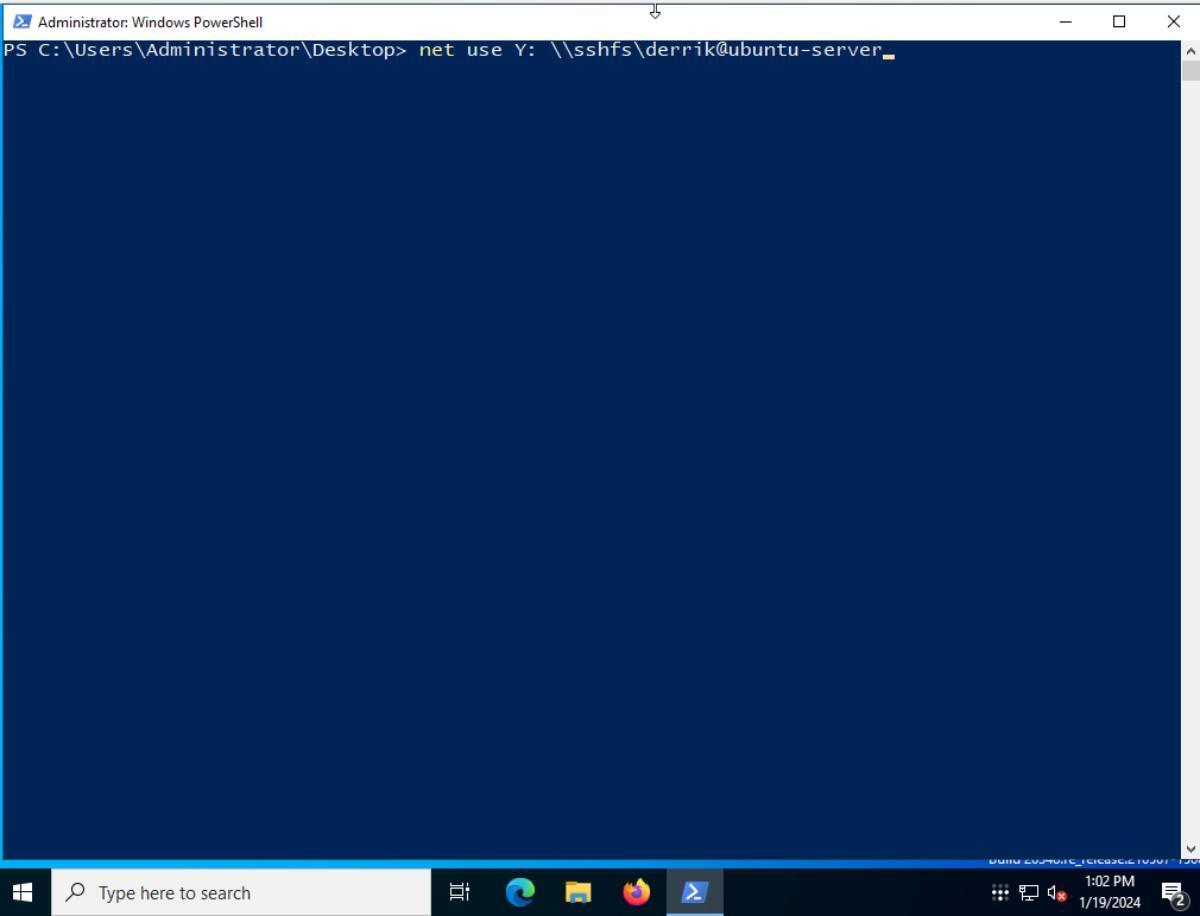
The easiest way to map an SSHfs share on Windows Server is with PowerShell, by utilizing the net use command. To start, launch a PowerShell window as admin on the Windows Server desktop.
Once the PowerShell window is open, start by specifying a drive letter. For example, to mount your SSHfs share to “Z”, do:
net use Z:
After choosing a drive letter, add in the network location:
net use Z: \\sshfs\derrik@nixos-server\
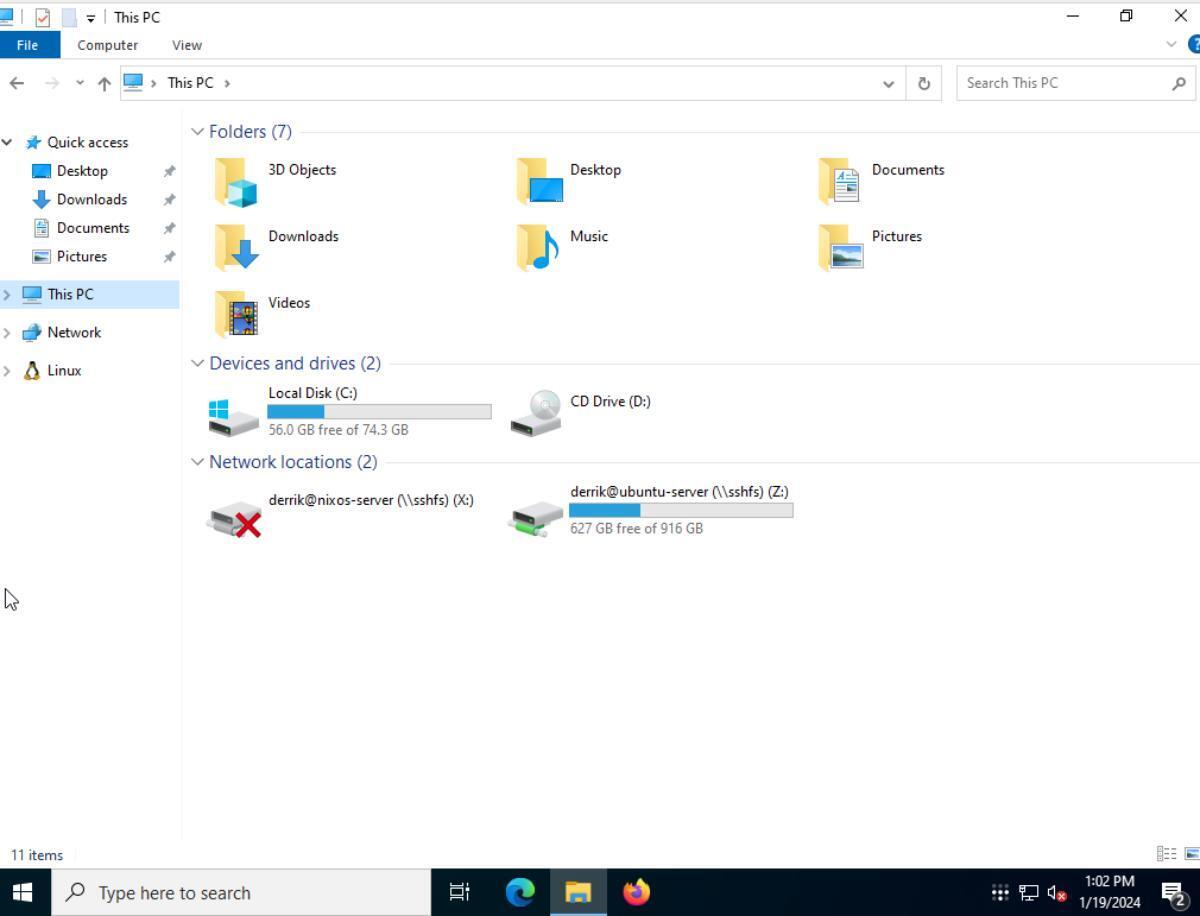
Press the Enter key to map your network location to the drive letter. Once mapped, it is accessible via “This PC”.
