How to set up MergerFS on Ubuntu Server
MergerFS is an excellent tool for combining multiple hard drives into one location to maximize space. It pools multiple storage drives into a single, large file system, simplifying data management. MergerFS is particularly useful for running a Media Server.
In this guide, we’ll demonstrate how to install MergerFS on Ubuntu Server, identify hard drives for use with MergerFS, and configure MergerFS to mount automatically during boot time.
How to Install MergerFS on Ubuntu Server
MergerFS is not pre-installed on Ubuntu Server and requires subsequent installation. Fortunately, setting up MergerFS is straightforward, as it is included in the official Ubuntu software repositories.
To install MergerFS on your Ubuntu Server system, start by opening a terminal window on your computer and logging into your Ubuntu Server system via SSH. Then, use the apt update and apt upgrade commands to update Ubuntu. Updating your system before installing new software is advisable.
sudo apt update
sudo apt upgrade -y
After upgrading Ubuntu Server, install MergerFS with the following apt install command:
sudo apt install mergerfs
With the installation complete, your Ubuntu Server will now support MergerFS.
How to Identify Your Drives for Use with MergerFS
MergerFS functions as a filesystem pool, creating a central point for all drives and merging them into a single location. Therefore, identifying the drives is essential.
There are various methods to identify hard drives on Ubuntu Server. The simplest is using the lsblk tool, which provides details about all connected block devices, including their device nodes. Device nodes, also known as device files, offer interfaces for hardware devices and are located in the /dev/ directory.
In the /dev/ folder, hard drives are typically represented by “SD” followed by a letter. For example, the first drive is usually /dev/sda, the second /dev/sdb, and so on.
To pool your drives with MergerFS, identify their corresponding files in the /dev/ directory. Use the lsblk command in the terminal to view your block devices.
Note: Adding the -e7 flag filters out loop devices associated with snap packages.
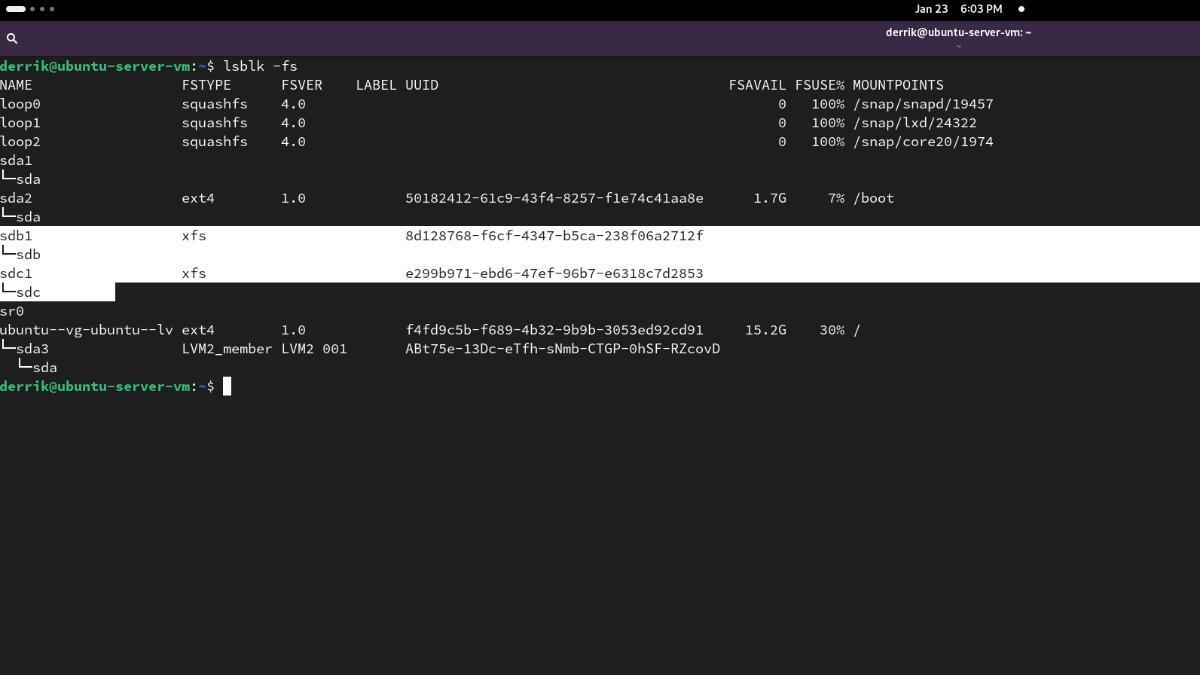
lsblk -e7 --all
In the lsblk output, locate the drives you want to pool under the “NAME” column and note their names for later steps.
How to Create Your MergerFS Mount Points
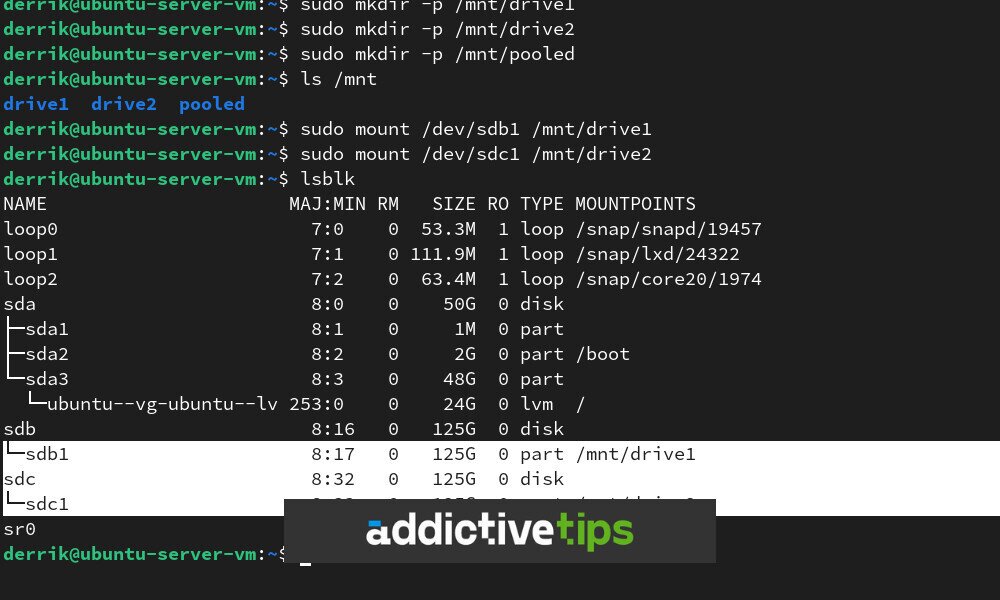
First, mount each drive you plan to use with MergerFS in separate folders. For instance, if using MergerFS with /dev/sdb1 and /dev/sdc1, mount them in /mnt/drive1 and /mnt/drive2.
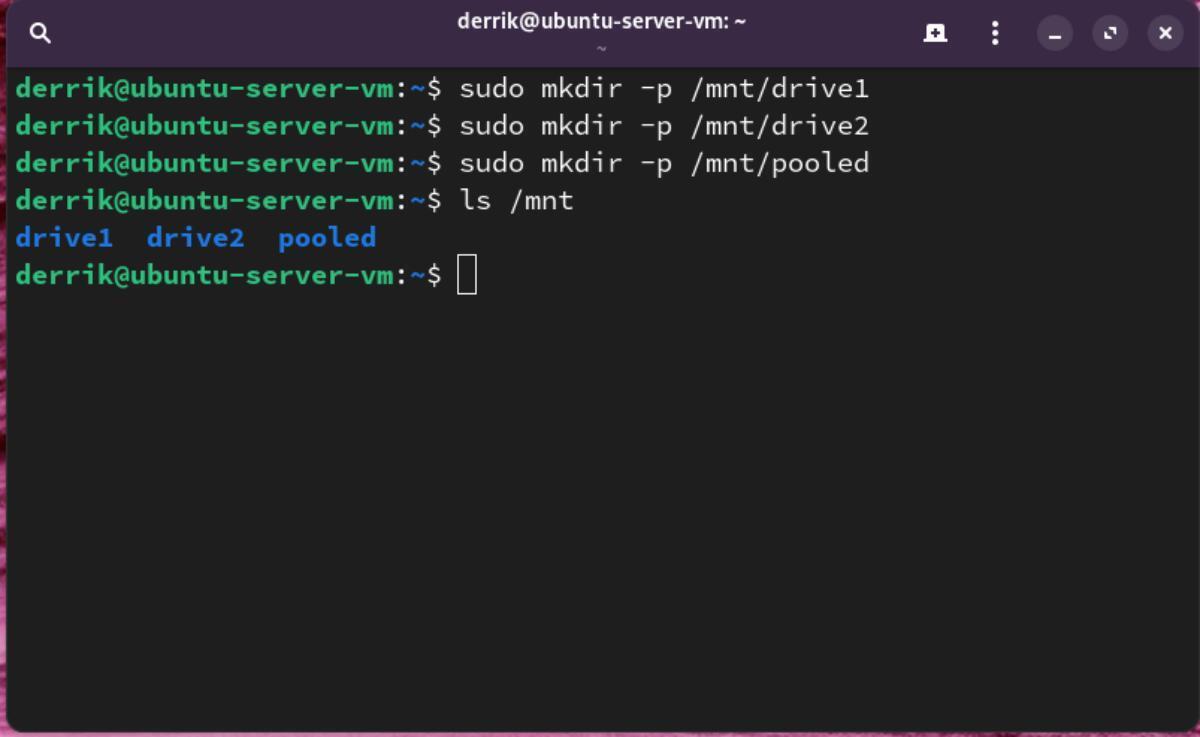
sudo mkdir -p /mnt/drive1
sudo mkdir -p /mnt/drive2
Additionally, create the /mnt/pooled folder, where Drive 1 and Drive 2 will be merged with MergerFS.
sudo mkdir -p /mnt/pooled
After creating the mount folders, create the mount entries in the fstab file. Begin by opening the /etc/fstab file in Nano.
Note: you may need to update your drive folder permissions. Do this with sudo chmod 770 -R /mnt/pooled.
sudo nano -w /etc/fstab
Add the following code to the bottom of the fstab file, customizing it to suit your needs. This code is an example.
Note: In this example, Drive 1 and Drive 2 are formatted as EXT4. Your drives may differ. Adjust the filesystem info accordingly.
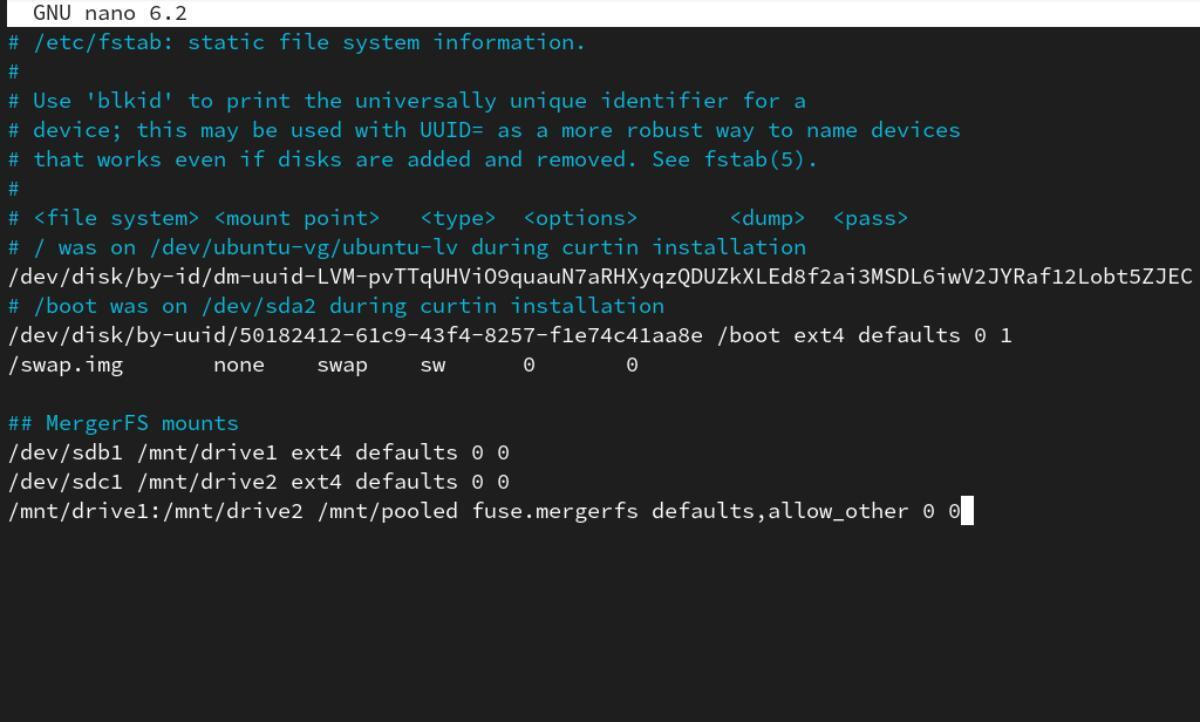
## MergerFS mounts
/dev/sdb1 /mnt/drive1 ext4 defaults 0 0
/dev/sdc1 /mnt/drive2 ext4 defaults 0 0
/mnt/drive1:/mnt/drive2 /mnt/pooled fuse.mergerfs defaults,allow_other 0 0
After adding the mount information to /etc/fstab, bring the drives online simultaneously with the sudo mount -a command.
sudo mount -a
Customizing MergerFS
MergerFS offers various options that users can use with their MergerFS mount pools. These options follow defaults, in /etc/fstab. To edit, enter the command below.
Note: Separate each option with a comma.
sudo nano -w /etc/fstab
Example fstab entry with MergerFS options:
/mnt/drive1:/mnt/drive2 /mnt/pooled fuse.mergerfs defaults,allow_other 0 0
- File Creation Policies:
epmfs: Create files on the drive with the most free space.ff: Fill drives sequentially in the order listed.lfs: Use the drive with the largest free space.mfs: Create files on the drive with the most free space available.- General Options:
defaults: A standard set of general-use options.allow_other: Allow pool access for all users.use_ino: Ensure more traditional inode behavior.direct_io: Disable caching, useful for certain setups.minfreespace: Set a minimum free space threshold for considering drives for new files.category.create=POLICY: Specify a file creation policy (e.g.,mfs,ff,lfs).
After making your changes, save the edits in Nano with Ctrl + O and exit with Ctrl + X. Finally, reboot your Ubuntu Server.
