How To Change Location Of Default Screenshot Folder In Windows 8
One of the many new bright spots of Windows 8 is the freshly designed screenshot feature. You no longer need to launch the Snipping Tool or any third-party screenshot app like Greenshot for the purpose; simply press Win + Print screen and everything is taken care of; this hotkey saves a snapshot of any on-screen activity to the Screenshots folder under your Pictures library. By default, the screenshots are saved in C:\Users\(user-name)\Pictures\Screenshots directory. If you’re looking for a way to move this folder to a different location on your computer, there’s a fairly easy solution for that. In what follows, we will guide you through the process of changing the screenshot folder, as well as restoring it back to its default location.
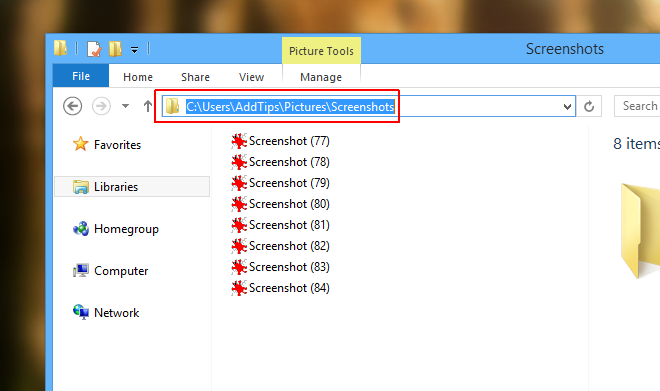
Open the Screenshot folder by heading over to the following directory in File Explorer.
C:\Users\(user-name)\Pictures\Screenshots
Right-click in this window and select Properties from the context menu.
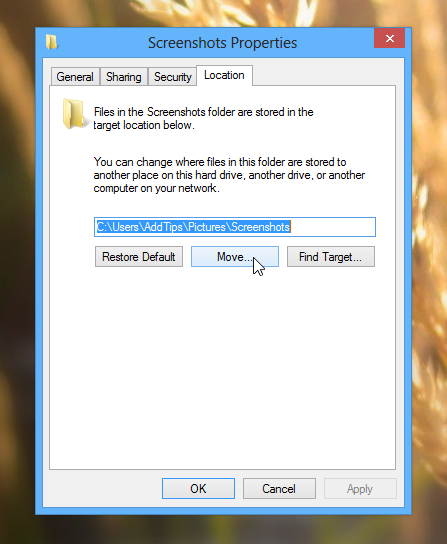
The Screenshot Properties window consists of four tabs; General, Sharing, Security and Location. Our target here is the Location tab. Click this tab, followed by clicking the Move button as demonstrated in the screenshot below.
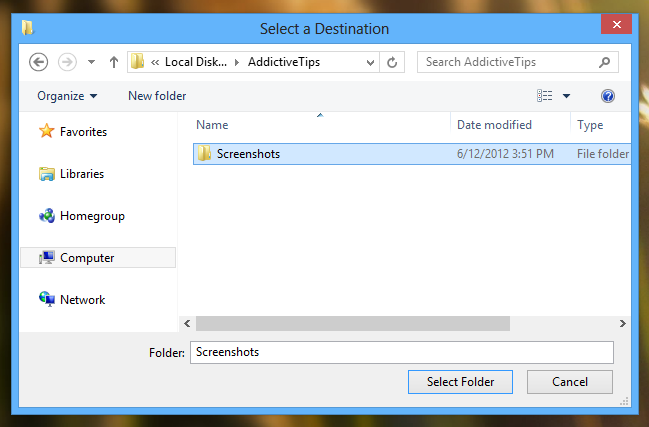
Now select the directory that you want to move the default folder to. You can select any folder of your choice but it’s advisable to choose a location that is both accessible and easy to remember. After selecting the directory, click the ‘Select Folder’ button.
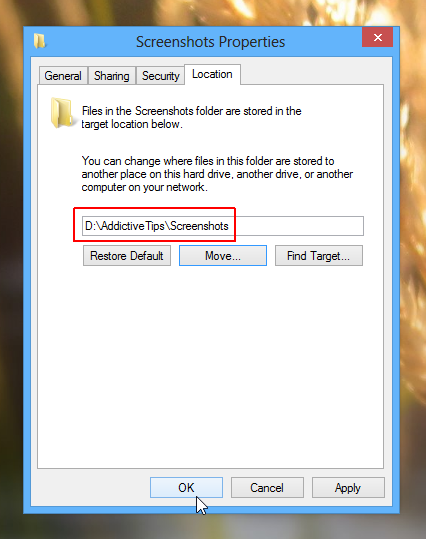
You will notice that the output location has been changed to the new location. Click OK to apply the changes.
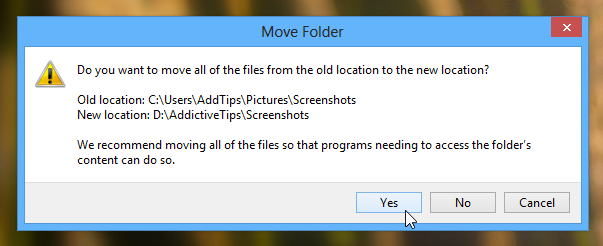
A ‘Move Folder’ dialog box will pop up. Click Yes to complete the process. From now on, all the screenshots you capture will be saved to the new directory.
Restore Default Location Of The Screenshot Folder
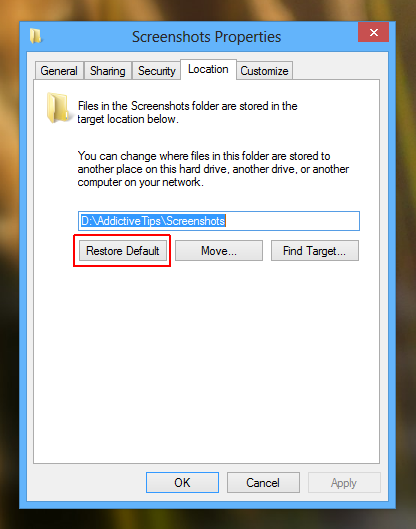
In case you want to revert your changes, restoring the Screenshots folder back to its original location is even easier. Just go to the location where you moved the folder in the preceding steps, right-click the Screenshot directory and select Properties from the context menu.

Under the Location tab, click the ‘Restore Default’ button and then click OK.
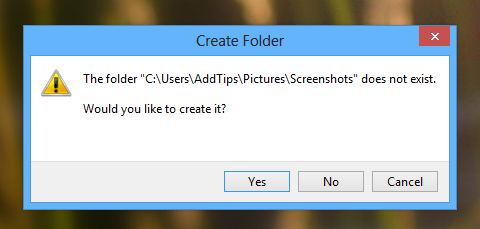
Windows will prompt you that the folder doesn’t exist anymore, and offer you to create it. Simply click Yes, which in turn will recreate the Screenshot folder and move all the files back to it.
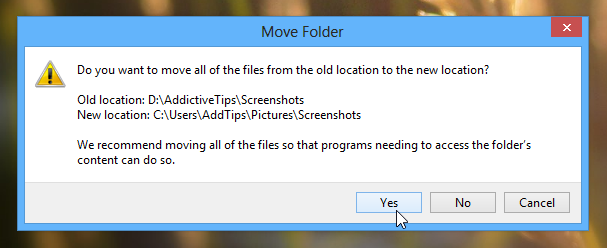
Afterwards, click Yes in the ‘Move Folder’ dialog to complete the restore process.
[via eightforums]

How to change the default screenshot format, please?
Nice Tip , You always come up with something Interesting and useful .