How to Test Mic on Windows 10 (And Configure It)
Right before a live performance, the sound engineer asks the artist to check the mic. This is called a mic test and ensures everything is working correctly before going live. Similarly, you can test the microphone even on Windows 10 and make sure that it is working correctly. Here are some ways that will help you test microphone on Windows 10.
How to test mic on Windows 10
Microphone issues on Windows 10 are relatively common. The best way to tackle this issue is by testing whether your microphone is connected properly.
Follow the steps below to install a new microphone.
Configure a new microphone
- Right-click the speaker icon on the bottom left and click on Sounds.

- Click on the Recording tab.

- Select the new microphone you want to configure and click on the Configure button.
- Click on Set up microphone.

- Now Microphone Setup Wizard will help you configure the basics.
- Click on Finish once the setup is completed.
Test a microphone that is already configured
- Right-click the speaker icon on the bottom left and click on Sounds.
- Click on the Recording tab.
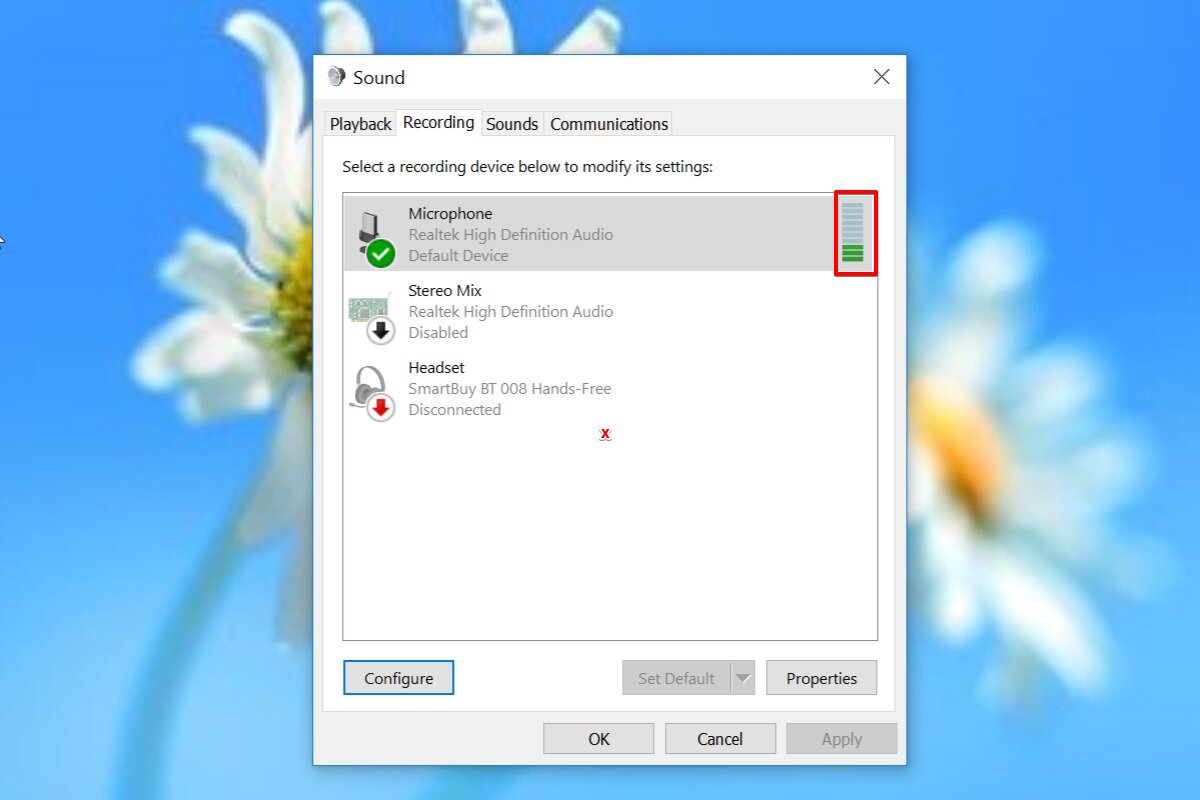
- As you speak, the green bar should rise accordingly. If it does, then there is no issue with your microphone. Try varying your pitch and see if the green bar rises or drops accordingly.
- If you want to test the quality of voice recording, then try speaking with your friend on Skype or any other app. You can also use the inbuilt Voice Recorder on Windows 10 and check the quality of the audio via playback. If you’re using AirPods with your PC, adjusting AirPods Pro noise cancellation can also make it easier to hear playback clearly while testing. If you’re setting up a microphone for content creation or live streaming, you may also want to check out our streaming webcam recommendations to ensure your entire setup delivers professional quality.
Check Microphone Privacy settings.
Windows 10 offers a privacy feature that allows users to block mic usage. Your microphone will not work if apps are blocked from accessing the same. Follow the steps below to check microphone access permissions.
- Click on Start Menu and open the Settings app.
- Click on Privacy Icon.
- Select Microphone from the left pane.

- In case the settings show “Microphone access for this device is off,” then click on Change and turn on “Microsoft access for this device.”
- Check whether “Allow apps to access your microphone” is Off, is so then use the toggle switch to switch it On. Now you should be able to use the microphone, if not, then proceed to the next solution.
Set Default recording device.
- Right-click the speaker icon on the bottom left and click on Sounds.
- Click on the Recording tab.

- Click on the microphone of your choice and select “Enable.”
- Now select “Set as Default Device.” If you’d rather choose app sound device settings for one program instead, Windows 10 supports that too.
- Click OK to apply the change.
Update audio driver
The microphone stops working if the audio driver is outdated or corrupt. This can be fixed by updating the audio driver to the latest version. Windows 10 comes with multiple options to update drivers. Here is how you can update the audio drivers by using Device Manager.
- Press the Start button.
- Search for Device Manager.
- Click on the top result to open Device Manager.
- Double click on the “Sound, video and game controller.“

- Select the microphone from the dropdown and click on “Update Driver.”
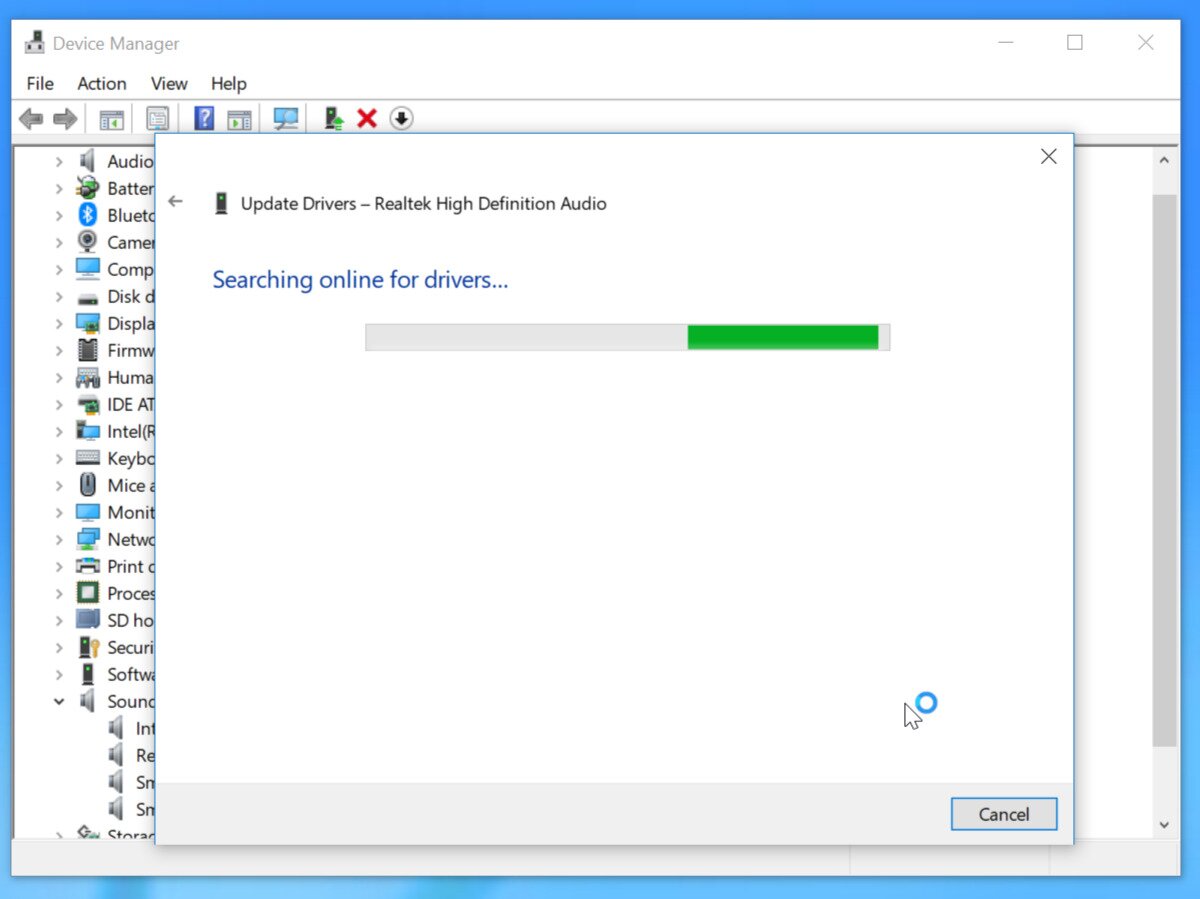
- Select “Search automatically for updated driver software.”
- If an update is available, the Device Manager will download and install the same.
Conclusion
We hope the above steps helped you set up and test the microphone on Windows 10. Please ensure your mic is working and it’s not a hardware issue.
The best way to test is to use it on other Windows 10 laptops and see if the mic works.
