Import Pictures & Videos in Windows 10 From Camera, SD Card, or Phone
Cameras, SD cards, and phones all have limited storage. You can use them to temporarily store photos but you will eventually have to move them off the device. It’s not just a matter of storage space. You should move your photos and videos to an external drive where they’re safe. Windows 10 has a pretty intelligent import feature. It detects when you connect a device like a phone or SD card and offers to import the data. If you dismiss it and set a different autoplay action, you won’t see the import prompt again. That said, you can still import pictures and videos in Windows 10 from a camera, an SD card, or a phone.
Connect Your Device
This is pretty simple if you’re connecting an iPhone, or inserting an SD card. It’s slightly complicated if you’re connecting an Android phone or a camera.
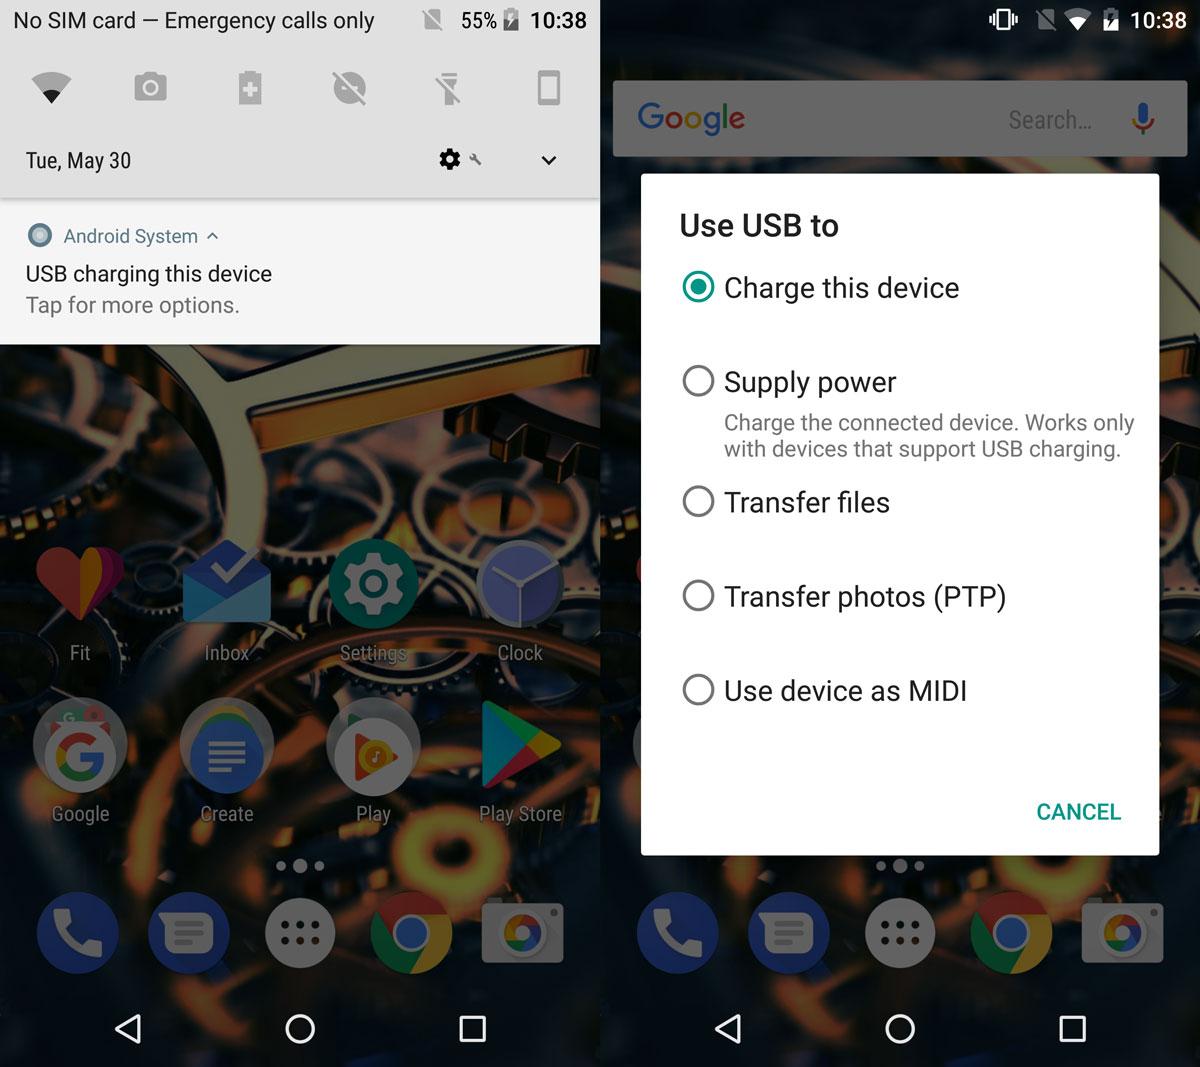
When you connect an Android device, make sure you connect it as an MTP device. If you connect it in charging mode, you will not be able to import pictures and videos. If your Android settings don’t have an MTP connection option, go with the File Transfer option.
Your camera may or may not have a similar option. Connect it and see if Windows detects it and lets you view photos on the camera in File Explorer.
If it’s the first time you’re connecting a device, Windows might need to install additional drivers.
Import Pictures And Videos In Windows 10 – Autoplay Option
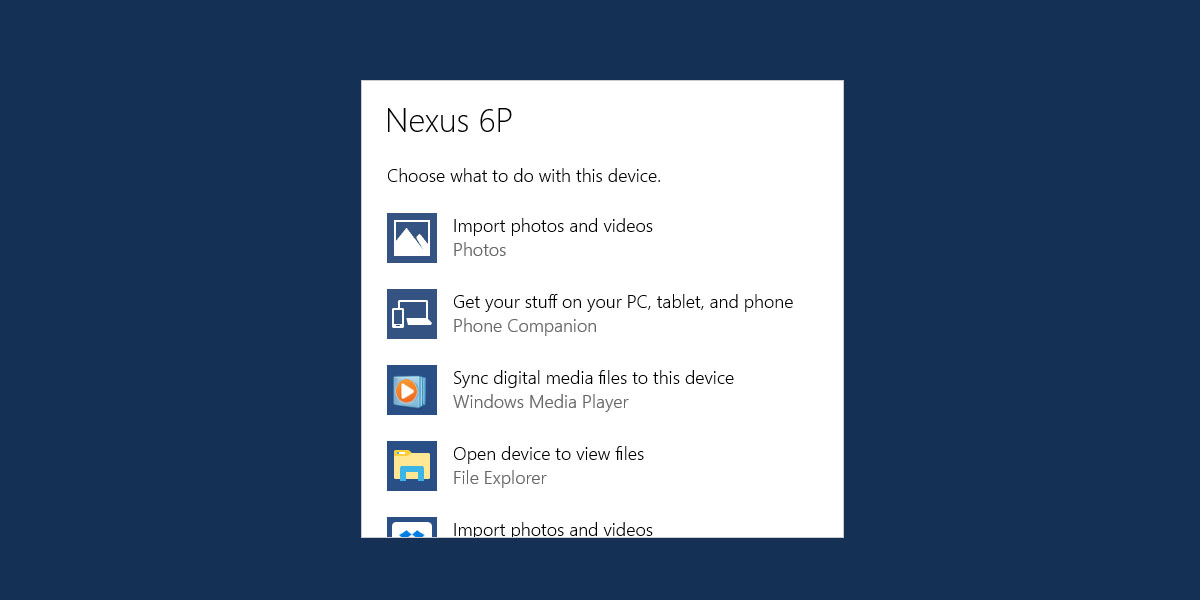
As mentioned earlier, importing photos and videos is an autoplay action you can set for your device. The option to set this as the default option might not suit you if you’re connecting a phone. You might connect your Android phone to charge it, and you might connect your iPhone to back it up. In both cases, having Windows 10 import photos and videos is going to get annoying. You can set this option for cameras and maybe for an SD card if it only has photos and videos on it. If you dismiss this option, or choose a different one, you can still import pictures and videos in Windows 10.
Import Pictures And Videos In Windows 10 – File Explorer
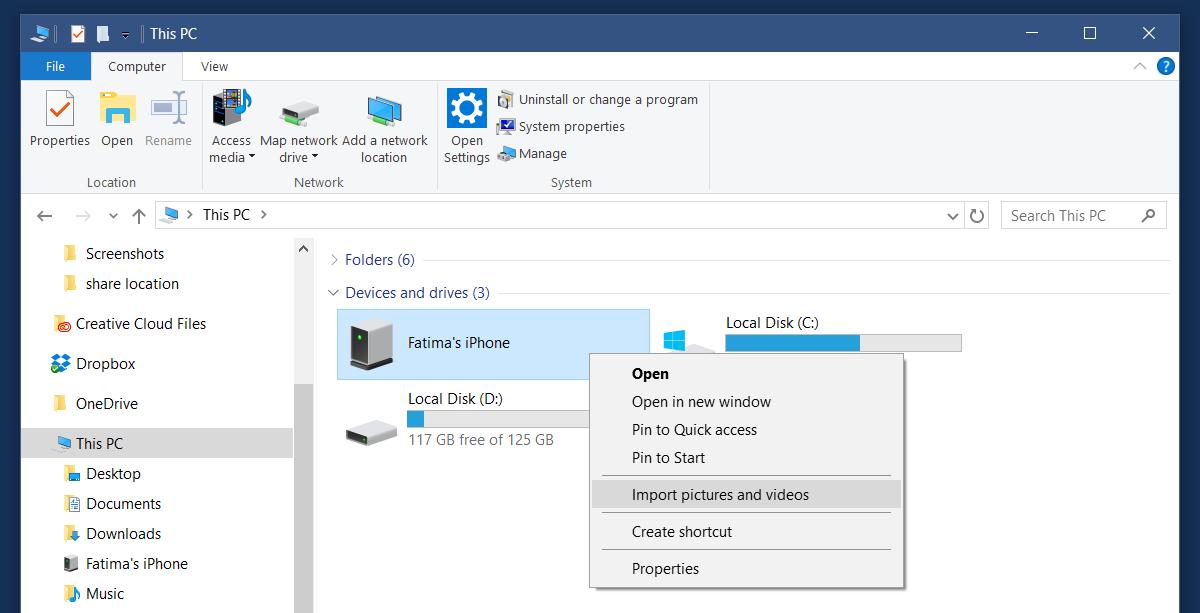
Connect your device and wait for it to appear in File Explorer. Make sure you can browse the photos and videos on your device in File Explorer.
Right-click the device and select ‘Import photos and videos’ from the context menu.
Windows will scan the device for photos and videos. This will take time depending on how much data you have on your device.

Windows offers to organize and group the items it’s found. If you want to skip that and just import new items since the last import, select the ‘Import all new items now’. You can add tags to the new items if you want.
When you’re importing photos and videos, you can choose where the photos and videos are saved to. Click ‘More options’ to choose the import destination. You can select a different location for the photos and videos. They’re sorted to folders named by the date of import and the image name. You can also define a naming convention.

That’s all it takes.

THANK YOU FOR THIS!
I don’t know why they make this so difficult for Windows users!