Steam Not Opening? Lets Fix It (18 Possible Solutions)
If you’re asking why won’t Steam open, you’re not alone. As the world’s most popular gaming platform, Steam offers a huge library of free and paid games, all within a user-friendly interface. However, sometimes Steam won’t open, leaving you unable to jump back into your favorite games. It’s a frustrating problem that many players face, disrupting their experience. Even more frustrating, there can be several causes for this problem.
Editor's Pick July 2026
But rest assured, today you’ll find a workaround for your problem, no matter what the root cause of the problem might be, so read on to learn how to fix Steam not opening.
How do I fix Steam not opening on my PC?
Before you make any changes to your computer, it’s a good idea to set up a system restore point. In case anything bad happens, you can use the Recovery option to restore Windows to a previous state.
You should also consider performing a full hard disk backup if you have enough storage space available. It’s more reliable since System Restore doesn’t always work as expected.
1. Reboot your computer
There are so many bugs and glitches that can upset your normal system functions. They can come from anywhere, too. Software updates, network issues, the list goes on. Luckily, quite often simply restarting your computer can fix minor errors, refresh network settings, and reset the whole system. It’s an easy troubleshooting method to try when you click on Steam, and it isn’t opening.
2. End all Steam processes from Task Manager
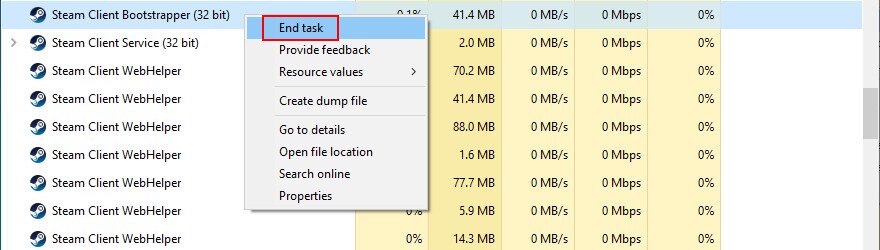
If you recently launched Steam, exited, and couldn’t open it anymore, it might be due to too many processes opened in the background. However, you should be able to quickly resolve this problem by ending all associated processes from Task Manager.
- Right-click the Windows taskbar and open Task Manager.

- Locate all Steam entries, select each one, and click End task (starting with Steam Client Bootstrapper).

- Restart your computer.
- Try to launch Steam now.

3. Repair the Steam service
If Steam is not opening on your computer due to service failure, you can fix it with the repair tool.
- Log in to Windows 10 as the administrator.
- Make sure to end all Steam processes (see the previous solution).
- Press Win key + R and type
"C:\Program Files (x86)\Steam\bin\SteamService.exe" /repair
- If Steam is in another location than default, replace it accordingly. Press Enter.
- Try to open Steam now.

4. Free up disk space
Check if your computer is running low on disk space. Just like other software applications, Steam requires free disk space to be able to function correctly, especially since it’s an Internet-enabled tool.
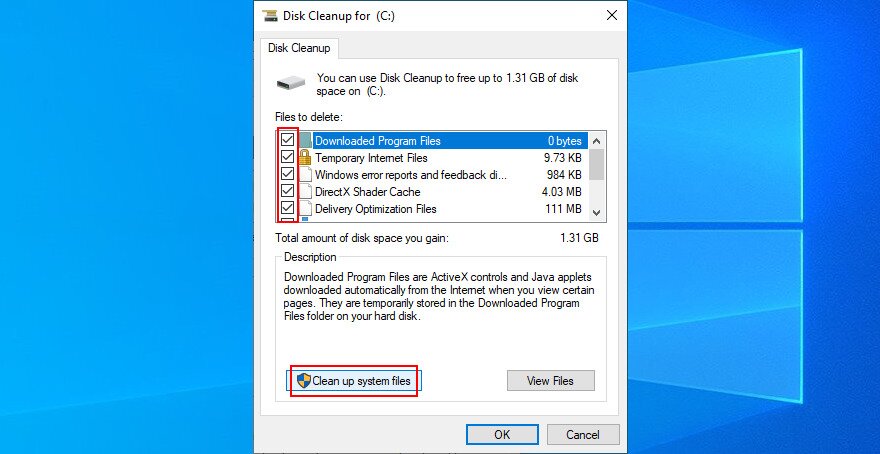
The simplest way to free up disk space on Windows 10 without installing third-party cleaners is by turning to the Disk Cleanup tool.
- Log in to Windows 10 as the administrator.
- Check the Downloads folder and Recycle Bin to save or restore any important files.
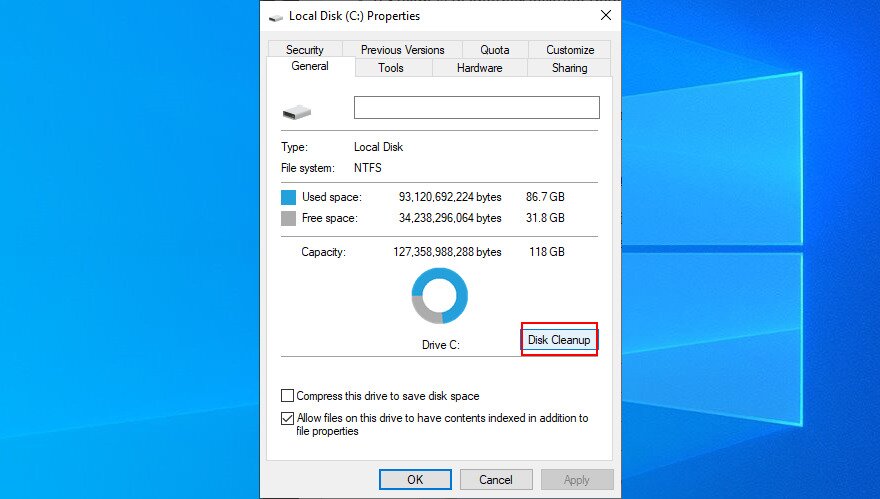
- If Steam is installed on the C: drive, right-click C: and select Properties.
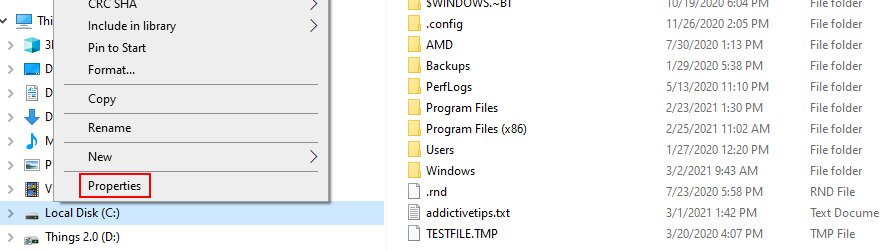
- In the General tab, click Disk Cleanup.

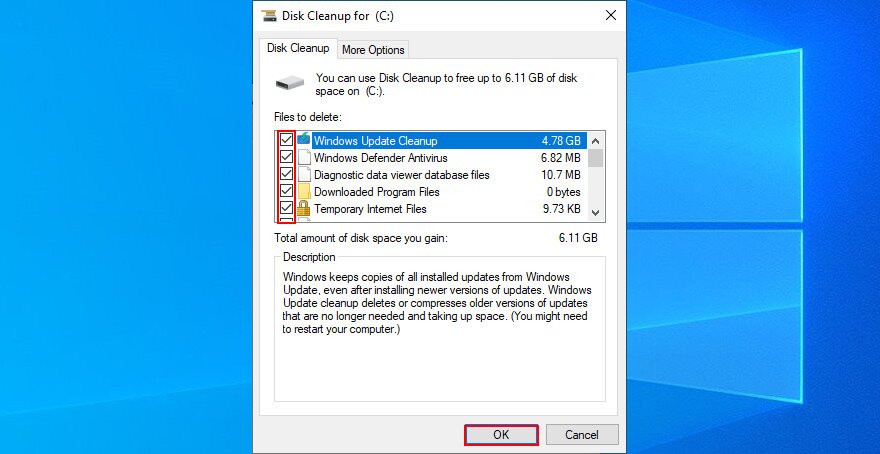
- Select all items from the list and click Clean up system files.

- Once Windows finishes the scan, select all items again, click OK and Delete Files to confirm.

- It might take a while. Once the task is complete, restart your PC and try to launch Steam.
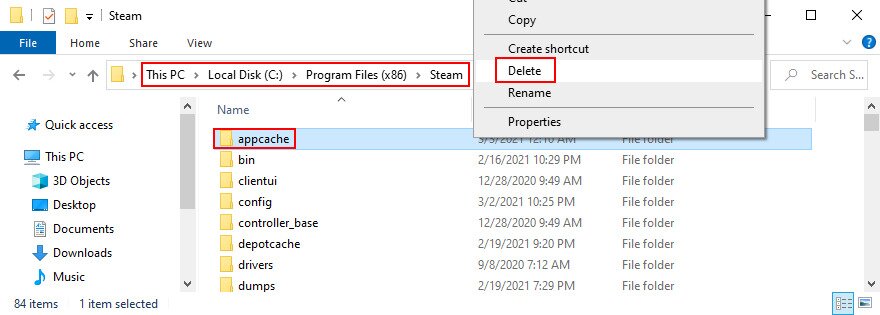
5. Delete the Steam appcache folder
The appcache folder contains information about the application and game files. Normally, it shouldn’t interfere with the Steam core components.
Still, you can delete it to give the gaming client a hard refresh. Don’t worry since the Steam will automatically rebuild the appcache folder with everything it needs.
- Go to
C:\Program Files (x86)\Steam\. If you installed Steam somewhere else, visit that location instead.
- Delete the appcache folder.
- Restart your PC and try to launch Steam.
6. Reinstall the Steam client
If the software application isn’t working normally, it could be the reason why Steam won’t open on your computer. You can fix this problem by uninstalling Steam and then downloading and installing the latest version. Don’t worry since your games will remain installed on your PC.
Here’s how to uninstall Steam
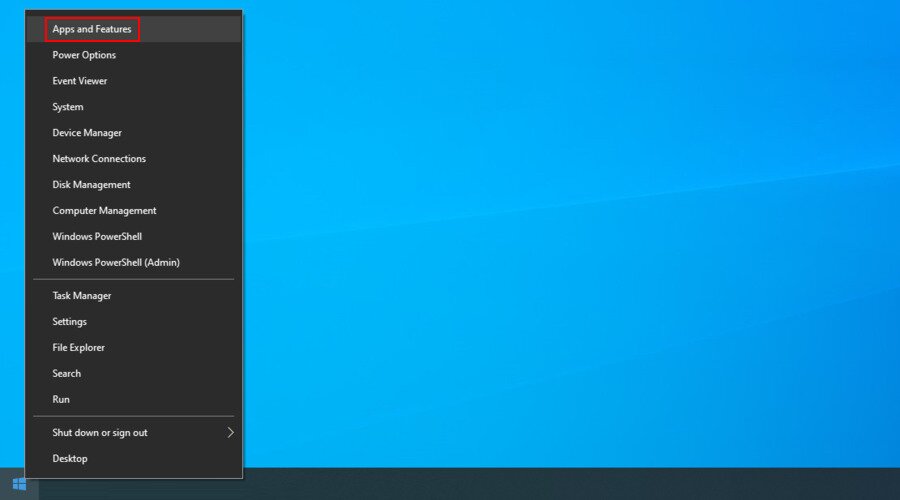
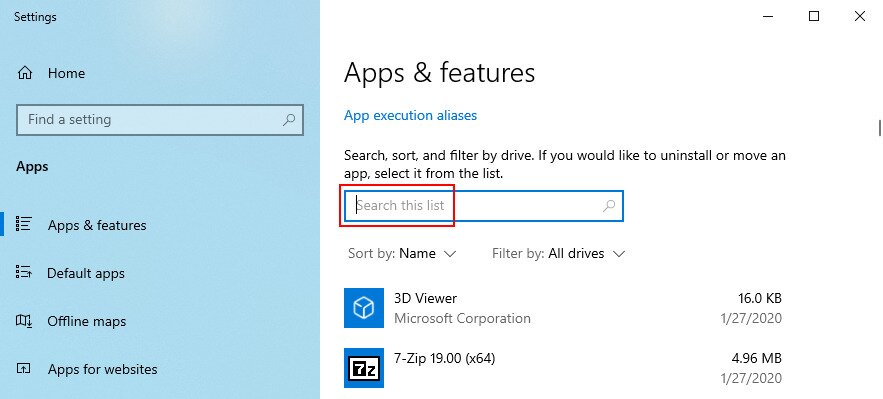
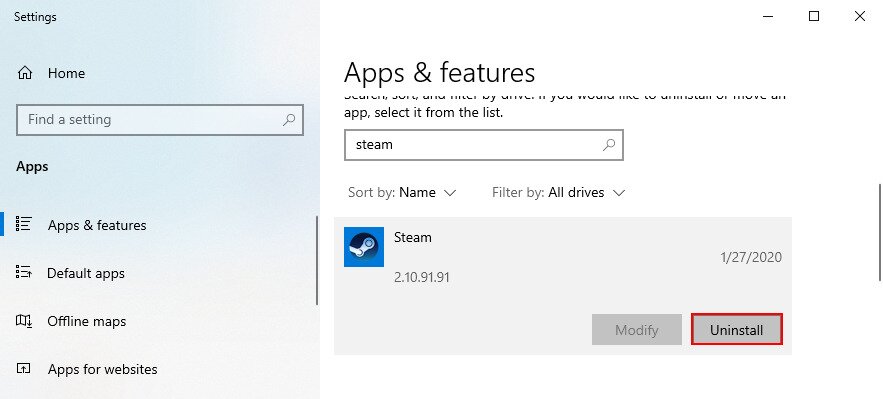
- Right-click the Windows 10 Start button and select Apps and Features.

- Click Search this list and type steam.

- Select Steam, click Uninstall, and proceed with the on-screen instructions.

You can download Steam from the official website and go through the setup operation again. It also ensures that you will be running the latest available updates. When downloading games, be cautious about third-party sources and always verify Is Steam Unlocked safe? before using unofficial platforms.
7. Clear the Steam download cache
If you can open the Steam desktop client but can’t download or launch any games, try this:
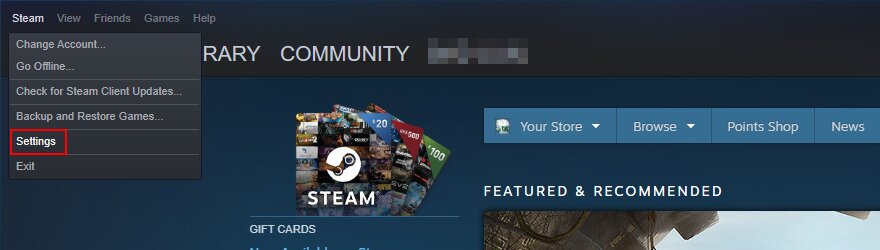
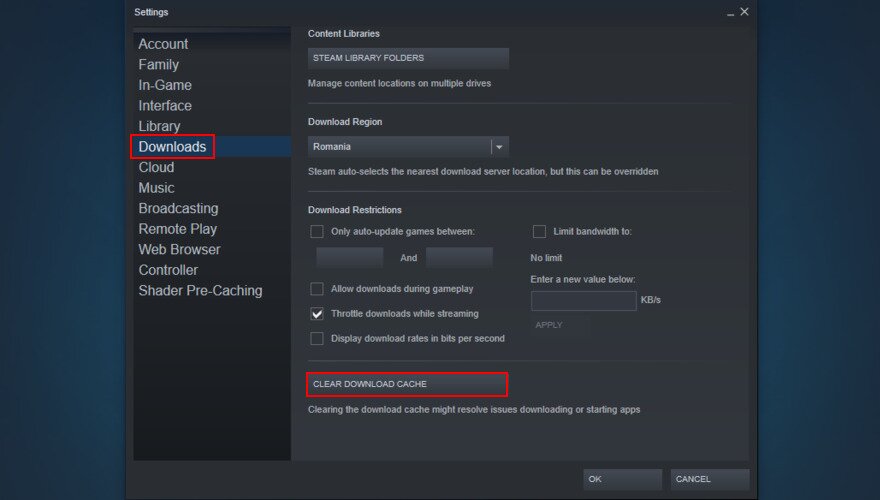
- Launch Steam, open the Steam menu, and go to Settings.

- Select Downloads, click Clear download cache, and Yes to confirm.

- Restart your PC and launch Steam.
8. Unplug all extra external devices
Peripheral devices like USB flash drives, memory cards, and external hard disks can cause application functionality issues, even to Steam.
Try to pinpoint the time when you started experiencing issues with the Steam launcher. If you plugged a new device into your PC around the same time, that device could be your culprit (or maybe you have faulty USB ports).
Just detach anything you don’t need, restart your computer, and try to open the Steam app. In the case of required devices, try plugging them into different USB ports.
9. Reset your Internet connection
Even if you don’t have an active Internet connection, you should still be able to launch the Steam app and switch to offline mode to play games. However, certain network connectivity settings could affect the entire client.
Here’s how to run the Internet troubleshooter:
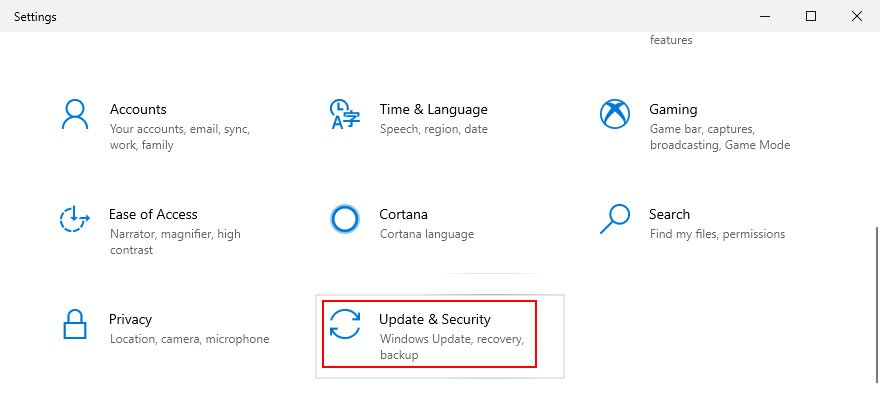
- Right-click the Windows 10 Start menu and select Settings.

- Click Update & Security.

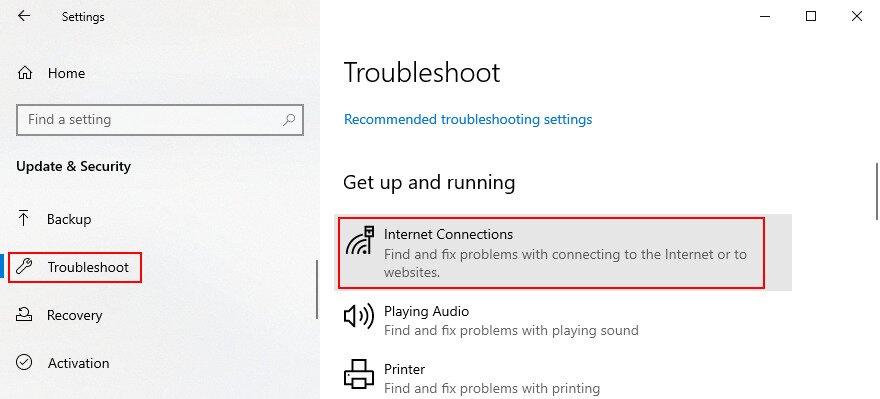
- Select Troubleshoot, click Internet Connections and follow the on-screen instructions.


You can also flush your DNS servers:
- Press Win key + R, type cmd, then press Ctrl + Shift + Enter to launch Command Prompt with admin rights.

- .Type the following lines (in this order) and make sure to press Enter between each line

ipconfig /flushdnsipconfig /registerdnsipconfig /releaseipconfig /renewnetsh winsock reset
- Restart your PC and try to launch Steam in online mode.


10. Add an exception for Steam in your firewall
If you recently changed your firewall settings, you might have accidentally disabled Internet access for Steam.
To test this theory, you can temporarily disable your firewall:
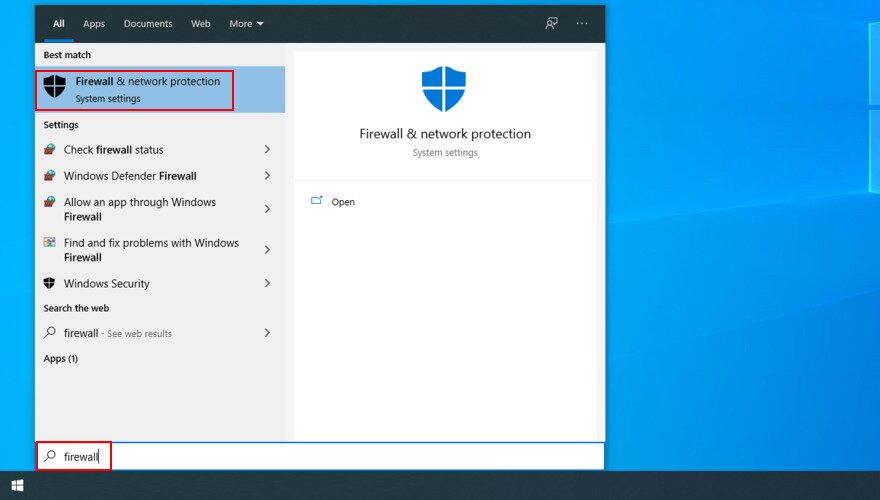
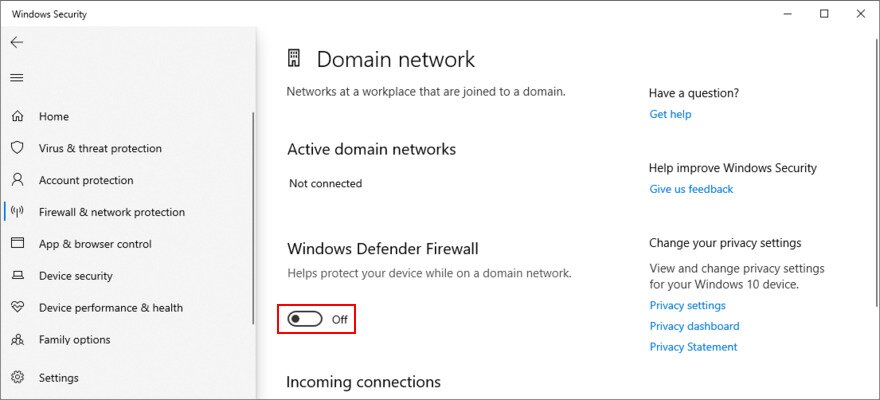
- Press the Win key, type firewall, and open Firewall & network protection.

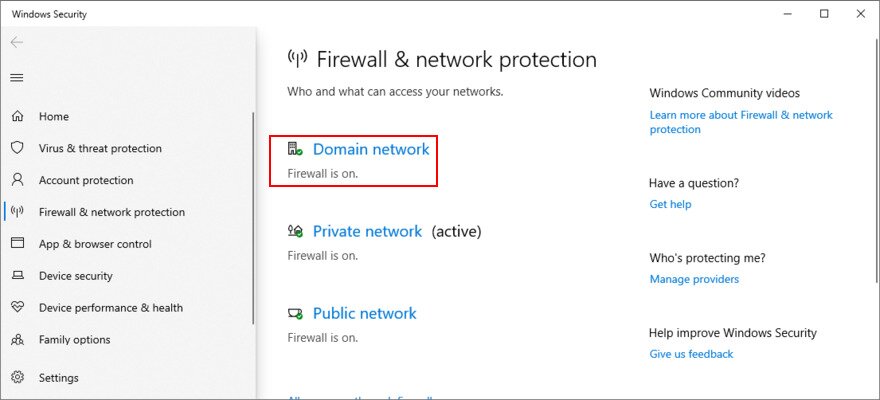
- Click Domain network.

- Turn off Windows Defender Firewall and click Yes if prompted by User Account Control (UAC).

- Try to open Steam in online mode.
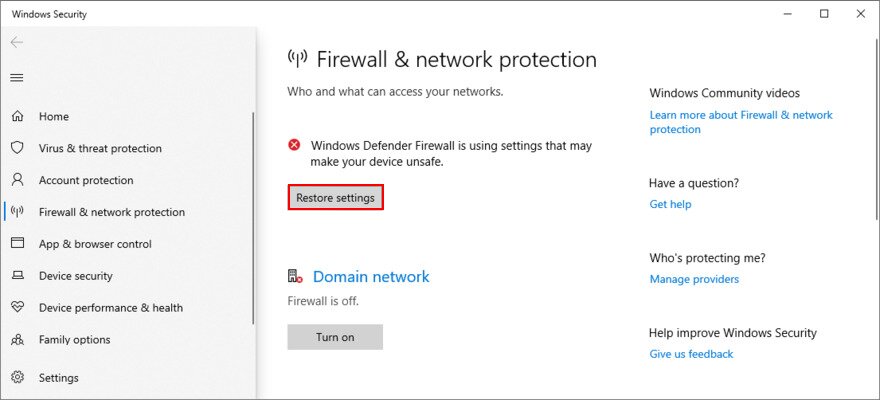
If everything is working fine now, then you know for sure that it’s the firewall’s fault. However, it’s dangerous to keep it disabled, so go back to Firewall & network protection, click Restore settings and yes, if prompted by UAC.
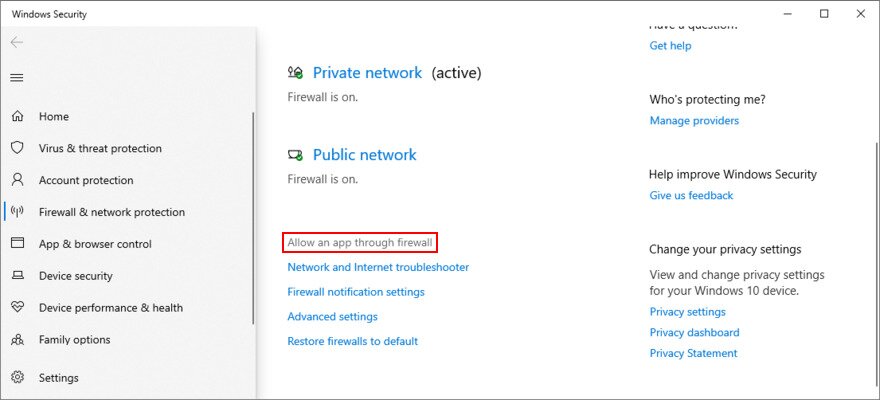
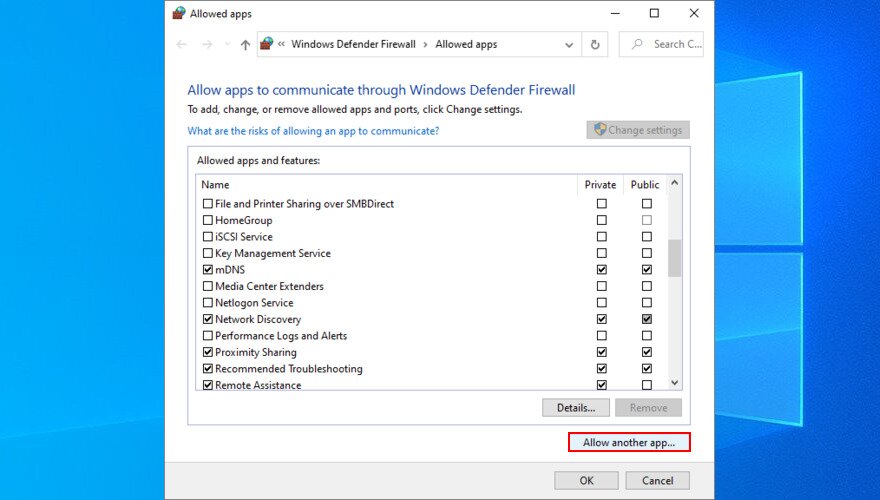
Here’s how to add an exception for Steam in your firewall:
- Go to Firewall & network protection and click Allow an app through firewall.

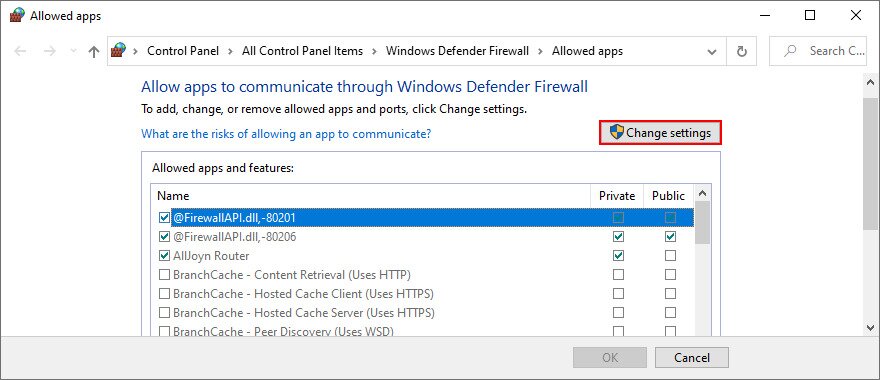
- Click Change settings (you need admin rights).

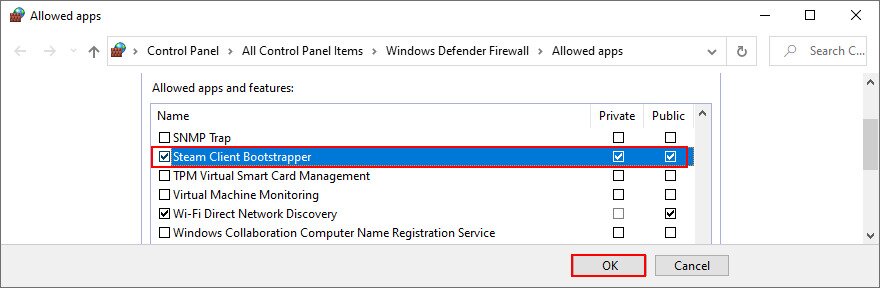
- Click Allow another app and use the file browser to locate Steam.

- Check the Private and Public boxes next to Steam, then click OK.

- Launch Steam in online mode.
11. Get the latest Windows updates
It’s critical to keep Windows updated to the latest version. Otherwise, your Steam client might not launch if your operating system is obsolete and has missing features.
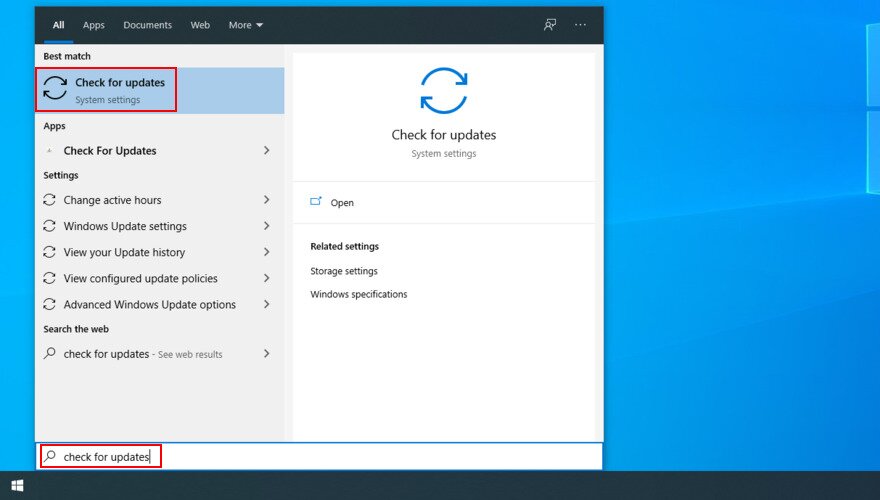
- Press the Start button, type “Check for updates”, and press Enter.

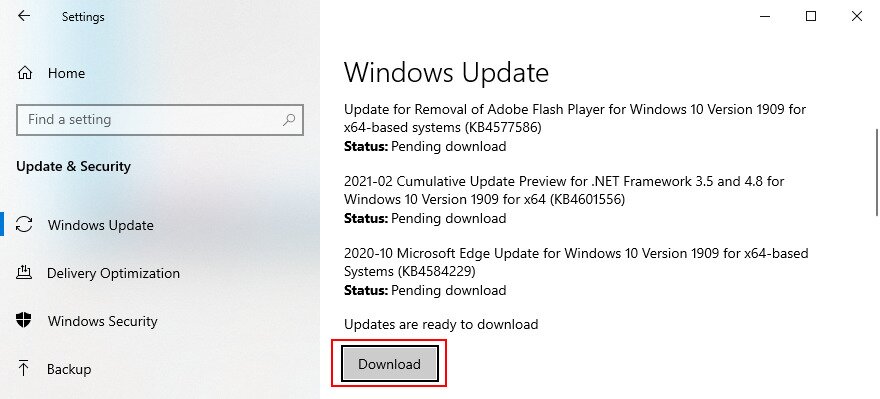
- Wait until the search is complete. If there are any pending updates, click Download.

- Once all updates have been downloaded and installed, reboot your PC and try to launch Steam.
12. Remove recent Windows updates
On the other hand, if you started having trouble with Steam after a recent Windows update, just remove it from your PC. It’s well known that some Windows updates are poorly designed and have a negative impact on your computer.
- Press Win key + R, type control panel, and press Enter.

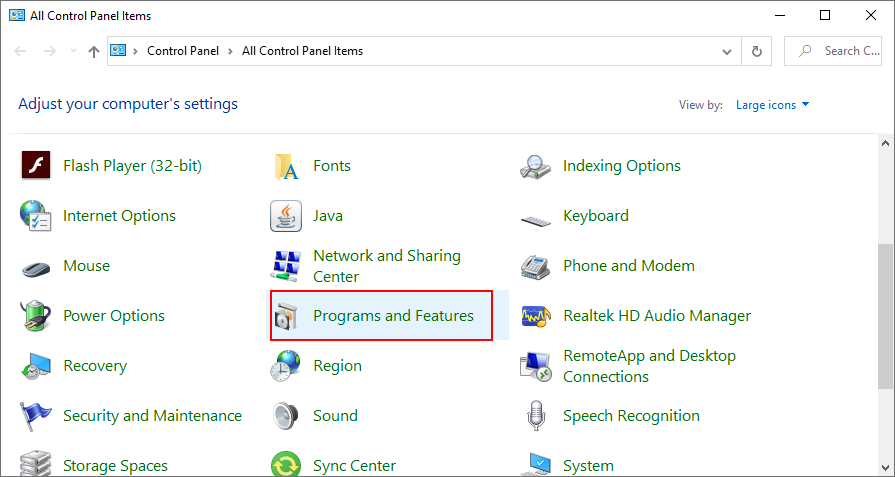
- Select Programs and Features.
![Windows 10 shows how to access Programs and Features from Control Panel]()
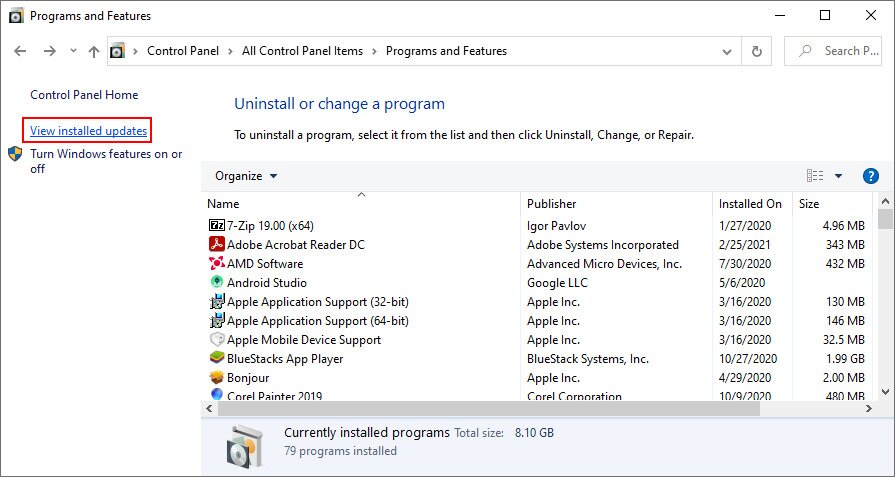
- Click View installed updates.

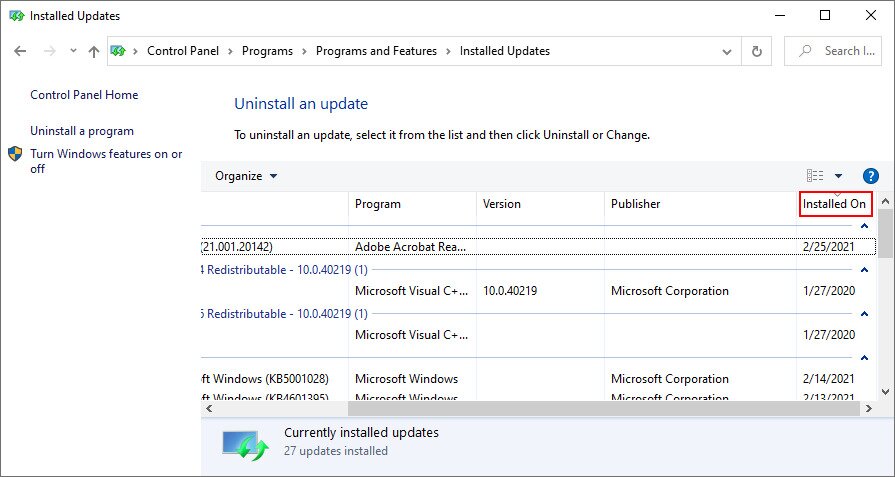
- Click the Installed On column to sort the Windows updates by time (newest first).

- Double-click the first entry in the list and proceed with its uninstall.
![Windows 10 shows how to confirm Windows updates removal]()
- Restart your computer and try to open Steam.

13. Update your device drivers
It’s an issue similar to Windows updates: if your device drivers are old and obsolete, it’s possible that Steam won’t open on your PC. Fortunately, it’s not a hardware problem, so you don’t have to spend money on new equipment.
Instead, make sure to update all your device drivers to the latest version. Pay close attention to the GPU and network drivers since, these are directly related to the Steam desktop client.
Here’s how to update your drivers manually:
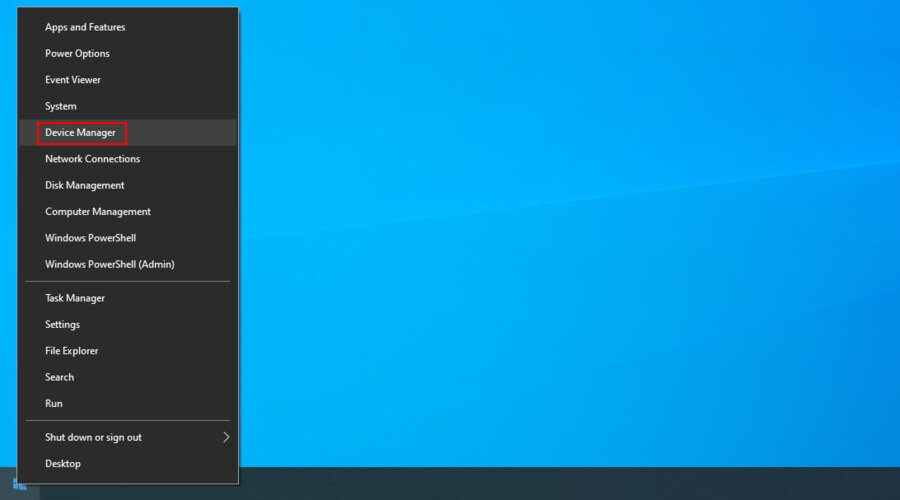
- Right-click the Windows 10 Start button and go to Device Manager.

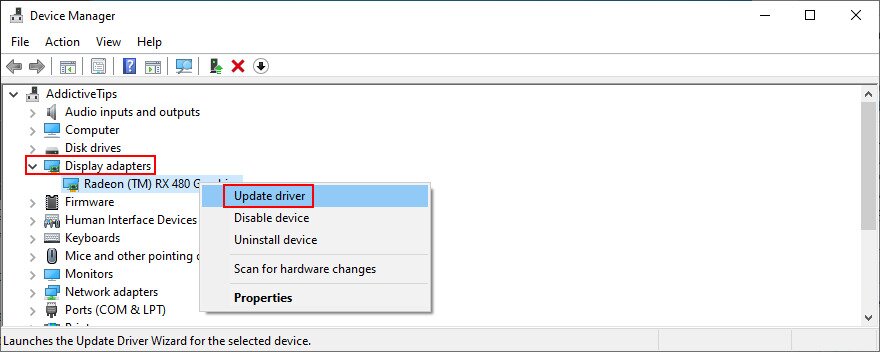
- Expand the Display adapters menu, right-click your GPU interface and select Update driver.

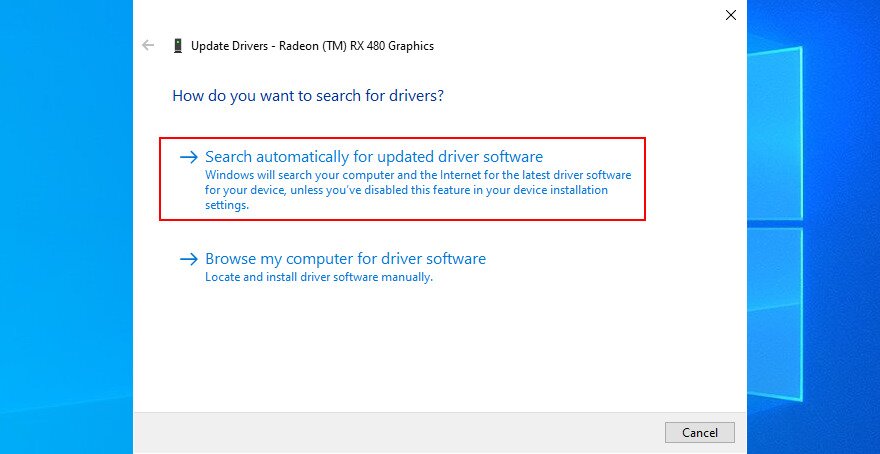
- Click Search automatically for updated driver software.

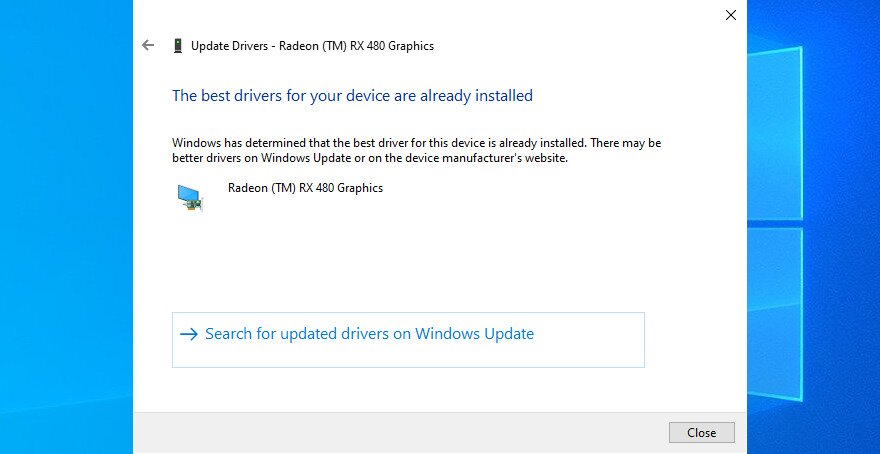
If Windows returns: The best drivers for your device are already installed message, click on Search for updated drivers on Windows Update.
However, if you already downloaded the latest Windows updates, you can skip this part. It’s possible to manually look up new driver versions on the official website, depending on your manufacturer.
It’s risky business, however, since you might accidentally install an incompatible device driver. In turn, this will likely cause Windows compatibility issues.
A safer option is to turn to a driver updating tool. It automatically detects your current and obsolete drivers, finds newer versions on the Internet, then quickly downloads and installs them. You just have to reboot your PC when it’s all over.
14. Uninstall recent software
Steam could be affected by programs you’ve recently installed on your computer. It doesn’t really matter if they’re legitimate or suspicious, since software conflicts are unpredictable and usually unavoidable.
Examples include CCleaner, Sandboxie, Process Hacker, Steam idlers, DLL injectors, free antivirus tools, some web browsers, and anything that could affect Steam and Steam game files.
Try to determine when you noticed that Steam is not opening on your computer anymore. If you’ve installed something you shouldn’t have right around that time, then you just have to remove the guilty party.
Here’s how to uninstall recent programs:
- Right-click the Windows 10 Start menu and go to Apps and Features.
