How To Trim A Video In Windows 10 Without Third-party Apps
Video editors are usually one of two things; complicated or expensive. If you’re looking to make a relatively simple edit to a video, a complicated video creating and editing app like OBS Studio is overkill. Unfortunately, free apps often come with limitations. The good news is that Microsoft is getting smarter and making its stock apps more powerful. The company hasn’t included a full video editing suite in its OS just yet but if you want to trim a video in Windows 10, you can without needing any third-party apps to do the trick.
The Photos app has been able to edit videos for a while but the controls weren’t exactly obvious and the app doesn’t integrate videos as well as it does photos. The Movies & TV app however has received an update which makes it easier to open a video for editing in the Photos app. One of the editing features in the app is a trim feature.
Movies & TV App
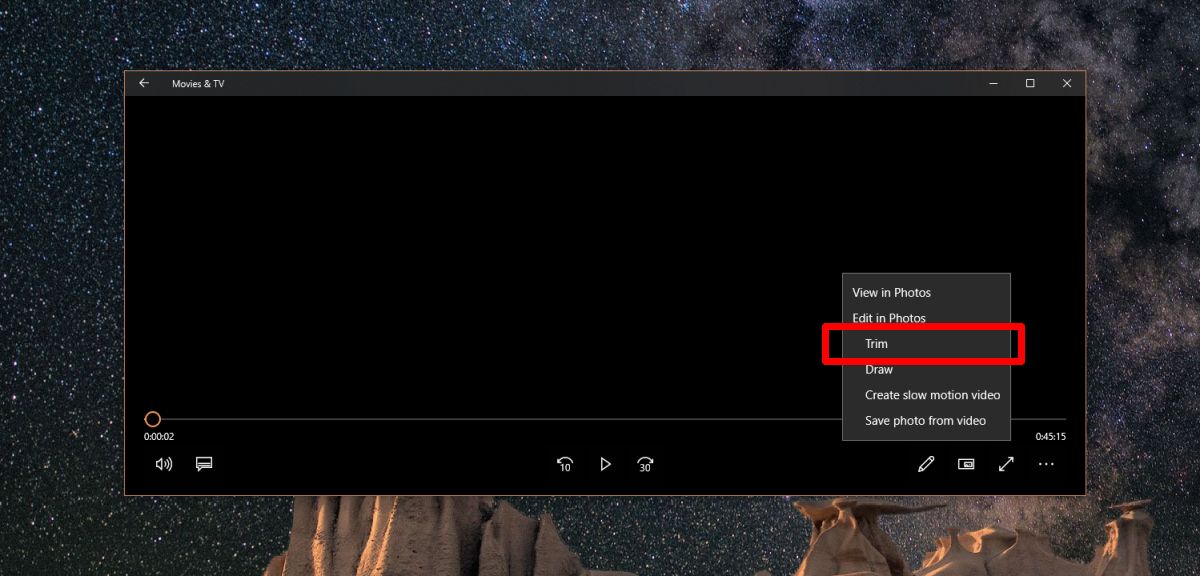
Open the video you want to trim in the Movies & TV app. You will see an edit button next to the mini view button. Click it and select the ‘Trim’ option from the menu that appears.

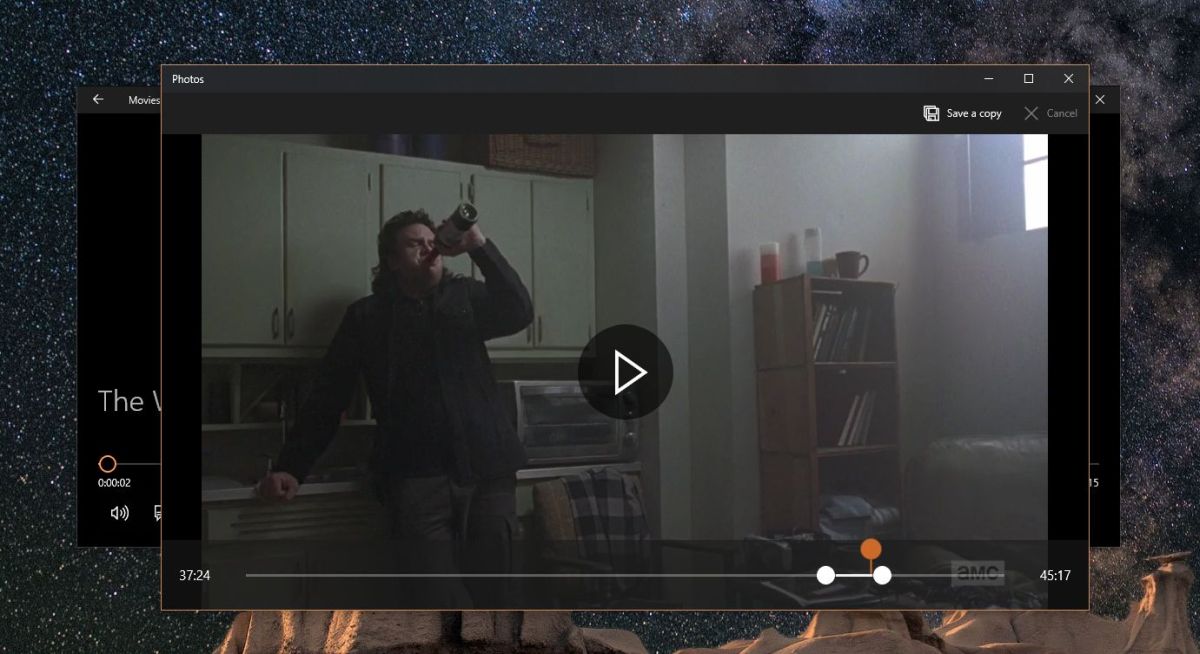
This will open the video in the Photos app. It will be paused automatically. Use the two sliders on the seek-bar to select the portion of the video you want to trim. The section between the two sliders is the part that will remain in the video that you save while everything outside it will be trimmed out. Click the ‘Save a copy’ button at the top right to save the trimmed video.

It will save the trimmed video to the same directory the original one is in for example; if a video is in your Videos folder and you trim it, the trimmed version will be saved to the Videos folder as well. It will have the same name as the original video with ‘Trim’ appended to the end.
Photos App
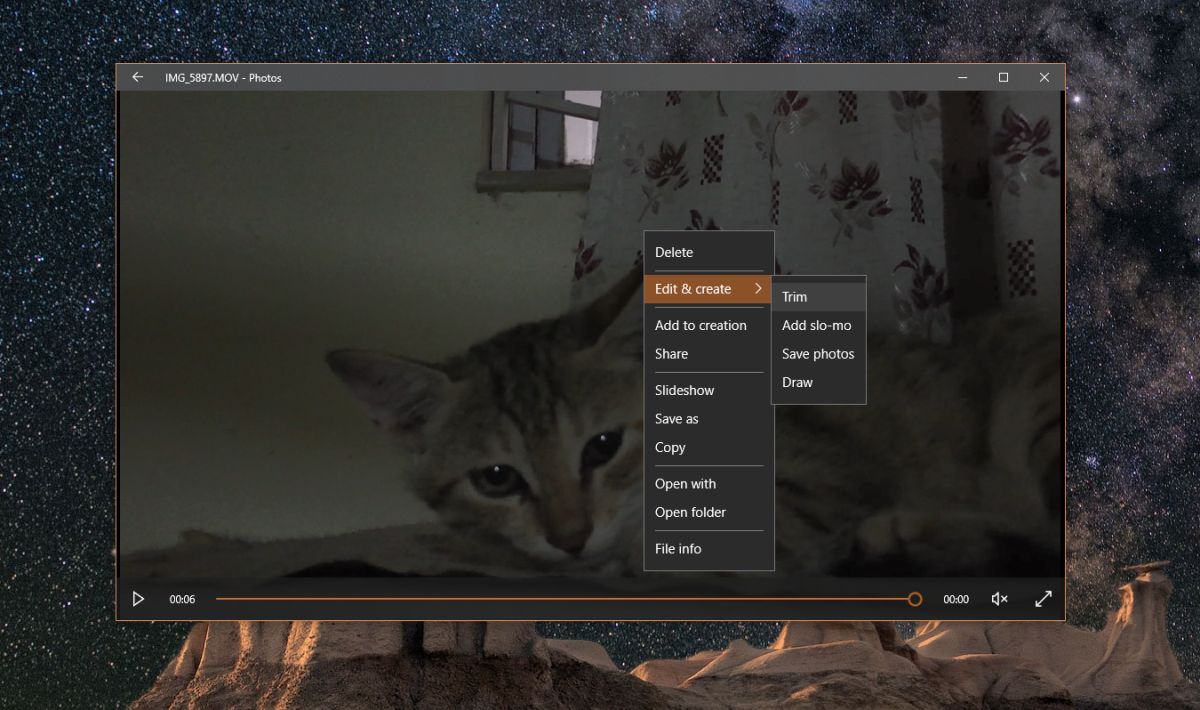
If you want to open a video in the Photos app for editing, you will first have to add the folder the video is in to the app. Open the Photos app and go to the Folders tab. Add the folder with the video in it, and then open it. Right-click the video and go to Edit & Create > Trim.

To be clear, in both cases you’re using the Photos app to trim videos in Windows 10. The only difference is how you open a video to trim it. The Movies & TV app affords you an easier method to open a video for editing. If you do so via the Photos app, you will end up adding one too many folders to it.

Mine does not seem to have this feature how do I add it?
Nice tip. Photos app is the easiest way to trim a video.