Using ExpressVPN on Linux: Quick Overview
You’ve landed on our quick-start guide to setting up ExpressVPN for Linux. We cover the basics of installation and configuration step by step, plus best practices for getting the most out of ExpressVPN on Linux. For niche versions of Linux without compatible ExpressVPN software, we’ll also show you how to use Terminal to get the same great privacy provisions.
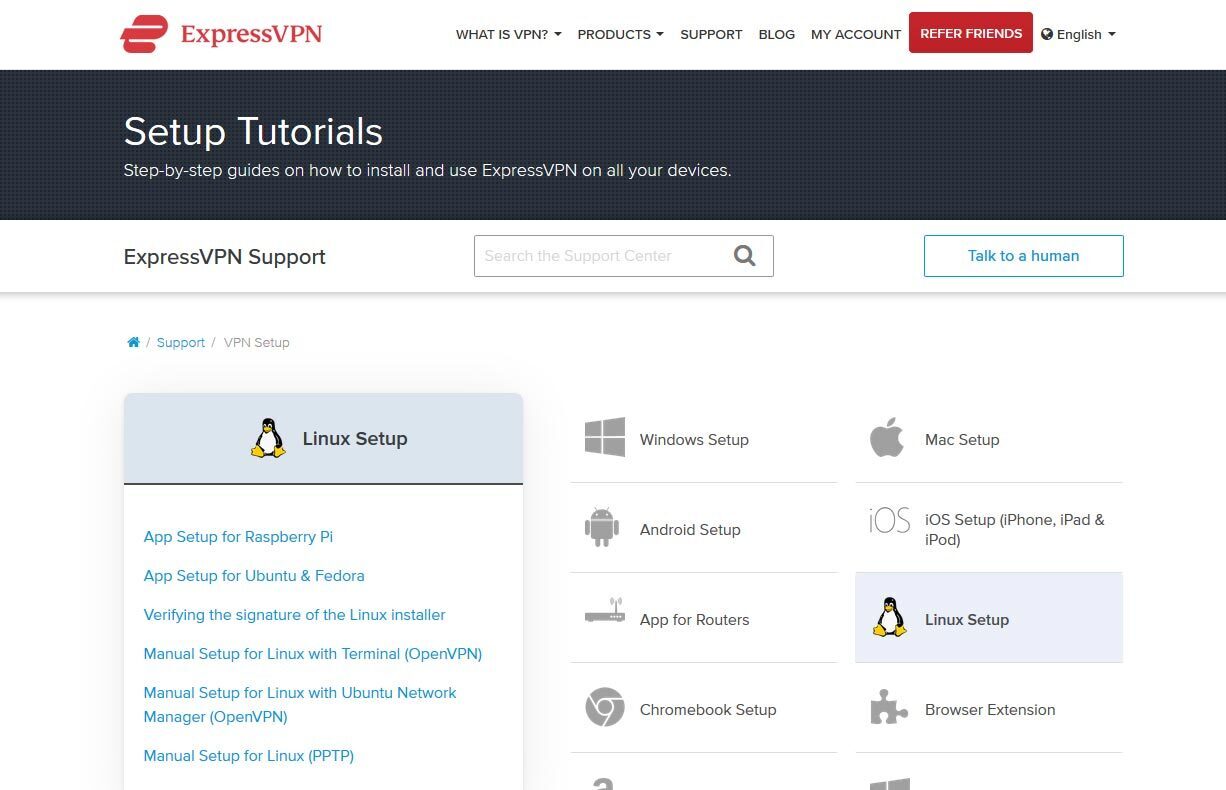
Linux is an incredible achievement of open-source software, but its users all know how much of a pain it can be to get some software working. This is because the operating system has been overlooked by many developers, who prefer to target their efforts on more widely adopted (and therefore more profitable) platforms like Windows and MacOS.
Fortunately, this isn’t the case with ExpressVPN for Linux. Unlike some VPN providers, ExpressVPN does support Linux and has an extensive section in its support pages about installing the software onto a Linux system. To help you out with this task, we’ll talk about why Linux users might need a VPN and then show you step by step instructions for how to install and use ExpressVPN for Linux.
Editor's Pick August 2026

ExpressVPN – Special Linux deal
If you’re a Linux user and you want to try out ExpressVPN for Linux, then we have a special offer on subscriptions that you will want to check out:



- SPECIAL OFFER: 3 months free (49% off – link below)
- Fast serves with minimal speed loss
- OpenVPN, IPSec & IKEv2 Encryption
- Strict no-logs policy
- Live chat support available.
- Max 3 simultaneous connections
- Slightly more expensive than some other options.
ExpressVPN is a VPN that is popular among serious internet users thanks to its combination of speed, security, and flexibility. The connections available are super fast and are perfect whether you’re browsing the web, streaming high definition video, or downloading large files. The security measures include the essential use of strong 256-bit encryption to prevent hackers from cracking your encryption, and a no logging policy so that you can be sure your privacy will be protected.
There are more security features available too like a kill switch, DNS leak protection, and an IP address checker. If you’re comparing other VPN feature sets, our GlobalProtect features review offers a useful point of reference.
The number of servers available is huge, with a network of over 3,000 servers available in 160 locations in 94 different countries. This means that you can easily get around region locks to view content from other countries, like funny videos on Comedy Central in the US, educational documentaries on BBC iPlayer in the UK, and great sports coverage from CBS in Canada.
The software from ExpressVPN for Linux isn’t the only platform supported, either: it can also be installed on Windows, Mac OS, and Android, plus some smart TVs and games consoles. And don’t forget about the browser extensions for the Google Chrome, Mozilla Firefox, and Apple Safari browsers.
Read our full ExpressVPN review.
Why Linux users benefit from a VPN
As a Linux user, you might feel pretty happy about your security situation. Linux users are far less vulnerable to viruses and malware than Windows or Mac users, thanks to both the option to improve your security options on Linux and the fact that is a lesser used platform making it less appealing to malware coders. Overall, your Linux machine is less likely to be hacked than a Windows machine or a smartphone. So you might think that you have no need for a VPN.
In fact, though, Linux users can still benefit from beefing up their security with a VPN. One big issue is online privacy; no matter how good your virus protection, if you go online then your activities can still be tracked. When you connect to your home internet network it’s shockingly easy for your ISP to see what sites you are visiting, what files you are downloading, and whether you are using P2P downloads like torrents. Linux users are just as likely to receive legal threats due to using torrents for copyrighted material as a Windows or Mac user.
So even if you think that your Linux system is safe, you still need a VPN to protect your privacy when you go online. As Linux users tend to be more tech savvy than other OS users, they generally appreciate the need for privacy protection even more than most people. That’s why VPN use is popular among Linux users too. If you’re new to using VPN on Linux, this guide will walk you through everything you need to know.
ExpressVPN for Linux: Platform Support and Features
ExpressVPN for Linux is one of the most popular VPN choices thanks to its great security and super fast connections. ExpressVPN is also known for supporting a wide range of platforms – and this includes full support for Linux. If you are unsure where to start setting up ExpressVPN on Linux, then you can find information on the ExpressVPN support pages.

There are two ways that you can install ExpressVPN on Linux. The first method is to use the Linux app, which is available from ExpressVPN and which officially supports the following distributions: Ubuntu 24.04 and above, Debian 11 and above, Fedora 30 and above, Arch (latest rolling release), Raspberry Pi OS 64-bit, and Linux Mint 20 and above. Distros outside this list are not officially supported by the app installer. The other method is to set up your VPN connection using OpenVPN, which is less convenient than using the app but has the advantage of working on almost all distros. We’ll give you full instructions for installation using both of these methods below:
ExpressVPN GUI app for Linux (current setup method)
ExpressVPN now offers a native graphical user interface (GUI) app for Linux, which means terminal-only operation is no longer the only app-based option. If you prefer clicking over typing commands, the GUI app gives you a familiar point-and-click experience for connecting to servers, switching locations, and managing settings — all without opening a terminal.
Here is how to get the GUI app up and running:
- Download the Linux installer by signing in to your ExpressVPN account and navigating to the setup page at https://www.expressvpn.com/setup. Select Linux from the device list and download the .run installer file for your distribution.
- Run the installer by opening a terminal, navigating to your download folder, and entering sudo bash expressvpn_installer.run (replace the filename with the exact file you downloaded). Follow any on-screen prompts to complete installation.
- Launch the ExpressVPN app from your application menu or by running expressvpn-gui in the terminal. The graphical interface will open.
- Sign in using your ExpressVPN credentials or your activation code from the setup page.
- Connect to a server by clicking the power button for a smart location, or use the location picker to choose a specific country or city.
GUI vs CLI — which should you choose? The GUI app is the right pick for most users who want a straightforward experience comparable to the Windows or Mac app. Choose the CLI (command-line interface) instead if you are managing a headless server, scripting automated connections, or simply prefer working in the terminal. Both options use the same underlying ExpressVPN service, so the security and speed are identical either way.
Setting up ExpressVPN for Linux using the app
The easiest way to get ExpressVPN for Linux is to use the Linux app. The command line-based app is lightweight and makes it easy to see a list of available servers and to connect to the server that you want. There are specific installers for the app available for Ubuntu, Fedora, Debian, Arch, Raspberry Pi OS 64-bit, and Linux Mint.
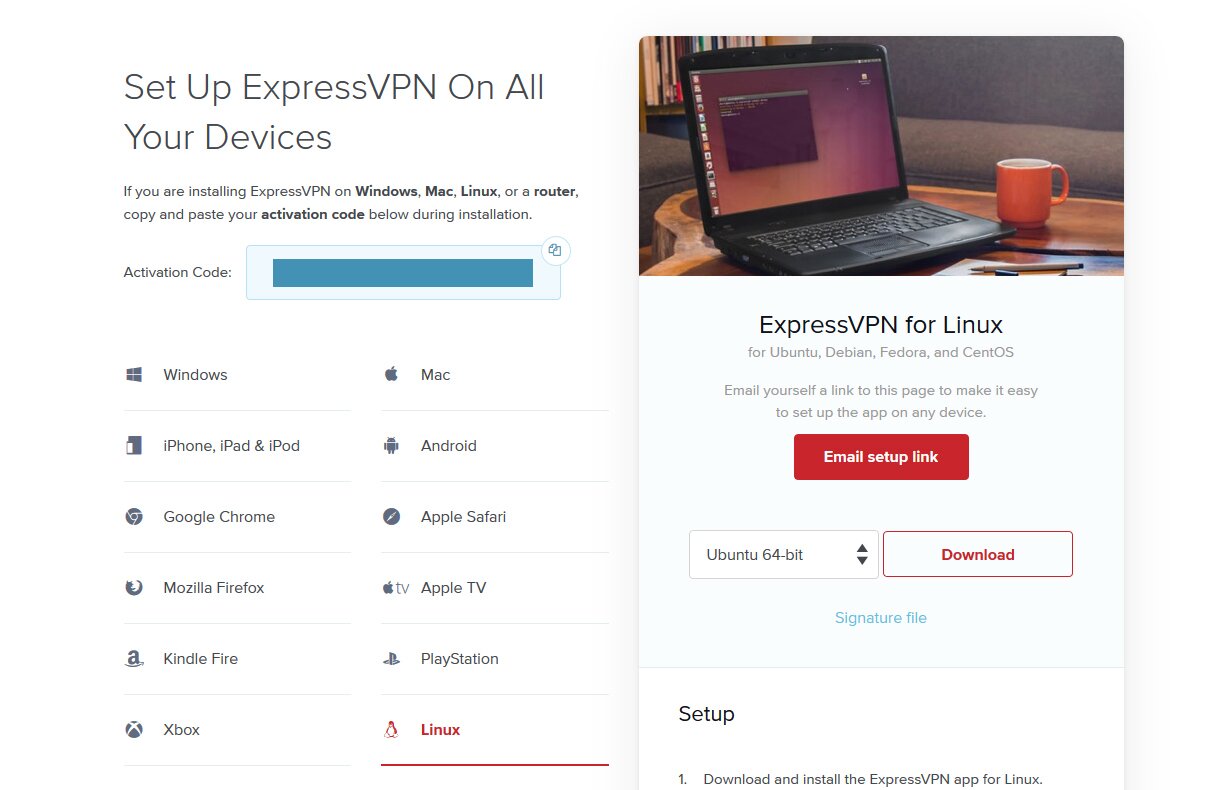
Now we’ll start with downloading the app and installing it:
- Begin by opening your web browser and navigating to https://www.expressvpn.com/users/sign_in
- Sign in with the username and password you used when you signed up for ExpressVPN
- On the My Account page, look on the Dashboard tab. If you’re on another OS, like Windows, then you’ll see a button saying Download for Windows. But we need something else, so look for a button that says Set Up on More Devices
- Now the download page will open, at https://www.expressvpn.com/setup
- On this page you’ll see your Activation Code in the blue box (it’s blanked out in our image for security reasons, but your code should be right there). Take a note of the code as you’ll need it later
- Scroll down the page until you find the Linux option in the left hand menu. Click on this
- Now you’ll see a drop down menu with the options for installing ExpressVPN for Linux. Choose the installer that matches your distribution — options include Ubuntu, Debian, Fedora, Arch, Raspberry Pi OS 64-bit, and Linux Mint
- Click the Download button to start downloading the installer file
- Now we can proceed with the command line installation for the app. Open up the terminal
- Navigate to the folder where you saved the installer file
- Once you are inside the correct folder, run the command to install the file. On Ubuntu, Mint, and Debian that’s sudo dpkg -i [installer filename] while on Fedora that’s sudo dnf install [installer filename]
- You’ll see a message in the terminal that the installer file is being unpacked and the app is being installed
- Once this is complete you need to activate the app. To do this, open up a new terminal
- Now run the following command: expressvpn activate and then paste in the activation code that you saved earlier
- You’ll see an option to share crash reports. Hit Y for yes or N for no
- Now your app is activated, your preferences are set, and you’re ready to use ExpressVPN for Linux
Using the ExpressVPN app
Now that the ExpressVPN app is installed, here’s how to use it to connect to a server:
- Go to your terminal and run the following command: expressvpn connect
- This command automatically connects you to your last previously connected server. If this is the first time you are running the command, then the app will automatically connect to a recommended server
- You will see a message confirming that ExpressVPN is connected
- You can also type expressvpn status to see information about the status of your connection
- Once you are connected you can browse the internet freely, knowing that your VPN is keeping you safe
If you want to disconnect from a server, then do as follows:
- Go to your terminal and run the command: expressvpn disconnect
- This will disconnect you from the server
- You will see a notification that the VPN has been disconnected
To connect to a different server – for example, to connect to a server in a particular country – then follow these instructions:
- Go to your terminal and run the command expressvpn list
- This will show you a list of available servers that you can connect to. A feature called smart location will select the optimal server for you, and this appears at the top of the list
- Choose the server that you want, then run one of the commands: expressvpn connect [LOCATION] or expressvpn connect [ALIAS]. For example, to connect to London you could use expressvpn connect “UK – London” or expressvpn connect uklo
- You’ll see a notification once you are connected to the new server
Finally, it can be useful to use the smart location feature. This selects a server that is nearby to you and which is fast for the best possible connection. Here’s how to use that:
- Go to your terminal and run the command: expressvpn connect smart
- This quickly connects you to a suitable server with no more input required
- You’ll see a notification that you are connected.
The ExpressVPN CLI gives you a lot more control beyond basic connect and disconnect. Here is a practical reference for the most useful everyday commands:
Check the app version and available commands
- Run expressvpn –version to confirm which version of the app is installed.
- Run expressvpn help to see a full list of available commands and options.
List all available server locations
- Run expressvpn list all to see the complete server list, including country, city, and alias for every available location.
Enable or disable auto-connect
- Run expressvpn preferences set auto_connect true to have ExpressVPN connect automatically whenever your device starts up.
- Run expressvpn preferences set auto_connect false to turn auto-connect off.
Change the VPN protocol
- Run expressvpn protocol to see which protocol is currently active and which options are available (such as Lightway UDP, Lightway TCP, OpenVPN UDP, OpenVPN TCP, and auto).
- Run expressvpn preferences set preferred_protocol [protocol] — for example, expressvpn preferences set preferred_protocol lightway_udp — to switch protocols.
Refresh the server list
- Run expressvpn refresh to pull the latest server clusters and location data from ExpressVPN. This is useful if you notice missing or outdated server entries.
Log out of the app
- Run expressvpn logout to sign out. You will need to re-activate with your activation code before connecting again.
Run diagnostics
- Run expressvpn diagnostics to generate a diagnostic report. This is the quickest way to gather information when troubleshooting a connection problem or contacting ExpressVPN support.
Manage Network Lock (kill switch)
- Network Lock is ExpressVPN’s kill switch. When enabled, it blocks all internet traffic if the VPN connection drops unexpectedly, preventing any data from leaking outside the encrypted tunnel.
- Run expressvpn preferences set network_lock on to enable it, or expressvpn preferences set network_lock off to disable it. Network Lock is on by default and we strongly recommend keeping it enabled.
Verify your connection status and public IP
- Run expressvpn status at any time to confirm whether the VPN is connected, which server you are on, and which protocol is in use.
- To verify your public IP has changed, open a browser and visit a site such as ipleak.net or use curl ifconfig.me in the terminal. The IP shown should match the location of your chosen ExpressVPN server, not your real IP address.
Advanced protection controls
- Depending on your app version, ExpressVPN may offer threat manager controls that block ads, trackers, malicious sites, and adult content at the network level. Run expressvpn preferences to see which protection options are available on your installation, and use expressvpn preferences set [option] true to enable any that apply.
For more commands to use in the ExpressVPN for Linux app, see the ExpressVPN help page here.
Setting up and using ExpressVPN for Linux using the terminal
If you don’t have a version of Linux which is compatible with the Linux app, then you can still connect to ExpressVPN using the OpenVPN protocol. It’s not quite as convenient as using the app, but this method should work on virtually any version of Linux. The OpenVPN project provides detailed documentation on how the protocol works if you want to learn more. Here’s how to use OpenVPN files to set up ExpressVPN on Linux:

- Use your web browser to navigate to https://www.expressvpn.com/users/sign_in
- Sign in with the username and password you used when you signed up for ExpressVPN
- Go to the My Account page, then look on the Dashboard tab. If you’re on another OS like Windows, you’ll see a button saying Download for Windows. But we want to go to the downloads page instead so look for a button that says Set Up on More Devices
- Clicking this will open the downloads page at https://www.expressvpn.com/setup
- On this page you’ll see your Activation Code in the blue box (it’s blanked out in our image for security reasons, but your code should be right there). Take a note of the code as you’ll need it later
- Scroll down the page until you find the Manual Config option in the left hand menu. Click on this
- Click on OpenVPN in the main section
- You’ll see a username and password (obscured here for security purposes). Take a note of this information
- Below that you’ll see options for configuration files organised by region. Select the server that you want your router to connect to. For example, we want to connect to the server in London, so we click on Europe then on UK – London
- This will start a download of a .ovpn file. Save this file somewhere convenient, like your desktop
- Now we need to install OpenVPN and configure it using the .ovpn file we just saved. The exact commands that you need to do this will differ between distros, so we’ll assume you’re working on the latest version of Ubuntu for the rest of this guide. For alternative commands for other distros, visit the ExpressVPN support page here
- To install OpenVPN, open a terminal and enter sudo apt-get install -y openvpn
- Now to configure OpenVPN we type the following command: sudo openvpn –up /etc/openvpn/update-resolv-conf –down /etc/openvpn/update-resolv-conf –script-security 2 –config
- You can now use the .ovpn file you downloaded earlier. Drag and drop the .ovpn file onto the terminal to capture the path
- With the path loaded, now you can connect to the server. Just press enter once the path is loaded and you will be connected to the server that you selected earlier. This will take just a second and you will see the line Initialization Sequence Completed once it is done
- You need to keep this terminal window open in order to keep the VPN connection active. You can minimise the terminal window, just don’t close it or you will terminate the VPN connection
One issue with this method is that it only lets you connect to one server – the server that you chose in step 9. However, you can go back and download lots of .ovpn files for all the different servers you want to be able to connect to. Keep these files somewhere safe, then you can simply drag and drop the file that you need each time to connect to that particular server.
Alternative – VPN browser extensions

ExpressVPN offers browser extensions for Google Chrome and Mozilla Firefox, and on Linux these extensions work differently from a generic browser VPN or proxy add-on. When you have the ExpressVPN app installed on your Linux machine, the browser extension acts as a controller for the app — it gives you a convenient graphical interface inside your browser to connect, disconnect, and switch server locations, while the app itself handles the actual VPN tunnel. This means the protection covers your entire device, not just traffic inside the browser, as long as the app is running.
This is an important distinction: ExpressVPN’s own Chrome and Firefox extensions are not standalone browser proxies. They require the ExpressVPN Linux app to be installed and running to function. If you use a third-party or generic browser VPN extension from another provider, that typically does only protect browser traffic. ExpressVPN’s extension, by contrast, is a remote control for full-device protection.
RELATED READING: Best VPN Browser Extensions for Firefox Reviewed

Once you’ve installed the ExpressVPN for Linux browser extension for Firefox or for Chrome, you can quickly choose a server, connect, and disconnect from your VPN from within your browser. There is also an option for the smart location feature to connect to the fastest and nearest server, or you can choose your own server by location. One feature that you’ll want to enable is the option to automatically connect to the last used server whenever you open up Firefox, so you don’t accidentally send data unencrypted before the VPN starts up.
Conclusion
Even though Linux systems are generally safer from viruses and malware than systems running Windows or MacOS, it’s still a good idea for Linux users to consider their privacy and security needs. Linux users are as vulnerable to tracking of their internet activity as everyone else if they are not using ExpressVPN for Linux or another VPN to hide their IP address and encrypt their data. You could also use a VPN to access blocked sites on Linux.
Not every VPN provider supports Linux, unfortunately, but luckily the highly regarded ExpressVPN does offer full Linux support. There are two methods available to get ExpressVPN for Linux: either through the Linux app or by using OpenVPN files. If your distro is compatible we recommend using the Linux app as this has the best features. But if you have another distro, don’t worry, as the OpenVPN option can be used to protect just about any Linux machine and keep you safe online.
If you’re a Linux user, do you have a VPN? Have you tried out ExpressVPN for Linux, and what was your experience like? Let us know about it in the comments below.
If you need a VPN for a short while when traveling for example, you can get our top ranked VPN free of charge. NordVPN includes a 30-day money-back guarantee. You will need to pay for the subscription, that’s a fact, but it allows full access for 30 days and then you cancel for a full refund. Their no-questions-asked cancellation policy lives up to its name.

