Install Leaked Android 4.1.1 Jelly Bean On Samsung Galaxy S III I9300
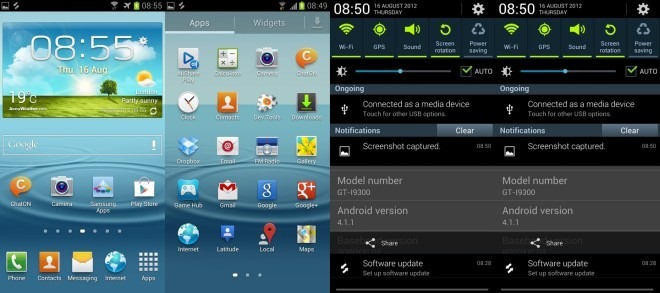
Got an international Samsung Galaxy S III (I9300)? We’ve got news beans for you, and they’re made of jelly! A leaked Android 4.1.1 Jelly Bean build has been spotted out in the wild, and we have grabbed it to bring it here for you. This ROM is reportedly a test build of Jelly Bean and the final release may have differences. Though it looks quite refined and everything seems to be working flawlessly. The build number is XDDLG4 and it is meant only for the international version of the Galaxy S III i.e. the I9300. Also, being official Samsung firmware, it sports Samsung’s TouchWiz user interface. To learn what has changed and for the download link and installation instructions, continue reading.

First of all, if you are expecting something drastically new entirely, don’t, because Jelly Bean from ICS isn’t as major a jump as ICS was from Gingerbread when it comes to the looks of the user interface. However, all the improvements made in Jelly Bean are there, including the major ones such as the new and greatly enhanced notifications, Google Now, and the performance improvements made with Project Butter, along with all the other relatively minor changes from Jelly Bean. Here’s a video of the ROM and all these features in action:
Here is a list of a few of the additional new features discovered so far:
- New Jelly Bean clock in notification bar
- Google Now accessible from Google Search widget
- New Live Wallpapers
- Dormant mode
- Take screenshots with a palm swipe on the screen.
- Reboot into a safe mode (could be only a test version option)
Note that these may not be all the new changes, but we’re sure to discover them all as we use it.
Had enough of the details and want to get Jelly Bean up and running on your SGS III? Let’s do it!
Disclaimer: Please follow this guide at your own risk. AddictiveTips will not be liable if your device gets damaged or bricked during the process.
Warning:
- This is a pre-release, test version of the Jelly Bean ROM. Installing it is not the same as installing the officially released version, and doing so will void your warranty.
- Also, the method of installing this test build involves wiping your phone’s internal data so make sure to backup everything you need to your internal or external SD card, or to your computer.
- Lastly, if you install it over a custom ROM, there is a chance that your phone will get bricked so you MUST be running an official Samsung ROM before you proceed.
Requirements:
- International / European Samsung Galaxy S III I9300 (Do NOT proceed if yours is a US carrier-specific variant, or any other version).
- Stock Samsung firmware running on your device. If you have a custom ROM running on it, restore it back to an official stock ROM first before proceeding.
- Samsung USB Drivers: Download for 32 Bit Windows | 64 Bit Windows.
- (https://forum.xda-developers.com/attachment.php?attachmentid=581913) Odin 1.85
- (https://hotfile.com/dl/167223841/a094765/I9300XXDLG4_NO_CSC_NO_MODEM.zip.html) Leaked I9300XXDLG4 Jelly Bean Firmware
Procedure:
- Download the ROM and extract the contents of the downloaded zip file to a folder on your computer.
- Extract the contents of the downloaded file for Odin on your computer as well, preferably in the same folder where you extracted the ROM.
- Install the USB drivers on your computer, if they aren’t already installed.
- Launch Odin on your computer.
- Power your phone off and then press and hold Home, Power and Volume-Down keys together. This will boot your phone into Download mode.
- Connect your phone to the PC via USB. Odin should now show a yellow sign in one of the boxes.
- Click ‘PDA’ in Odin and select the ‘CODE_I9300XXDLG4_11164_REV00_eng_mid_noship.tar.md5’ file extracted from the downloaded ROM zip file.
- Leave everything else as it is in Odin, and make absolutely sure that the re-partition check box is NOT checked.
- Click ‘Start’. Odin will now flash the ROM to your phone. Wait patiently till it’s finished. Your phone will then restart.
- Once the phone restarts, it will likely get into a boot loop. Don’t panic; we’re about to fix it.
- Pull out the battery to power the phone off, and then put it back in.
- Press and hold Home, Power and Volume-Up keys together. This will boot your phone into recovery.
- From recovery, select the option to wipe data/factory reset.
- Finally, reboot your phone and it should boot normally into Android without any boot loop this time.
There you have it. Enjoy Jelly Bean on your SGS III.
