How to Screenshot on Mac: Comprehensive Guide
Mac has multiple products available, all which use the macOS and all of which have screenshot capabilities. This means you capture the image of whatever is currently on your screen, saving it like you would any other picture. Learning how to screenshot on Mac is easy. All of our methods are very similar, though they may have slightly different purposes, such as capturing a window, the entire screen, or just part of the screen. Regardless, with just a quick keyboard shortcut, you’ll have your screenshot saved and be on your way.
Quick Summary
If you’re in a hurry and just want a rundown of the different shortcuts, here they are:
- Shift+Command+3: (Classic full screenshot)
- Shift+Command+4: (Capture part of the screen)
- Shift+Command+4, then Space Bar: (Capture a window/menu)
- Shift+Command+5: (Capture via screenshot app)
- Shift+Command+6: (Captures the Touch Bar for MacBook Pro)
Method 1: Shift+ Command+3
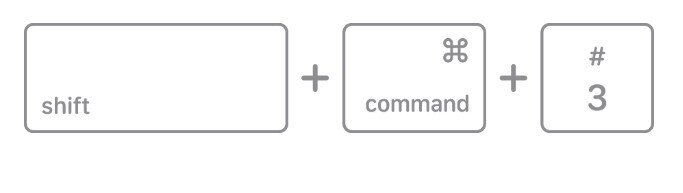
This is the most simplistic, classic method of how to screenshot on Mac. Here are the steps:
- Press and hold Shift + Command + 3
- You may see a thumbnail of the screenshot, which you can then click and edit. You can also ignore it and the screenshot will be saved to your desktop automatically
Method 2: Shift+ Command+4

If you only want a screenshot of part of your screen, here are the steps to do so:
- Press and hold Shift + Command + 4
- Drag the crosshair cursor to select the part of the screen you want to capture. If you need to reposition the selection box without resizing it, press and hold Spacebar while dragging to move it into place
- The screenshot will be taken once you release your mouse or trackpad. To cancel the screenshot, just hit the Esc key
- You can then edit the thumbnail of the screenshot or wait for it to be saved to your desktop automatically
Method 3: Shift+ Command+4+ Spacebar

If you have a specific window or menu you want to capture, here’s an easy way to do it:
- Open the menu/window you want to screenshot
- Press and hold Shift + Command + 4 and then hit the Spacebar
- This changes your pointer into a camera icon. Whatever menu or window you click on with this icon will automatically become a screenshot
- Pressing the Esc key cancels the screenshot
- If you want to avoid including the window’s shadow from the screenshot, you can push and hold the Option key as you click the window
- You’ll see a thumbnail of the finished screenshot you can edit, or you can wait for it to save automatically to your desktop
Method 4: Shift+ Command+5

For Macs that use macOS Mojave or later versions, there is the option to use the Screenshot app for more control over taking your screenshots. Here’s how:
- Press and hold Shift + Command + 5
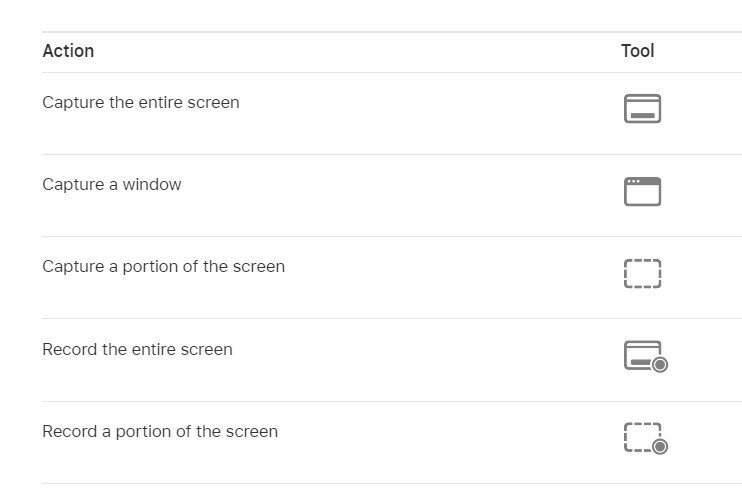
- A pop up toolbar will appear with various options for taking screenshots. Some of these include recording or capturing a screen, or taking partial screenshots or recordings, etc.
- Clicking on the icon for any of these tools helps you customize your screenshots. When you’re ready to finish, you click Capture
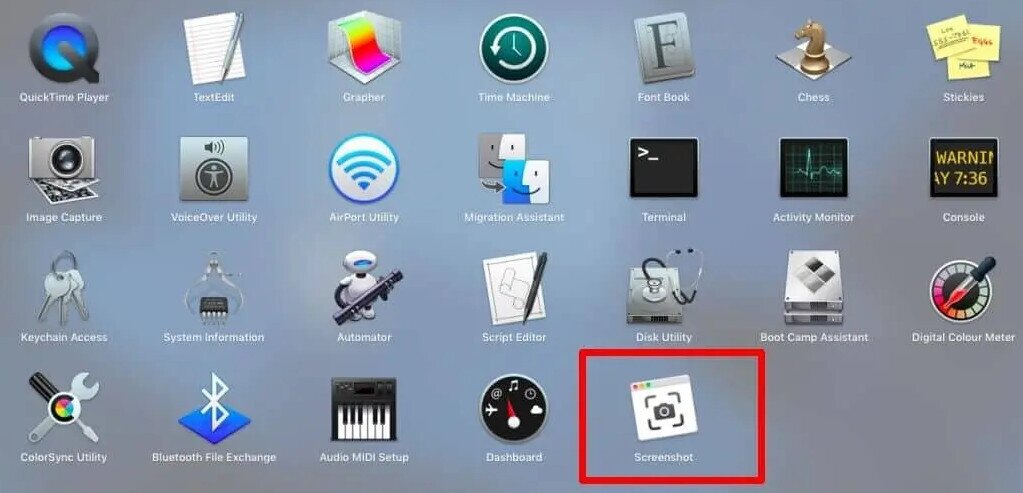
You can also open the Screenshot app directly from Applications > Utilities if you prefer not to use the keyboard shortcut.
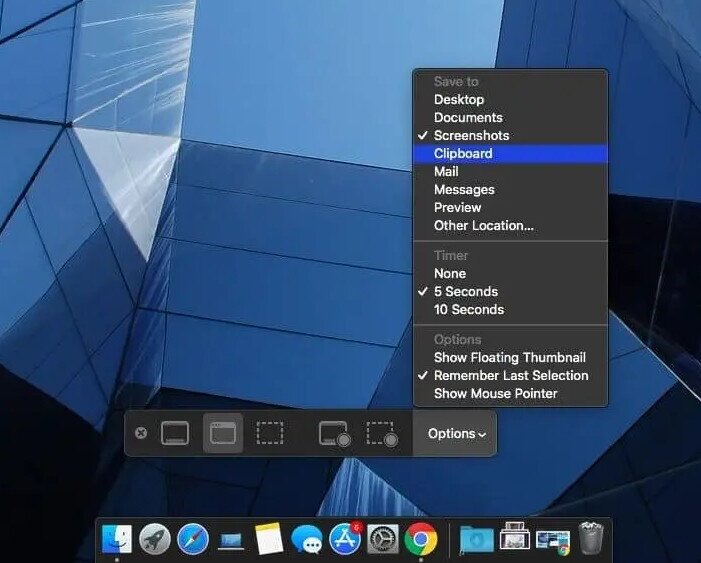
Once the toolbar is open, click the Options button to access several useful settings:
- Save to: Choose where screenshots are saved — Desktop, Documents, Clipboard, Mail, Messages, Preview, or a custom folder of your choice (options may vary slightly by macOS version)
- Timer: Set a 5-second or 10-second delay before the screenshot is taken, giving you time to set up exactly what you want to capture
- Floating Thumbnail: Turn the preview thumbnail that appears after a screenshot on or off
- Show Mouse Pointer: Choose whether the mouse cursor appears in your screenshots
The toolbar also includes screen recording tools — you can record the entire screen or just a selected portion, making it a handy all-in-one capture utility.
Method 5: Shift+Command+6

Some previous models of MacBooks had a Touch Bar at the top of the keyboard, replacing the usual Function keys found on most keyboards. You could customize the Touch Bar with frequently used features, emojis, gestures, and other personalized options. Apple has stopped making Macs with Touch Bars, however, if you have a slightly older version, you may still have it. The following shortcut will take a screenshot of the actual Touch Bar itself. Here’s how:
- Press and hold Shift + Command + 6
- This saves the currently displayed buttons shown on your Touch Bar, saving automatically to your desktop
How to Find Screenshots on MacOS
By default, screenshots are saved directly to your Desktop. The file name follows the format “Screen Shot [date] at [time]” — for example, Screen Shot 2024-09-15 at 10.30.45 AM.png. If you’ve changed the save location in the Screenshot app’s Options menu, check that chosen folder first before searching elsewhere. You can also drag the floating thumbnail that appears immediately after taking a screenshot to any folder or app before the file is saved to its default location.
Now that you know how to screenshot on Mac, here’s how to find the saved screenshots:
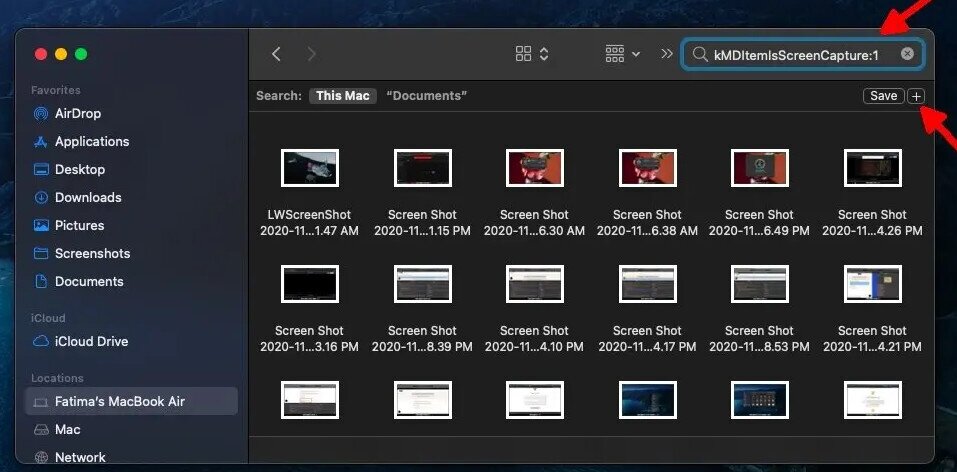
- Open Finder.
- Navigate to the folder you want to search or select your Mac from the column on the left to search the entire system.
- Click inside the Finder search bar and enter the following;
kMDItemIsScreenCapture:1
- Tap Enter and all screenshots that are present on the Mac will appear in the search results.
- You can click the plus button under the search bar to refine the results or create a smart folder out of the search.
How to Automatically Copy Screenshots on Clipboard on MacOS
In order to automatically copy screenshots to the clipboard, you need to change a small setting in the screenshot utility. To access the screenshot utility on macOS, you can either search for ‘Screenshot’ in Spotlight, or you can open Launchpad and look inside the Other folder. Launch the screenshot utility and it will add a control bar at the bottom of the screen just above the Dock.
On the control bar, click the dropdown arrow next to the ‘Options’ button and from the menu that opens, select ‘Clipboard’. That’s all you need to do. You can now exit the Screenshot utility and take screenshots like you normally do.
For a quicker, one-off method that doesn’t require changing any settings, use these keyboard shortcuts to send a screenshot directly to your clipboard:
- Control + Shift + Command + 3: Copies a full-screen screenshot straight to the clipboard
- Control + Shift + Command + 4: Lets you drag to select an area and copies it to the clipboard
Once copied, press Command + V to paste the screenshot into any document, message, or image editor. Think of the Screenshot app’s Clipboard setting as changing your default destination for all screenshots going forward, while holding Control alongside the usual shortcut is the fastest way to grab a one-time clipboard copy without touching your settings.