3 Ways To Take Screenshots On Windows Phone 7 [How To]
On your PC taking a screenshot is such a simple task that it merely requires pressing a button on your keyboard and then pasting the image in some photo editing application. Windows Phone 7 was launched with the aim of emulating the desktop version of the OS, but unfortunately some fairly common utilities got left out. Among the missing features is Print Screen. You don’t have a built-in method to capture screenshots on your WP7 device. However there are ways now which are almost as simple as the default print screen in a PC. And what’s more, they’re free! Want to know how to take screenshots in WP7? Read on.
Method 1:

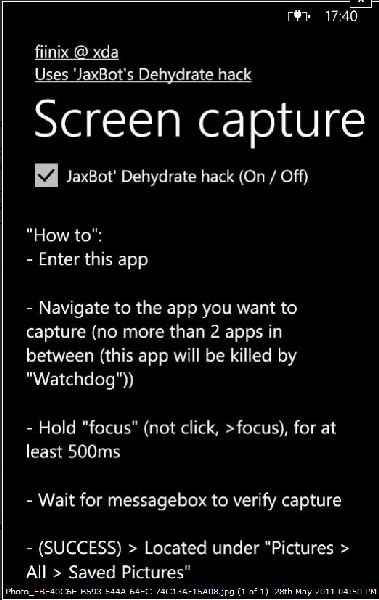
Once you have enabled that, go to the download link for Screen Capture tool developed by XDA member fiinix (using the official thread link given below). Install the app like any ordinary app. After installation, reboot your device and run the app. Go straight to the app you want to take a screenshot of, if you wander here and there between apps then you will get screenshots of some other app.
Once you have reached the correct app, press “Focus” and keep holding it until Screen Capture confirms that you have successfully taken the screenshot.
To know more about this app, follow the XDA official thread.
Method 2:
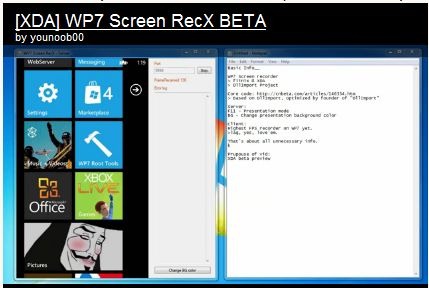
Screen Recorder is another app developed by fiinix. This goes one step further and records your actions on the phone to give a video as output. The app and support software can be downloaded from the XDA thread link given below. Simply install the app and you are ready to go. To record your activities once the app is running, select the recording option and it will keep recording until you have hit the “Stop” button. Strictly speaking, Screen Recorder isn’t providing you with screenshots, but hey, who’s complaining when you are getting the full video of your work.

Follow the official XDA thread for details.
Method 3:
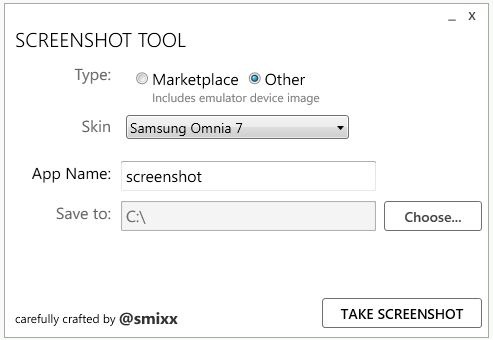
Cory Smith has developed this handy tool for capturing screens on WP7 named without much fuss simply as Screenshot Tool. When using this tool you connect your phone to your PC and then run the app. The app will ask you for the path to the destination where the screenshots will be stored. Simply tapping the “Take Screenshot” button will do the trick. This app comes with the added bonus of giving you options to use multiple skins to give a fresh look to the app each time you start working on it. The app has been tested by many testers and is declared bug-free by most.

For downloading, comments and details, visit Cory Smith’s page.
So you can choose from among any of these 3 tools depending on your needs and the availability of the tools.

I read on another blog that a simpler method works that is built-in to Windows Phone just by pressing Start and Power button at the same time, however…
On Windows Phone 8.1 when taking a screenshot with this method, a message pops up that reads: “The screenshot button combo has changed. Press and hold the Power and Volume Up buttons at the same time to capture whatever is currently on your screen.”
You can view your screenshot in the “Photos” app, just swipe over to “Albums” and tap “Screenshots”. This will allow you to share to Facebook, etc.
If you connect your phone to your PC to copy the file off your phone, your screenshot can be found under “Phone -> Pictures -> Screenshots (or “SD card -> Pictures -> Screenshots”).
**********
Alternatively, you can use the Project My Screen App for Windows Phone. On the Windows Phone, go to “Settings -> Project my screen” and choose the device you want to connect to (wireless option) or connect your Windows Phone to your PC using a USB cable. Now run the Project My Screen App on PC and take a screenshot like you would normally (i.e. press “Print Screen” on your keyboard, load the Paint program and then click Paste / Edit -> Paste / Control + V).
Why I can’t find any program on my nokia lumia 800 marketplace???
Thanks, really usefull
I suggest PonyPhoto
Editor for Windows Phone7. It has many features including a gif creator
feature. It works perfect on my HD7 device. Quite nice app. I love it very
much. haha~
But this does not have a screenshot feature?
method 3 is malware
no, its not.. i have it and there is no malware on it.
It’s not malware though it only works with the emulator aparrently, not with an unlocked device.
no, its not.. i have it and there is no malware on it.
I tried method one. Its a shame you can take pictures within a Live game.