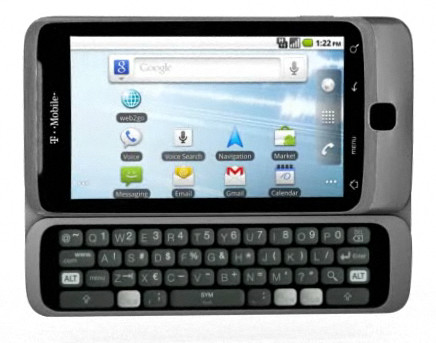
Install Modaco Custom Froyo ROM With Sense On HTC Desire Z / T-Mobile G2
The Modaco Custom ROM based on 1.34.405.5 WWE Android 2.2 Froyo ROM for HTC Desire Z / T-Mobile G2 is now available for download. The ROM is pre-rooted with SuperUser and also optimized with MCR build process. The MCR build process reaffirms the fact that you won’t have to wipe or remove anything on your phone before installing / flashing this custom ROM.

Here are the step by step instructions on installing / flashing the Modaco Custom ROM with Sense on your T-Mobile G2 / HTC Desire Z:
- The first step is to download Modaco’s Custom ROM from here and save it on your desktop.
- Once done, download ROM Manager from Market on your phone.
- Once the ROM Manager is installed, launch app and flash ClockworkMod Recovery. You can take help from this guide if needed.
- Now after flashing ClockworkMod Recovery, connect your phone to the computer.
- Once your phone is connected, mount SD card and copy the earlier downloaded ROM file to SD card root.
- After this launch ROM Manager again and tap on Reboot into Recovery.
- Once you are in recovery, scroll down to Apply Zip from SD card and select.
- Now wait for the installation to finish. The ROM size is 257 MB, so you can well imagine the time it will consume.
- Once the installation is finished, reboot your phone.
And there you go! You now have Modaco’s Custom ROM with HTC Sense running on your HTC Desire Z / T-Mobile G2. As the ROM is pre-rooted, so you won’t have to go through rooting hassle at all.
Disclaimer: AddictiveTips will not be responsible in case you brick or incur any other damage to your device following this guide.

could you please tell me where to find the factory recovery img. because i cant find it in the net and I have installed the ClockwordMod recovery. thanks for the great help
You will most likely find it by searching on XDA-Developers forum. Perhaps someone has already uploaded it there but if that isn’t the case, you can just ask on the Desire Z or T-Mobile G2 forum there if someone who still has the stock recovery installed can extract the recovery image and upload it or send it to you. I would have gladly shared one with you if I had access to a device with the stock recovery still installed.
PS: If one of your friends owns this phone and hasn’t flashed any custom recovery to it yet, you can ask them to lend you their phone for a few minutes so that you could extract it following the guide I linked in my earlier reply.
hi,
If I do that would my G2 get the official 2.3 update in the future?
Your phone will get the over-the-air official update only if it is running the official ROM and an official update is released for it. Though there are ways to revert back to the official ROM in case an official update is out and you wanna grab it. Fortunately, you can find most stock ROMs at http://shipped-roms.com/
thanks for the info.
Is there a way to backup my Rom instead of searching the net. correct me if i’m wrong, I can do the nand backup through the Amon RA’s Recovery and then I can restore my G2 to factory and then unroot the G2 with Visionary. then I will be able to get the official update, right!. One more thing, regarding the recovery mode how can I restore the factory recovery mode after installing the Amon RA’s Recovery. thanks and sorry for asking so many question.
Correct on recovering the nand backup bit. Though to restore the factory recovery, you will have to look for the stock recovery image to flash, unless you backed it up usingusing RomDump or ADB etc (see https://www.addictivetips.com/mobile/how-to-backup-your-android-phones-boot-recovery-and-system-partition-images/ ) before you installed your custom recovery. The restore process is simple if you have the recovery image backed up…you have to put the phone in fastboot mode, connect it to the PC via USB, launch a command prompt or terminal window and enter ‘fastboot flash recovery /path/to/recovery.img’ (replacing /path/to by the actual path where recovery.img is located) followed by ‘fastboot reboot’. You must have fastboot installed, which you get with the Android SDK if you have used it to install ADB.