How to Install a VPN on Raspberry Pi – OpenVPN Setup with NordVPN
We love getting the most out of Raspberry Pi, and today we’re sharing tips on how to get a proper raspberry pi vpn setup configured on your device without hassle. It’s actually quite a user-friendly process, and takes only a few minutes without the need for advanced technical knowledge. Read on to get NordVPN installed on your Raspberry Pi.
In this age of online surveillance and cybercrime, taking steps to protect your privacy and security online has never been more important. And with more and more devices connecting to the internet and being of interest to both surveillance officers and hackers, using a VPN to secure your internet connection and protect the activity of all your connected appliances is becoming increasingly standard practice.
Teaching the next generation of internet users and developers about the importance of online privacy and security, and how a VPN can help in that, is therefore absolutely essential. And this is why the installation of a VPN on a Raspberry Pi devices is a core skill and something every Raspberry Pi user should be learning.
But before we get into the details of how to install a VPN on Raspberry Pi devices, let’s cover off a few basic points to make sure everyone is up to speed. Although small in size, the Raspberry Pi can be quite a powerful device. In this tutorial, we’ll teach you how to make sure you keep things private by installing a VPN on your Raspberry Pi machine. We’ll use NordVPN.
Editor's Pick July 2026
Raspberry Pi VPN client vs VPN server: which setup do you actually need?
Before you open a terminal, it is worth pausing on something that trips up a lot of beginners: the phrase “Raspberry Pi VPN setup” actually describes two completely different things, and following the wrong tutorial will leave you frustrated.
VPN client setup (using a commercial VPN on the Pi)
This is what the NordVPN walkthrough below covers. You install a commercial VPN provider’s software or configuration files on the Pi itself, and all outbound traffic from that device is encrypted and routed through the provider’s servers. This is the right path if your goal is privacy while browsing on the Pi, bypassing geo-restrictions on streaming content, or simply keeping your Pi’s internet activity away from your ISP’s view.
VPN server setup (turning the Pi into your own VPN server)
This is what the PiVPN section further down covers. Here, the Pi sits on your home network and acts as a VPN endpoint. You connect to it remotely — from a coffee shop, a hotel, or anywhere else — and your traffic is tunnelled back into your home network as if you were sitting at home. This is the right path if your goal is any of the following:
- Accessing a home NAS, Plex server, or network-attached storage while travelling
- SSH-ing into home machines securely without exposing ports directly to the internet
- Controlling Home Assistant or smart home devices remotely
- Viewing home security cameras without a cloud subscription
- Avoiding the risks of unsecured public Wi-Fi by routing through your own trusted connection
One important clarification: a self-hosted Pi VPN server does not replace a commercial VPN service for hiding your home traffic from your ISP or for changing your apparent exit location to another country. When you connect back to your Pi at home, your traffic exits through your home internet connection — the same ISP, the same IP address. For global IP switching and ISP-level privacy, a commercial provider like NordVPN is still what you need.
Getting Started with Raspberry Pi VPN Setup
Like any other device, it is a good idea to use a VPN when connecting to the internet using your Raspberry Pi computer. But whereas most computers will allow users to download a VPN from a ready-to-use VPN provider, the nature of a Raspberry Pi means it is not quite so simple on this device.

Many of the big-name VPN providers, such as NordVPN, PureVPN, and Private Internet Access can be installed onto Raspberry Pi computers, but a basic degree of coding knowledge is needed to do it. If you are using a Raspberry Pi device, this is a skill you are likely to either have, or be learning, so that shouldn’t be too much of a problem.
The basic premise of installing each of these VPNs is broadly the same, but it is, of course, advisable to inquire with customer support about the specific recommendations of each VPN provider.
NordVPN – A solid choice for Raspberry Pi VPN Setup

- Very affordable plans
- GooglePlay users rating: 4.3/5.0
- No IP/DNS leaks found
- No logs and encrypted connections for total privacy
- Great customer service via chat.
- Not much
- Can’t specify City or Province in App
In this article, I am going to outline the process recommended by NordVPN using the OpenVPN protocol.
I have chosen this process for three reasons:
1. Firstly, NordVPN is one of the best VPN providers on the market today and Raspberry Pi users will not go far wrong if they choose them as their provider.
2. Secondly, the process recommended by NordVPN for installing and using their service on a Raspberry Pi is one of the simplest ones around and mirrors the process others use as well.
3. Thirdly, whilst it is possible to install VPNs on Raspberry Pi devices using different VPN protocols, OpenVPN is a secure and robust VPN protocol, and the one best suited for devices such as the Raspberry Pi.
How to Complete Your Raspberry Pi VPN Setup
Prerequisites checklist before you begin
Jumping straight into terminal commands is the fastest way to end up with a broken install. Run through this checklist first and you will save yourself considerable troubleshooting later:
- Hardware: A Raspberry Pi 4 or Pi 5 is strongly recommended. Earlier models work but are noticeably slower under VPN encryption. A wired Ethernet connection is preferred over Wi-Fi for stability and throughput.
- Operating system: Use a current 64-bit Raspberry Pi OS Lite build, or another supported Debian/Ubuntu-based OS. Keep it updated before you start.
- SSH access: If you are running the Pi headless (without a monitor), enable SSH before first boot by placing an empty file named ssh on the boot partition of your SD card, or by using the Raspberry Pi Imager’s advanced options.
- Static local IP: Assign the Pi a fixed local IP address either through your router’s DHCP reservation feature (preferred) or by configuring a static IP on the Pi itself. This prevents the Pi’s address from changing and breaking your VPN configuration.
- Dynamic DNS (for server setups): If your home internet connection uses a changing public IP address — which most residential connections do — you will need a Dynamic DNS service such as DuckDNS or No-IP so that remote clients can always find your Pi.
- Port forwarding (for server setups): Log into your router and forward the correct port to your Pi’s local IP address — port 51820 for WireGuard or port 1194 for OpenVPN. Without this step, incoming VPN connections will be blocked at your router.
To install NordVPN onto your Raspberry Pi you will simply need to follow these steps
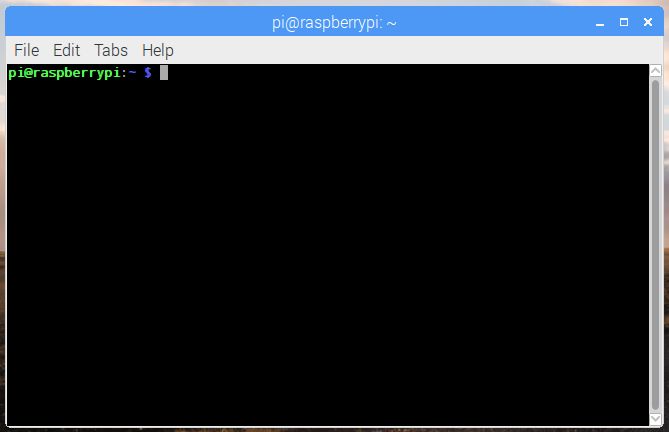
- Switch on your Raspberry Pi terminal.
- Type in sudo apt-get update to get the latest update to your Raspberry Pi package list.
- Type in sudo apt-get install openvpn. This should install OpenVPN onto the device.
- Once OpenVPN has been installed, you need to navigate to OpenVPN directory. You can do this by typing in: cd /etc/openvpn/
- You will then need to download the NordVPN .ovpn configuration files. You can do this by typing in: sudo wget https://nordvpn.com/api/files/zip
- Once those have downloaded, you will need to unzip the zip file. You can do this by typing in: sudo unzip zip
- Once the file is unzipped, you need to connect to the NordVPN service. To do this you need to type in sudo openvpn file_name (the example given by NordVPN is: sudo openvpn de75.nordvpn.com.udp1194.ovpn)
- Once connected, OpenVPN will ask for your NordVPN account details. If you haven’t already, you will now need to sign up with NordVPN on their website. Once you have done this, enter your NordVPN username and password.
- Once that is done, you will be connected to the NordVPN server and all of your online activity will be both secure and private.
- If you want to disconnect from the NordVPN server, you can just press Ctrl+C on the keyboard. But if you want to disconnect while using a different terminal window, you will need to enter the command sudo killall openvpn
Verifying your connection and troubleshooting basics
Once your VPN tunnel is up, the best way to confirm it is working is to test from a device that is genuinely off your home network — use your phone on mobile data, not your home Wi-Fi. Visit a site such as ipleak.net or whatismyip.com and confirm the IP address shown matches your VPN server rather than your home connection.
If the tunnel fails after a network change, these are the first things to check: verify that your Pi’s local IP address has not changed (this is why the static IP step above matters), confirm that your router’s port forwarding rule still points to the correct local address, and check whether your home public IP has changed — if so, your Dynamic DNS record may need a moment to update. On the Pi itself, sudo systemctl status openvpn will show you whether the service is running and display the most recent log lines.
For those familiar with the workings of a Raspberry Pi, this raspberry pi vpn setup process should be a pretty straightforward one. Even those who are coming at this for the first time shouldn’t encounter too many problems.
Read our full NordVPN review.
How to set up a Raspberry Pi VPN server with PiVPN
If your goal is to connect back into your home network from anywhere in the world — rather than simply protect the Pi’s own browsing — then PiVPN is the tool the community has rallied around. It wraps the entire WireGuard or OpenVPN server configuration into a single guided installer, handling the cryptographic setup that would otherwise take hours to do manually.
Before you run the installer, make sure you have worked through the prerequisites checklist above: static local IP, port forwarding on your router, and a Dynamic DNS hostname if your home IP changes.
Installation steps
- Start with a Raspberry Pi 4 or Pi 5 running a fresh 64-bit Raspberry Pi OS Lite, or another supported Debian/Ubuntu-based OS. A Pi 3 will also work for light usage.
- Open a terminal or SSH into your Pi, then update the system: sudo apt update && sudo apt upgrade -y
- Run the PiVPN installer: curl -L https://install.pivpn.io | bash
- The guided installer will walk you through each step. When asked to choose a protocol, select WireGuard for most new setups — it is lighter on the Pi’s CPU and typically faster. Choose OpenVPN if you need broader compatibility with older client devices or if your employer or school network blocks WireGuard’s UDP traffic.
- Confirm your Pi’s static local IP address or DHCP reservation when the installer prompts you.
- Choose the VPN port: 51820 is the default for WireGuard; 1194 is the default for OpenVPN. Make sure this matches the port you opened in your router’s port forwarding settings.
- Select a DNS provider for VPN clients to use. Cloudflare (1.1.1.1) and Google (8.8.8.8) are reliable public options; you can also point to a local Pi-hole if you have one running.
- Reboot the Pi if the installer prompts you to do so.
- Create your first client profile: pivpn add. Give it a descriptive name (for example, my-phone or laptop-travel). PiVPN will generate a configuration file and a QR code.
- On your phone, open the WireGuard or OpenVPN app and scan the QR code, or transfer the generated .conf file to your laptop and import it. You are now ready to connect remotely.
Useful PiVPN management commands
Once your server is running, these are the commands you will reach for most often:
- pivpn -c — shows currently connected clients and their real-time data usage
- pivpn -l — lists all client profiles that have been created
- pivpn revoke [client-name] — immediately revokes access for a specific client, useful if a device is lost or stolen
What is a VPN?
VPN is an acronym which stands for Virtual Private Network. A VPN is an increasingly common and popular piece of software which helps users to protect their online data from unwanted snooping and the threat of hackers, and also render themselves anonymous whilst online.
When connecting to the internet through a VPN, all of your online traffic is diverted down a secure tunnel to an external server. This tunnel encrypts all of your data meaning that everything you do online is encoded and hidden from prying eyes.
This data passes through the VPN’s server before it reaches the online site or service you are connecting to. In passing through this server, the data is tagged with the IP address of that server rather than yours as a user. An IP Address is the piece of data which is used to link individual users with their online activity.
If your data passes through a VPN server, this means that the sites you visit cannot trace your online activity back to you directly, but only to the server you are using. Likewise, your ISP can see that you are connecting to the VPN server, but cannot see where your data is going from there.
In this way, VPN users are rendered anonymous online. This can help with simple things like getting around online censorship or geo-blocked content, but also stops ISPs being able to track and sell your online activity, and the sites you visit from using your online activity for advertising or data-selling purposes.
In an age of growing government surveillance and persistent attacks on online privacy, VPNs are growing in popularity.
A VPN can be downloaded and used on an individual device, such as a computer, smartphone, or tablet. But it can also be used with a router. If you are using a VPN-enabled router, this means that any device that attaches to that router’s Wi-Fi signal is protected by the VPN.
This is especially helpful in this age of the Internet of Things as many connected appliances are not equipped with, or indeed capable of supporting, a VPN connection on their own.
What is a Raspberry Pi
The Raspberry Pi is a wonder creation from the UK which is intended to help with the teaching of computer science in schools and colleges, as well as in the developing world.
It is essentially a single board computer which features a Broadcom system on a chip (SoC), including an ARM-compatible central processing unit (CPU) and an on-chip graphics processing unit (GPU, a VideoCore IV).
The operating systems and computer memory are stored on an SD or micro-SD card, and most devices are equipped with USB slots, HDMI connectors and video and audio output sockets. But additional hardware, such as a keyboard, mouse, or case, has to be purchased either separately, or as part of an official or unofficial bundle.
They are developed and manufactured by the Raspberry Pi Foundation and have enjoyed huge success. They were initially intended for markets in developing countries, but have proved popular all over the world. In November 2016, the Raspberry Pi Foundation claimed to have sold more than 11 million units making it the biggest selling UK-made computer (Update March 1st, 2019: They now celebrate the 25 millionth sale)
With prices starting from just £32.99 (around $43) for the latest model, the Raspberry Pi 3 Model B SBC, and a basic Raspberry Pi Zero development board available for just $5, and the desire and need for computing skills ever increasing, it is little wonder they have proved so popular. That affordability is one reason why a proper raspberry pi vpn setup is so valuable — it lets you secure an inexpensive device without spending extra on dedicated hardware.
Concluding thoughts
If you are an enthusiast for the Raspberry Pi, the likelihood is that you can already boast a degree of knowledge and understanding about computing and therefore appreciate the importance of online security and privacy.
Using a VPN whilst connecting to the internet is every bit as important when using a Raspberry Pi as it is with other such devices. It should be a default reaction to ensure that your online data remains both secure and private. A well-configured raspberry pi vpn setup gives you the same level of protection you would expect from any desktop or laptop machine.
For most new Raspberry Pi VPN server setups, WireGuard is now the better default choice. It is considerably lighter on the Pi’s CPU, which matters on low-power hardware, and typically delivers faster throughput. OpenVPN remains a strong and valid option where broad compatibility is a priority — for example, when connecting from a network that only permits certain traffic types, or when a commercial provider supplies only OpenVPN configuration files. The NordVPN client walkthrough in this guide uses OpenVPN specifically because it matches that provider’s configuration file workflow, not because OpenVPN is universally the best protocol today.
But whichever VPN provider you opt for, and whichever protocol you choose, using a VPN with your Raspberry Pi is, in this day and age, an absolute necessity. Whether you are a seasoned developer or a first-time user, completing a raspberry pi vpn setup is one of the most impactful steps you can take to protect your online activity.
If you need a VPN for a short while when traveling for example, you can get our top ranked VPN free of charge. NordVPN includes a 30-day money-back guarantee. You will need to pay for the subscription, that’s a fact, but it allows full access for 30 days and then you cancel for a full refund. Their no-questions-asked cancellation policy lives up to its name.
