Auto-Organize Files Into Custom Folders Based On Extensions
Keeping our files organized goes a long way; with all our related files neatly organized together, it’s easy to find our required files when we need them. With huge hard disks and broadband access becoming common, many of us don’t care about keeping everything organized anymore, and just keep on piling all our downloads in the default download folder. Later, the thought of going through such a huge pile often makes us shy away from the task. As a result, whenever you need a previously downloaded file, you have to do a manual search. One way to avoid all this mess is to transfer the files to different folders based on file types, as soon as they are downloaded. Desktop Intray lets you automate this process by organizing your files for you into folders of your choice, according to their types.
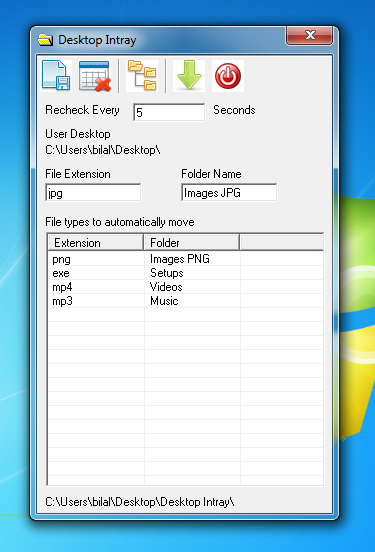
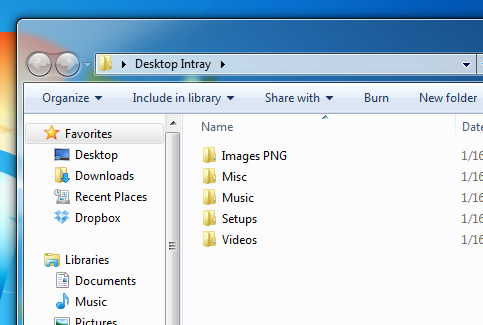
It might appear a little difficult to understand at first but once you get the hang of it, using Desktop Intray will be as simple as it gets. The app basically works by monitoring a folder for content, and automatically moving it to folders based on their extensions according to rules set by the user. It is a portable app and requires no installation. Note that the app will create its Settings.ini file at the same location you run it from, so make sure to transfer the tool to a folder of your choice before running it. When you first run the app, a folder called ‘Desktop Intray’ will be added to your desktop. We’ll come to that later but first, you need to configure the app. To do this, right-click its system tray icon and select Settings.

Here, you can specify an automatic recheck time and associate an extension with a folder name. Just enter the extension and folder name in their corresponding fields to create a rule. For instance if you want all files with mp3 as their extension to be organized in a folder called Music, simply add ‘mp3’ as extension and ‘Music’ as folder for that pair. Once done, click the first button in the toolbar (from the left) to save your settings, and the extension-folder pair will be added to the list area in the bottom part. You can similarly create as many extension-folder pairs as you want.
With the extension pairs configured, you’re good to go. Now each file that you drop into the Desktop Intray folder will be sent to its specified folder based on its extension. The app will automatically keep on doing this after the interval specified by you. To keep things even more clutter-free, files with extensions that you haven’t set rules for will be automatically placed in a folder named Misc.

It’ll be a great idea to set the Desktop Intray folder as your default download folder so that each downloaded file gets automatically sent to its specified folder. This handy little app works on both 32-bit and 64-bit versions of Windows XP, Windows Vista, Windows 7 and Windows 8.

domain expired. have a mirror??
error 75
path/file access error
Error 339
Error 339
registration required for download link…;(