Critical Process Died (Windows 10) Stop Code – FIXED
BSOD error messages are seemingly random and affect all Windows users every now and then. Critical Process Died is one of the given stop codes, which prevents the operating system from running properly due to error code 0x000000EF.
Unfortunately, it happens because an essential process that was supposed to be running in the background suddenly stopped, resulting in the Blue Screen of Death. Perhaps it was stopped by another process, or maybe it became corrupt if your computer crashed or ran out of power.

Critical Process Died: Fixes
Whatever the case may be, you should be able to troubleshoot the error and get Windows 10 to run normally again, without having to reinstall everything.
1. Run CHKDSK
CHKDSK is a special tool that checks your disks for errors and fixes any issues it finds, such as corrupt disk problems. You can use it to verify the integrity of the partition that includes your operating system (it’s usually C:).
To run CHKDSK from the graphical interface:
- Close any running applications
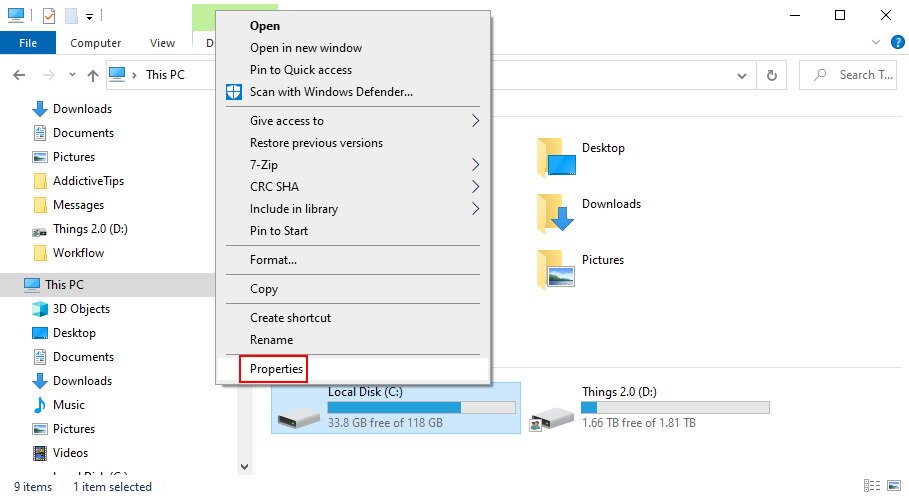
- Use your file explorer to right-click your drive and select Properties

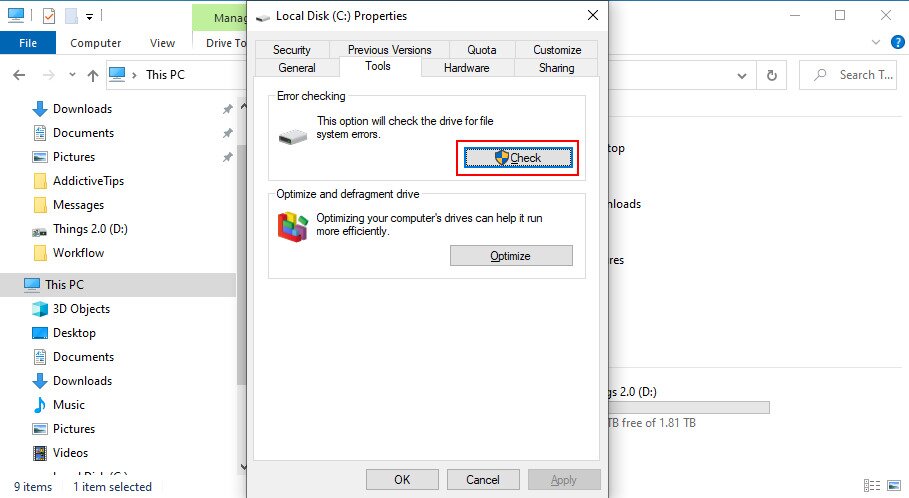
- Select the Tools tab and click Check under Error checking (you need administrator rights)

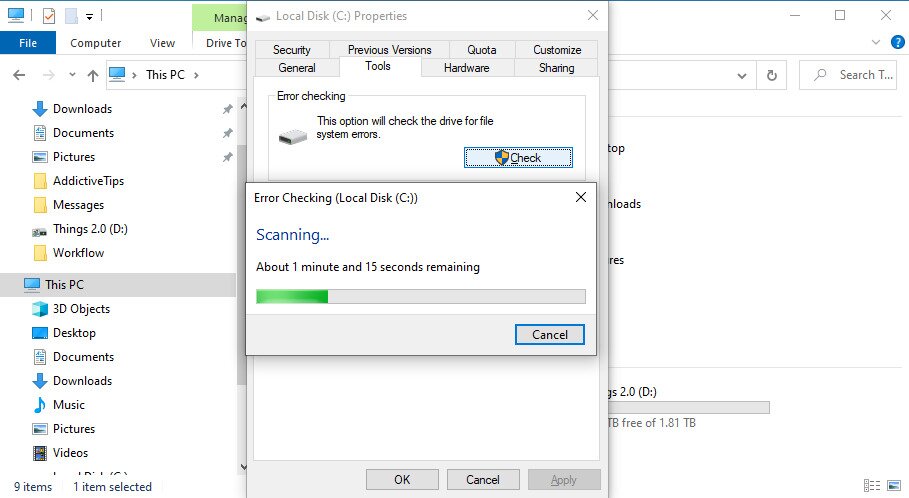
- Wait until the scan is complete (it can take a while)

- If Windows finds any disk errors, it will fix them during the next PC reboot
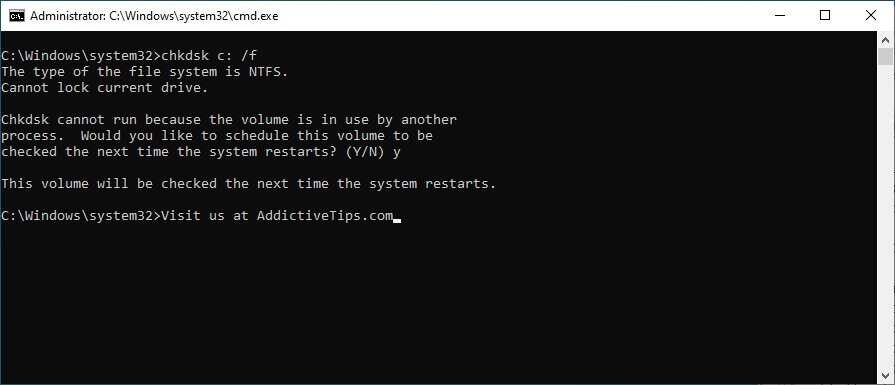
Alternative, you can run CHKDSK from CMD:
- Launch Command Prompt with elevation rights
- Type
chkdsk c: /f(or, replacec:with the correct letter of the drive that hosts your operating system)
- When the tool asks you to schedule the scan at the next PC reboot, type Y
- Restart your computer and wait until CHKDSK scans your drive and fixes any errors it finds
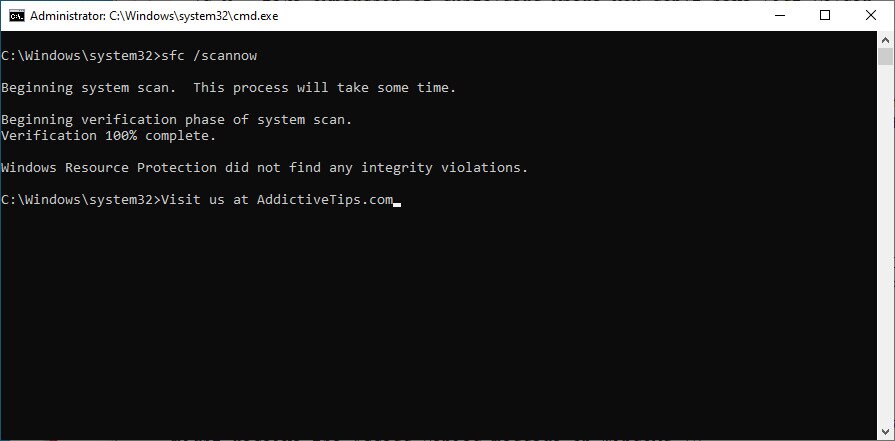
2. Use System File Checker
System File Checker is a tool built into Microsoft’s operating system, designed to find and repair corrupt system files.
If you received the Critical Process Died error message because of file corruption, then SFC can definitely help, especially if CHDSK failed.
- Run CMD with administrator rights
- Type
sfc /scannow. Windows will automatically try to repair any corrupt files it finds.
- Patiently wait until it finishes scanning. Reboot your computer.
3. Check your system for malware
If your computer was recently hit by a malware attack, perhaps it corrupted essential system files, leading to the Critical Process Died stop code on Windows 10.
Here’s how to scan your PC for malware using Windows Defender:
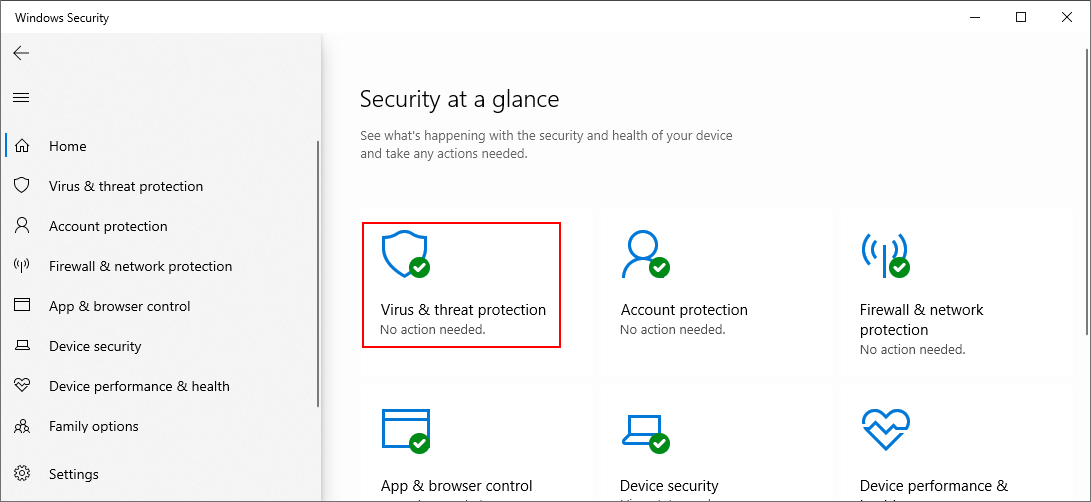
- Press the Win key, type Windows Security, and open this app

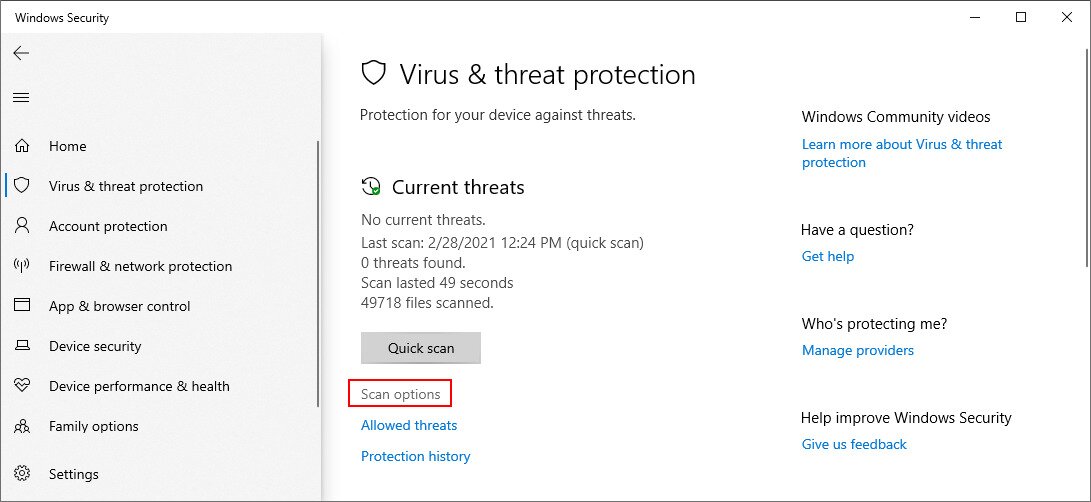
- Select Virus & threat protection
![Windows 10 shows how to select Virus and Threat Protection]()
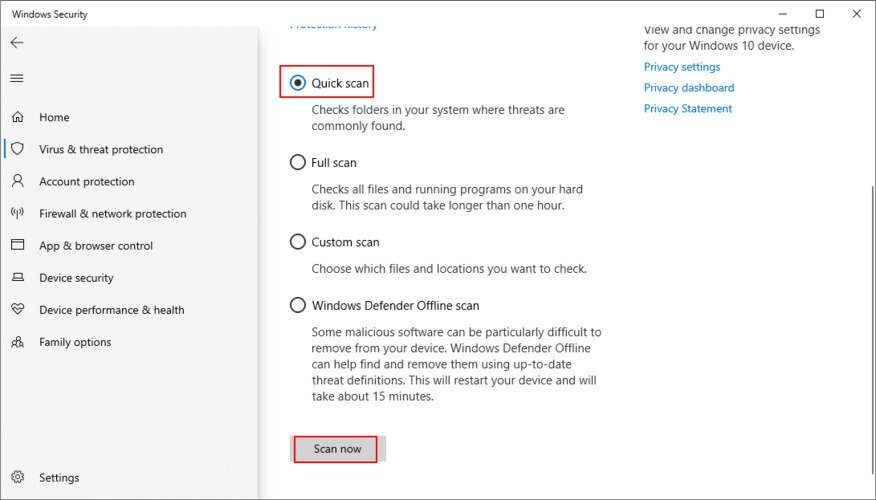
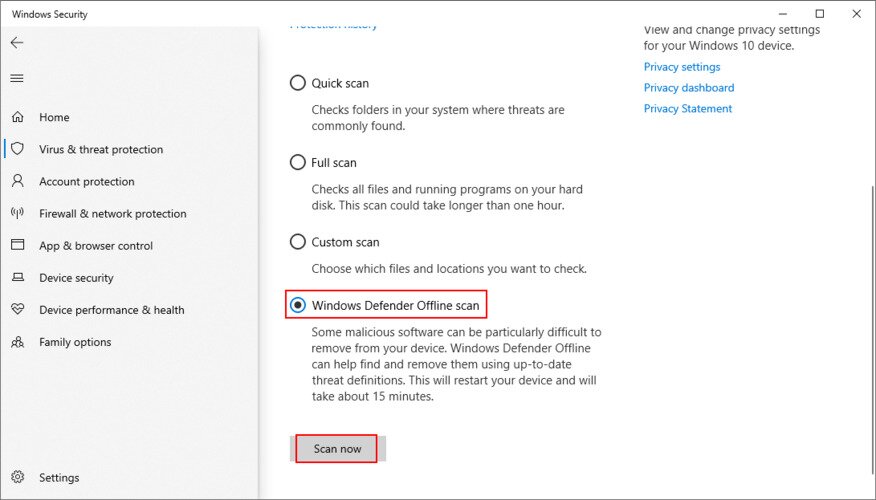
- Click Scan options

- Select Quick scan, click Scan now, and let Windows Defender do its job

- If the scan fails, return to the Scan options, select Windows Defender Offline scan, and click Scan now


If you have a third-party antimalware application installed on your computer, make sure to adjust the steps above accordingly.
4. Run DISM
DISM (Deployment Image Servicing and Management) is another Windows 10 diagnostic utility that falls in the same category as SFC and CHDSK.
However, it’s more powerful than the two and should be used with caution since you risk losing all your files. Compared to SFC and CHKDSK, DISM checks the component store of the OS image for corrupt files.
That’s why it’s strongly recommended to back up your entire hard disk or, at least your important personal files before using DISM. Once you create a backup, here’s what you have to do:
- Run Command Prompt with admin privileges
- Type
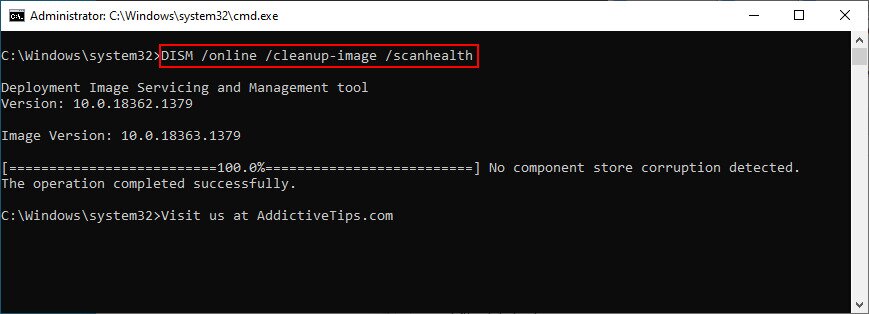
DISM /online /cleanup-image /scanhealth
- Wait until the scan is over. If DISM reports any issues, type
DISM /online /cleanup-image /restorehealthto fix them - Reboot your PC, open CMD as admin, and type
sfc /scannow - Restart your PC again
5. Check your device drivers
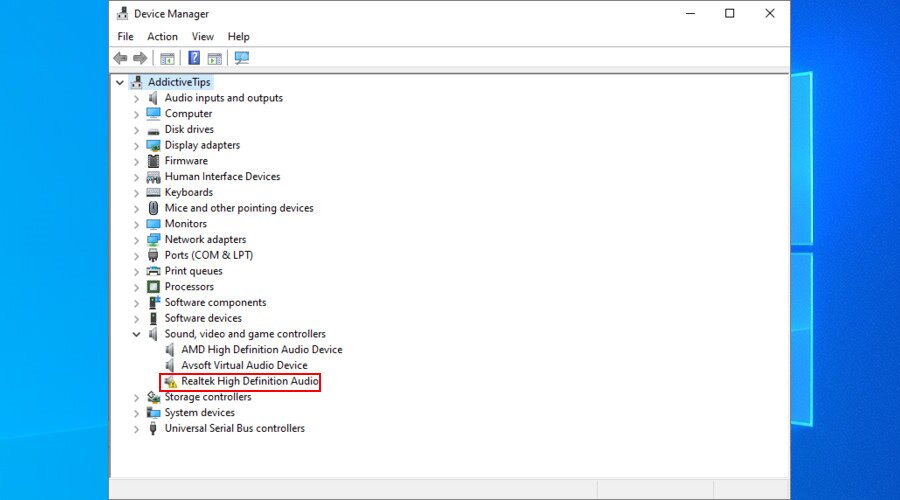
If the Critical Process Died stop code was caused by faulty device drivers on Windows 10, it’s a good idea to look under the hood of Device Manager.
Firstly, look for any drivers with a yellow exclamation point in Device Manager. Right-click their entries, click Uninstall device, and restart your PC. Windows should reinstall the correct driver versions automatically.
Secondly, you should make sure that you didn’t accidentally install an incompatible driver for your device. Thirdly, your device drivers should constantly remain updated to the latest version.
For the second and third scenario, using a driver update application is ideal. We’re talking about special tools dedicated to scanning your PC for all drivers, showing the outdated or incompatible ones.
A driver updater locates the correct driver version on the web, then proceeds with downloading and installing drivers with minimal intervention from your side.
It certainly beats manually updating your drivers since you risk doing more harm than good if you don’t know what you’re doing.
6. Uninstall recent applications or Windows Updates
Certain software programs may interfere with the Windows runtime, causing the Critical Process Died BSOD error. Furthermore, it has been reported that some Windows Updates weren’t constructed properly, leading to system compatibility issues instead.
Before getting started, try to remember when your computer started displaying the Critical Process Died message. It should help you narrow down your search by uninstalling the apps that may have triggered the error.
Here’s how to remove installed programs from your PC:
- Right-click the Windows 10 Start menu and select Apps and Features

- Set Sort by to Install date to list your installed applications by date (newest first)

- Select a recent app, click Uninstall, and follow the on-screen instructions to remove the program from your computer

- If you have multiple apps recently installed, remove all of them
- Reboot your computer


If you recently used Windows Updates, here’s how to remove them:
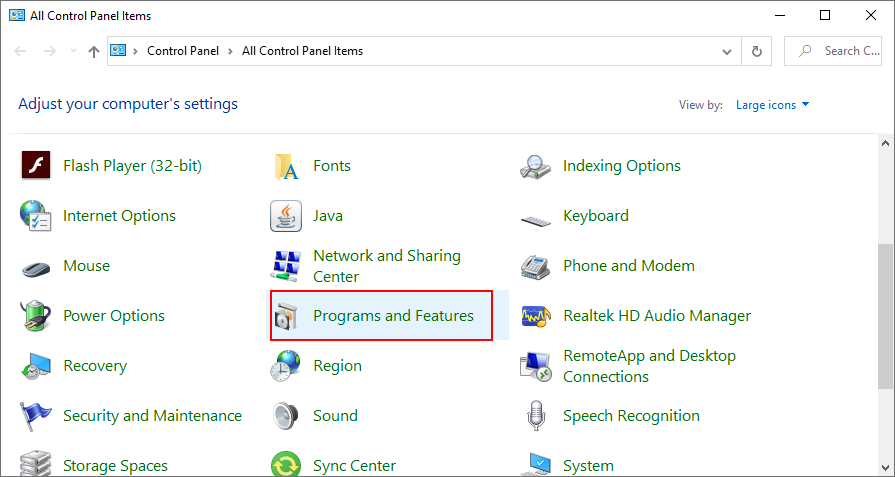
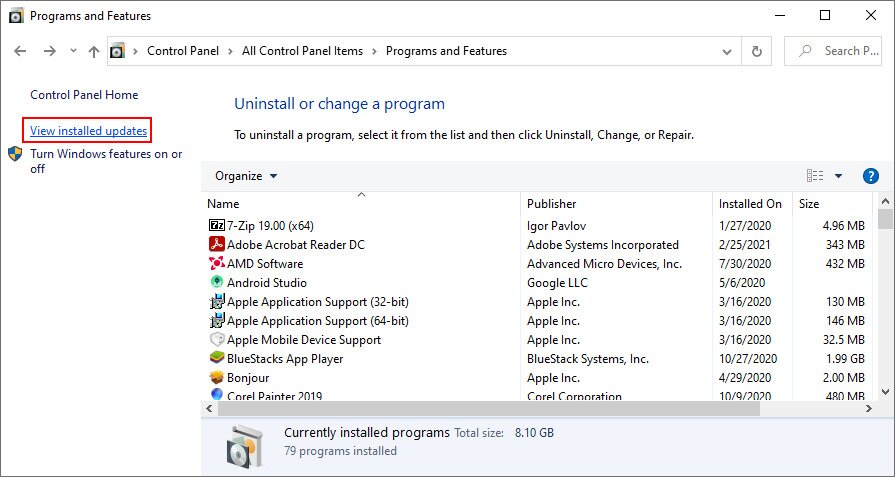
- Press Win key + R, type control panel, and hit Enter

- Locate and select Programs and Features
![Windows 10 shows how to access Programs and Features from Control Panel]()
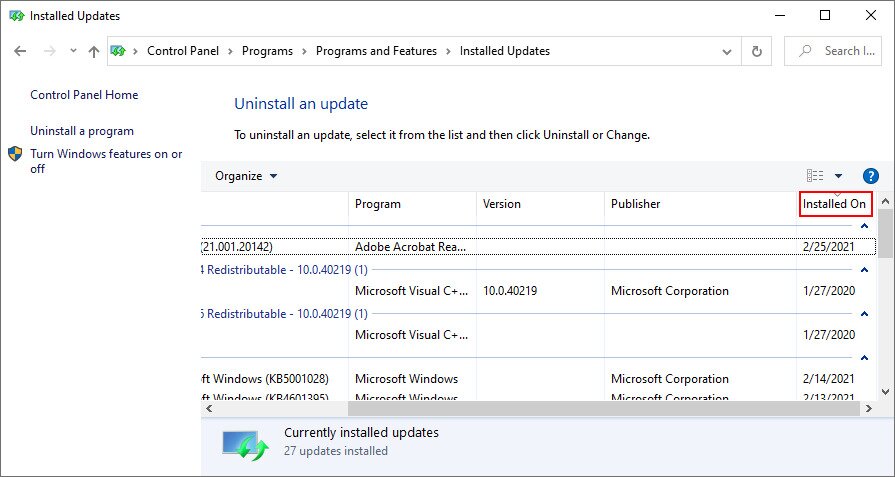
- Click View installed updates on the left panel

- Click the Installed On column to view recent updates first

- Double-click the first update in the list and click Yes to confirm its removal
![Windows 10 shows how to confirm Windows updates removal]()
- Reboot your PC
- Check if you still get the Critical Process Died error. If so, remove additional Windows Updates (newest first)


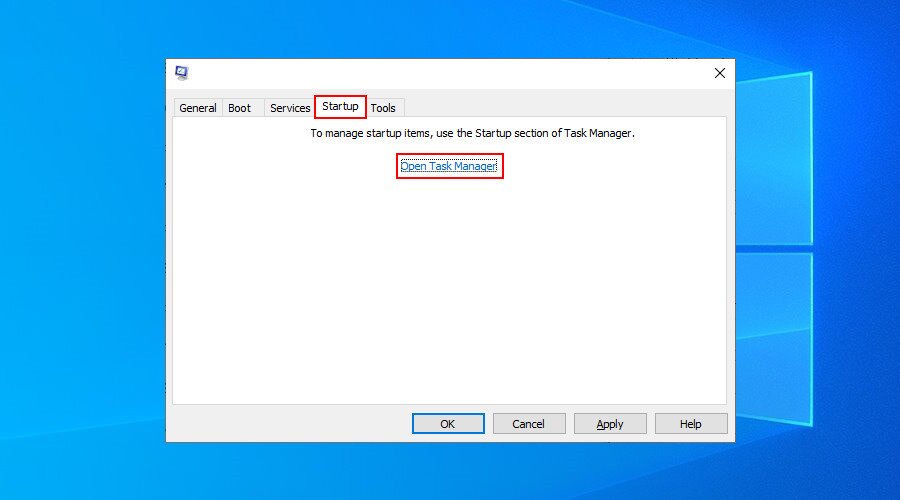
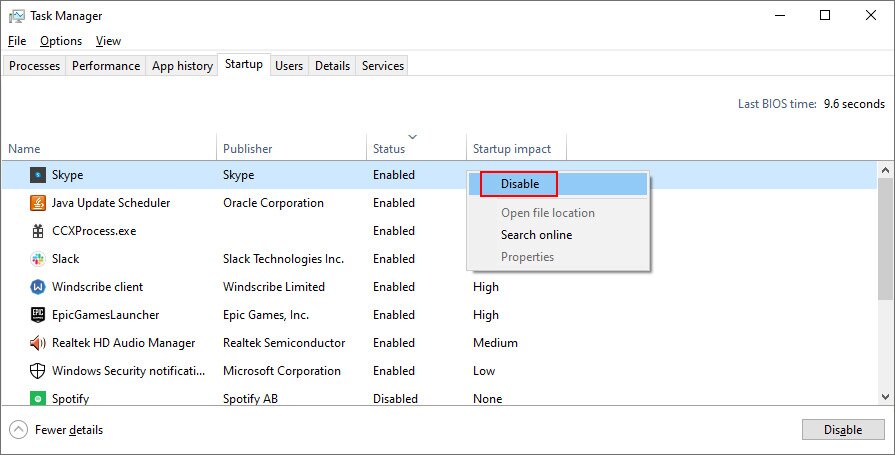
7. Perform a clean boot
Running a clean boot means starting up Windows using only the required drivers, processes, and services. It’s a simple way to isolate all possible issues from the get-go. Then, you can turn on your extra drivers, processes, and services one by one to see which one causes the BSOD.
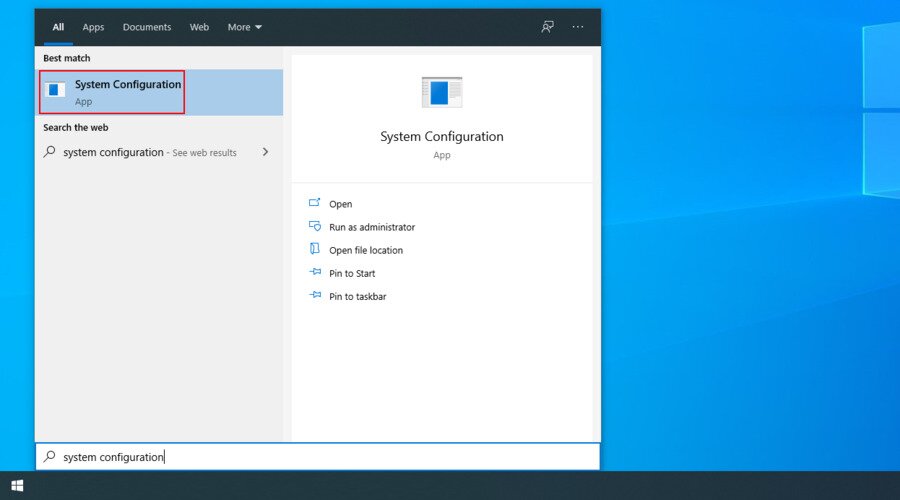
- Press the Win key, type System Configuration, and open this app

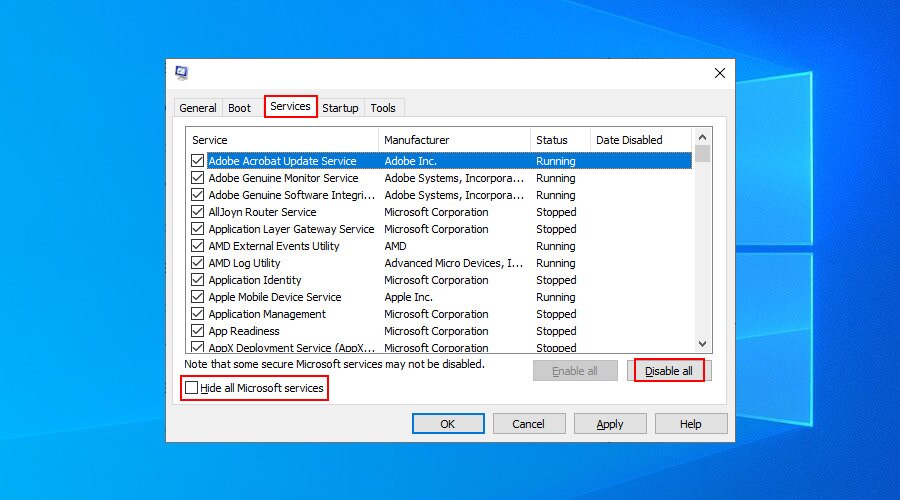
- Go to the Services tab and ensure that Hide all Microsoft services is deselected. Click Disable all

- Select the Startup tab and click Open Task Manager

- Disable all startup processes

- Reboot your computer
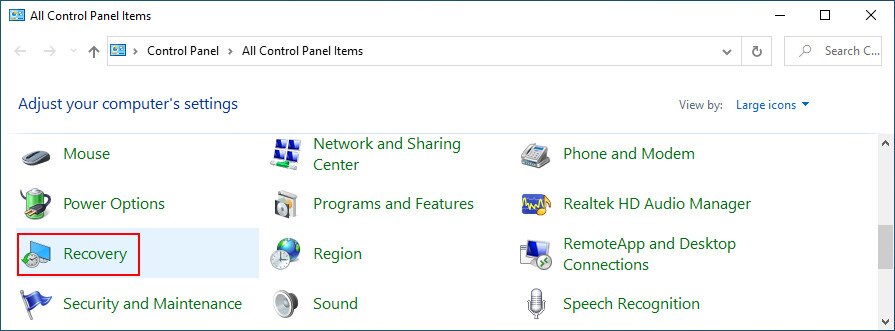
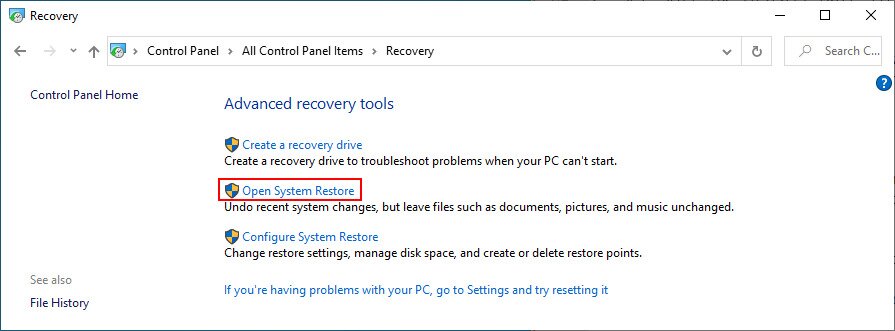
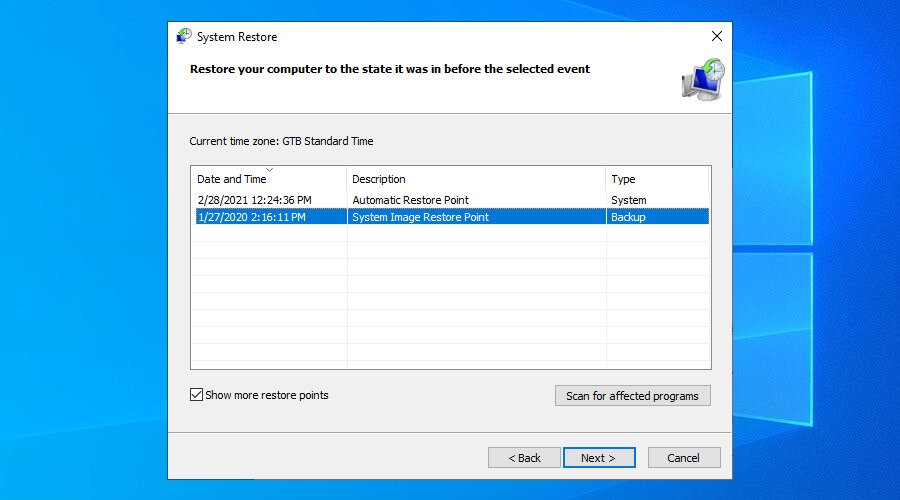
8. Revert Windows to a previous checkpoint
You can use the System Restore utility to restore Windows to a previous checkpoint, assuming that you regularly create system restore points.
Just keep in mind that you might lose important programs and files in the process, so it’s a good idea to back up all essential data.
- Press Win key + R, type control panel, and press Enter
- Select Recovery

- Click Open System Restore

- Select a checkpoint, click Next, and proceed with the on-screen instructions

- Restart your PC
Conclusion
To summarize, if you keep receiving the Critical Process Died stop code error on your Windows 10 PC, you can try to fix it by running CHKDSK, SFC, and DISM.
It’s also a good idea to check your PC for malware, as well as to verify the integrity of your device drivers in order to install, reinstall, or uninstall them.
However, you can also uninstall recent applications or Windows Updates that may have triggered the BSOD error. If you’re feeling up for it, you can perform a clean boot to isolate the faulty process, driver, or service.
Or, if you’re the kind of responsible user who creates system restore points on a regular basis, simply revert Windows 10 to a previous state. However, if everything fails, it’s time to consider reinstalling your operating system.
If you encounter other BSOD errors like Critical Process Died, you may also want to fix PFN_LIST_CORRUPT on Windows using similar troubleshooting methods. We hope you managed to get rid of this annoying problem using the solutions above. Did we miss anything important? Let us know in the comment section below.
