How To Use Wacom Bamboo Graphics Tablet With Photoshop
If you’re a graphic design enthusiast with a steady hand, willing to spend a reasonable amount of dough to expand upon your skill set, pen tablets are the way to go. Wacom’s Bamboo series of graphics tablets are quite popular with designers all around the world. This article walks you through the installation of a Wacom Bamboo Craft Pen and Touch Tablet and using it to the full in Photoshop.
We’ll proceed assuming that you’re here because you’re new to pen tablets and want a detailed but easy installation and usage walkthrough.
Installing Your Wacom Tablet
Let’s get started. On unboxing your new Wacom Bamboo graphics tablet, you’ll find a couple of installation CDs, one of which contains the driver for the tablet and will be labeled accordingly. Insert the disk into your computer. If it doesn’t run on autoplay, navigate to your CD drive and run the setup file (Install.exe, for instance) inside and you should see a screen similar to the following.
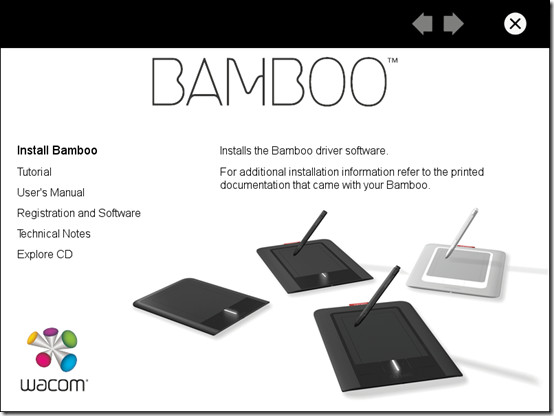
Click on “Install Bamboo” and follow the simple instructions to complete the installation. Once that is done, connect your tablet to your computer and wait for Windows to detect it.
Setting It Up
Now that your tablet is installed, you need to get accustomed with some essential settings that’ll enable you to make the most out of it. First up, navigate to Start>All Programs>Bamboo and select Bamboo Preferences.
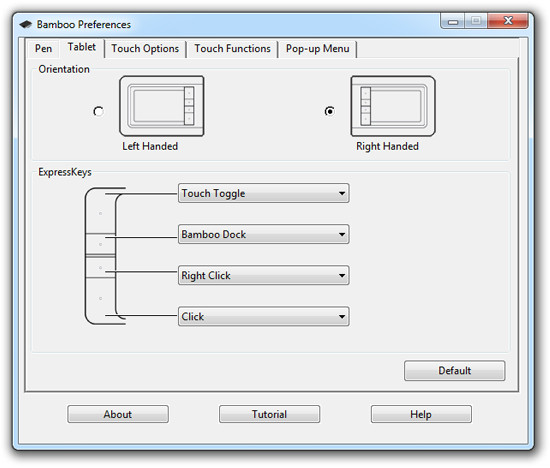
In the Bamboo Preferences dialog box that appears, go to the Tablet tab and select your desired orientation. This tab also allows you to assign functions to tablet buttons. Your tablet’s preferences window may not be an exact match to the one shown in the above screenshot but you’ll find it to have similar settings.
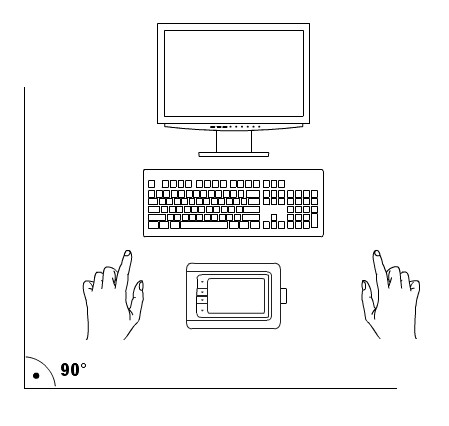
Set your tablet in front of your computer’s display as shown below. Whether the buttons face right or left depends on the orientation settings.
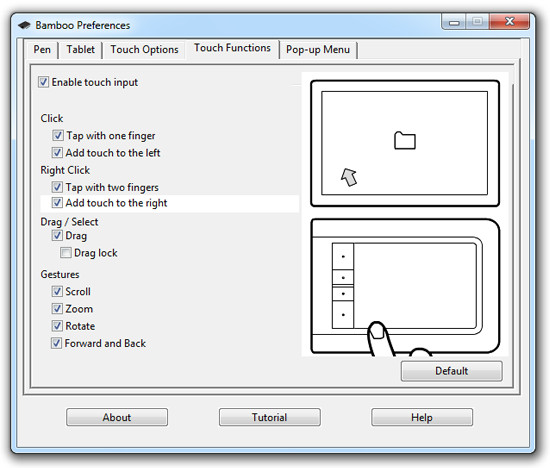
Now, your tablet works with both the provided pen and your finger tips. The settings for operation with touch can be found under the Touch Options and Touch Functions tab. The Touch Options tab holds simple touchpad settings such as Pointer Speed and Pointer Acceleration. Under Touch Functions, you’ll find a variety of available gestures, each of which can be individually enabled or disabled.
We recommend enabling all gestures for a better tablet experience – easier, faster usage and less shifting between tablet and mouse.
Under the Pen tab, you will find the Tip feel slider. This is an important option. The firmer the Tip Feel is, the more pressure you’ll have to apply on the active surface of the tablet to make thicker strokes and vice versa. We would recommend setting it a point firmer than the default setting. When you start using the tablet you’ll find that making smooth strokes is harder with a softer Tip Feel.
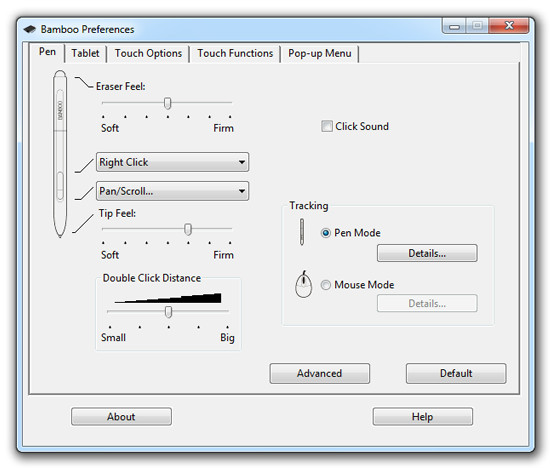
Check to see the functions allotted to the on-pen buttons. You may leave these and the other settings as they are and come back to alter them once you decide what suits your hand.
Using the Tablet’s Active Surface
The active surface of the tablet is the part that responds to touch and to strokes from your pen.
While using your fingertips, the tablet operates much like a touchpad. With the pen however, the active area becomes a map of the screen with your pen acting as the pointer.
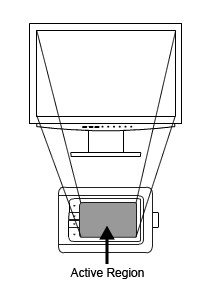
Start hovering the tip of the pen over the tablet’s active surface and the cursor on the screen will follow suit.
Tap the screen with the pen and a selection/click will occur.
In Photoshop, holding the tip down and dragging will create a stroke. Similarly holding the opposite end (Eraser) of the pen down on the active area and dragging will erase.
Testing Your Tablet In Photoshop
Proceed to launch Photoshop. We are now going to check to see if Photoshop recognizes your tablet as more than just a mouse-alternative. That is, if Photoshop responds to tablet features such as pen pressure or pen tilt, then you’re good to go. If not, your tablet’s drivers might require an update.
Open a new file in Photoshop (File>New or Ctrl+N). Set the canvas dimensions to a scribble-friendly size of around 1280X768. Now, if you don’t already have the Brushes palette visible in your workspace, select Window>Brushes from the taskbar.
Select the Brush Tool from the toolbar to the left (as in the Default Workspace) to enable the Brushes palette. In the Brushes panel, select the checked (by default) Shape Dynamics preset from the Brush Presets list on the left. This will display the corresponding preset options on the right. Below the Size Jitter option, set Control to Pen Pressure. The shape of the preview stroke at the bottom should change as shown in the following screenshot.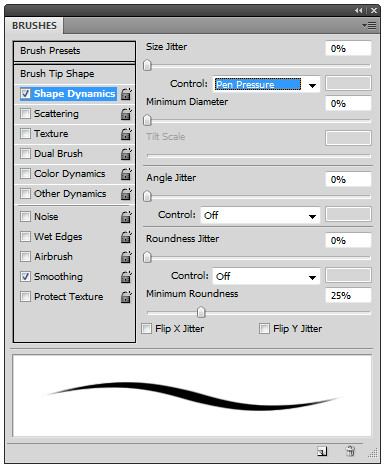
Now, pick up your tablet’s pen and start scribbling on the canvas. If the strokes respond to pen pressure (that is grow thicker when you press down harder with the pen mid-stroke and vice versa), then your all set. If not, move to the next section to upgrade your tablet’s drivers.
Tip: For a better tablet experience with Photoshop, select View>Screen Mode>Fullscreen With Menu Bar from the taskbar and then View>Fit on Screen (Ctrl+0).
This will spread the canvas as much over the screen as possible while letting Photoshop’s menus remain visible.
If that doesn’t cut it, you could switch to View -> Screen Mode -> Fullscreen which hides everything but the canvas. Then you could zoom in our out to fit the canvas to screen by holding down Alt and rolling the mouse-wheel or by holding down Ctrl and pressing “+” or “-” keys respectively.
Updating Wacom Tablet Drivers
If Photoshop fails to detect your tablet’s pen pressure feature, then there is quite a chance that your Wacom tablet’s drivers are out of date. To fix that, head over to the Wacom website’s Hardware Drivers page here.
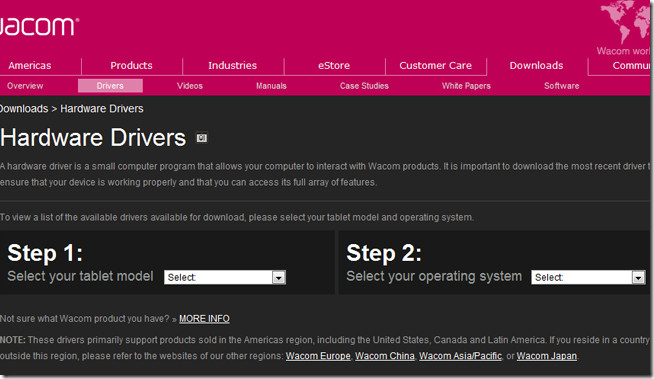
Select the correct tablet model and operating system from the respective drop down menus and a list of available drivers should appear below. Select the latest available driver from the list and download it to your computer.
Once the download is complete, install the driver and reboot your computer. Launch Photoshop again and enable Pen Pressure if it isn’t already enabled. You should notice the required change in your strokes. Draw away!

Thanks a lot for this!! so happy to finally see my tablet pen strokes looking like a brush stroke!
good day… i got a problem i am using adobe photoshop cs5 and the pen sensitivity seems to have troubles… it sometimes have pen pressure but most times it wont work. but only in photoshop. coz i tried the pen pressure in other apps and it works perfectly… please healp me i dont know what to do.
Hello,
I have tried everything but I always end up with this 🙁
http://dl.dropbox.com/u/5593269/Screen%20shot%202011-03-17%20at%2012.12.55%20PM.png
Any idea what could be wrong?
Hello, I visited the always addictive Tips, congratulations on your site.
But I come here asking for help with a problem I’m on my blog. I know it has nothing to do but hope you guys help me out. I have a VPS server with CentOS and used the Apache, and noticed that the server uses https://www.addictivetips.com/ nginx, I tried to install it in every way and the server can only interpret html. I’ve tried to uncomment the code below to interpret the PHP but he had no success. What should I do for work ..
location ~ \. php $ {
root / opt / nginx / html;
fastcgi_pass 127.0.0.1:9000;
fastcgi_index index.php;
fastcgi_param SCRIPT_FILENAME / scripts $ fastcgi_script_name;
fastcgi_params include;
}
I noticed that nginx can not run PHP and play for the error statement error_page 500 502 503 504 / 50x.html;.
Please if you can … send an email solution by the informed commentary. Hug!