How To Log Startup And Shut Down Times In Windows
The Events Viewer in Windows is a pretty handy tool. It logs everything that happens on your PC. Both system and user activity are faithfully recorded and time-stamped. If your system is acting up, the event viewer might be able to help you find the problem. The event viewer isn’t a troubleshooting tool, though. It’s a log, a very useful one at that. You can use it to log startup and shut down times in Windows. Actually, it does that by itself. All you need to do is extract the information so that it’s easier to make sense of.
Event IDs
Startup And Shut Down Events are logged automatically. Windows assigns these events their own separate IDs. These IDs are what we use to filter out the respective events.
Startup event ID = 6005
Shut down event ID = 6006
Custom View
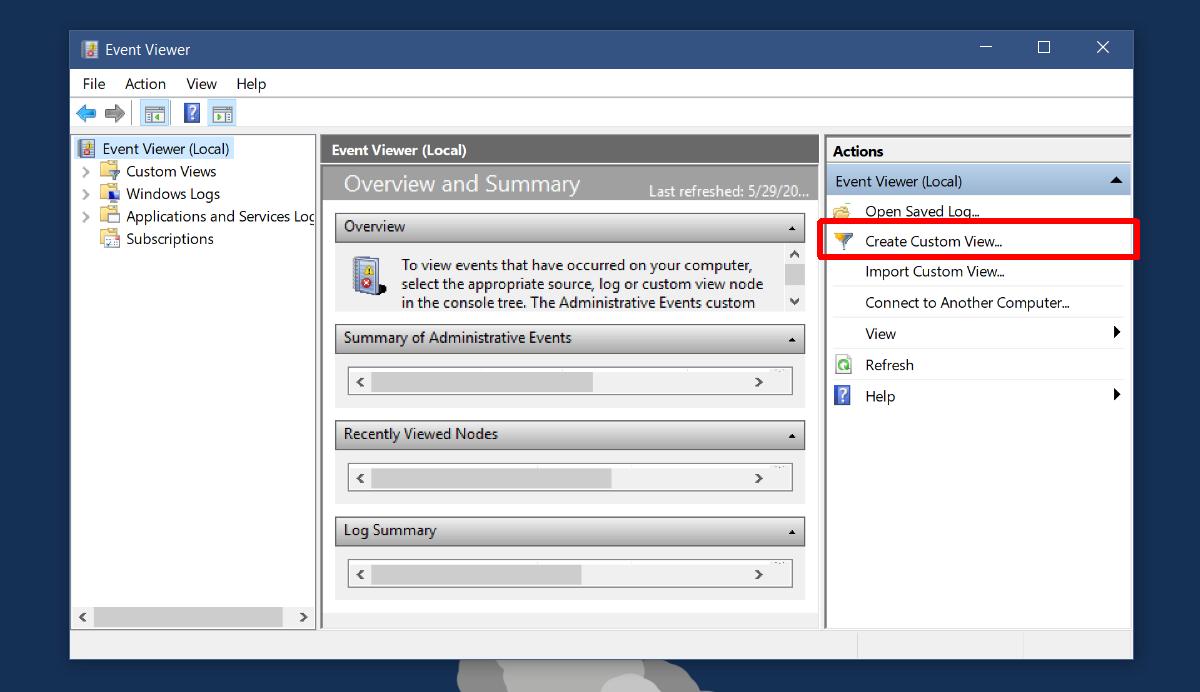
Once you know the event IDs that log startup and shut down on Windows, you can create a custom view to filter them out exclusively. Open the Event Viewer. Click ‘Create Custom View’ on the right.
On the Create Custom View window, open the ‘Events Log’ dropdown. Expand Windows Logs, and select ‘System.’
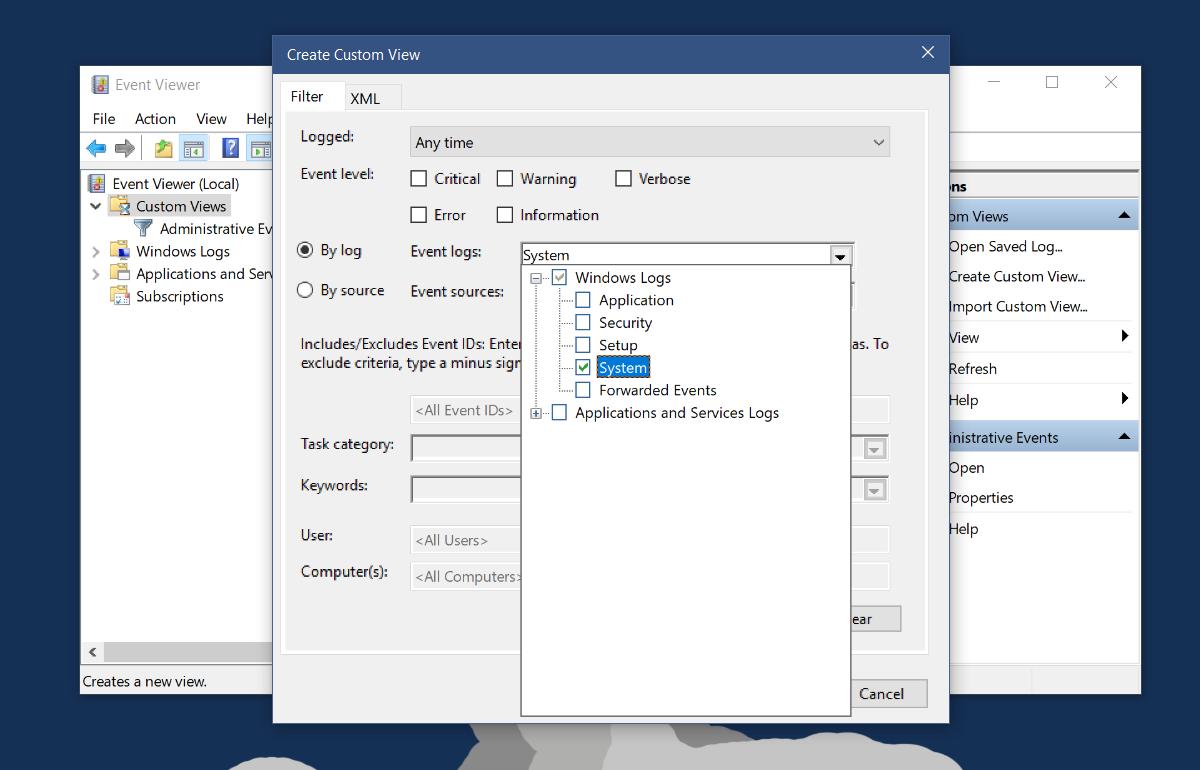
Next, click inside the field box that reads <All Event IDs>. Enter 6005 and 6006, separated by commas. This will give you startup and shut downtimes in the same custom view. If you want to keep them separate, create a different filter for each one.
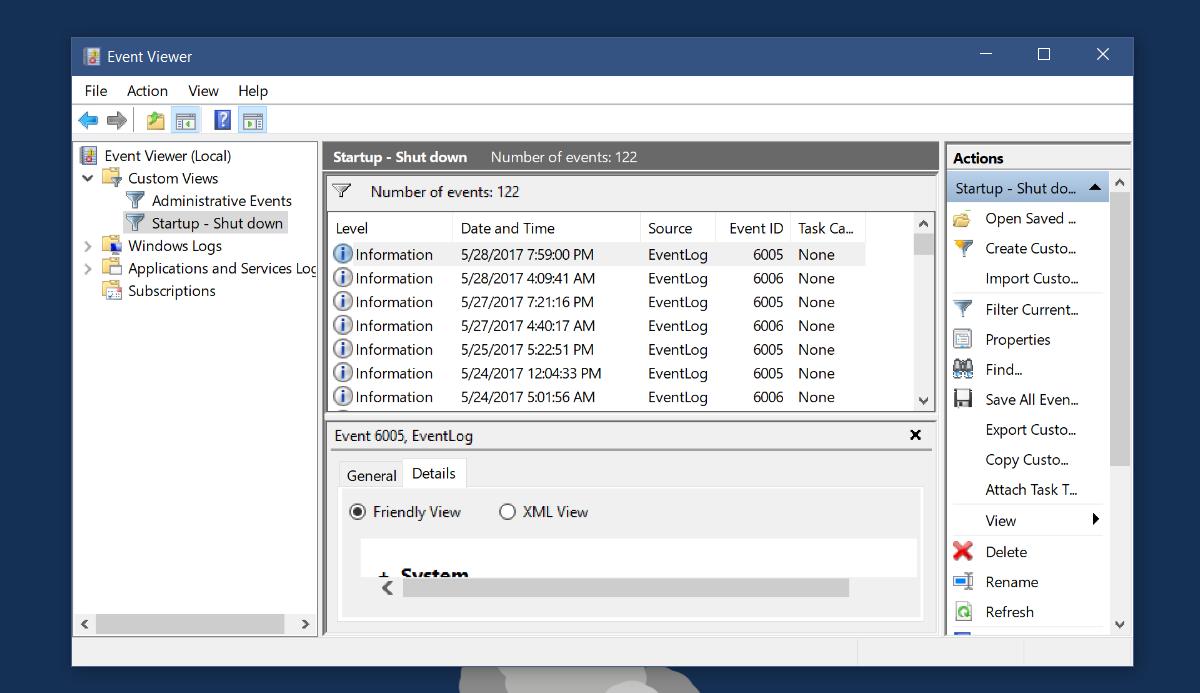
Leave the <All Users> field untouched if you want to log startup and shut down times for all users. If you want to target a particular user, enter their name. Next, give your custom view a name and a brief description. That’s all you need to do. You will get a complete list of every time your system started up and shut down. The Event ID column will help you identify these events.
Export To XML And CSV
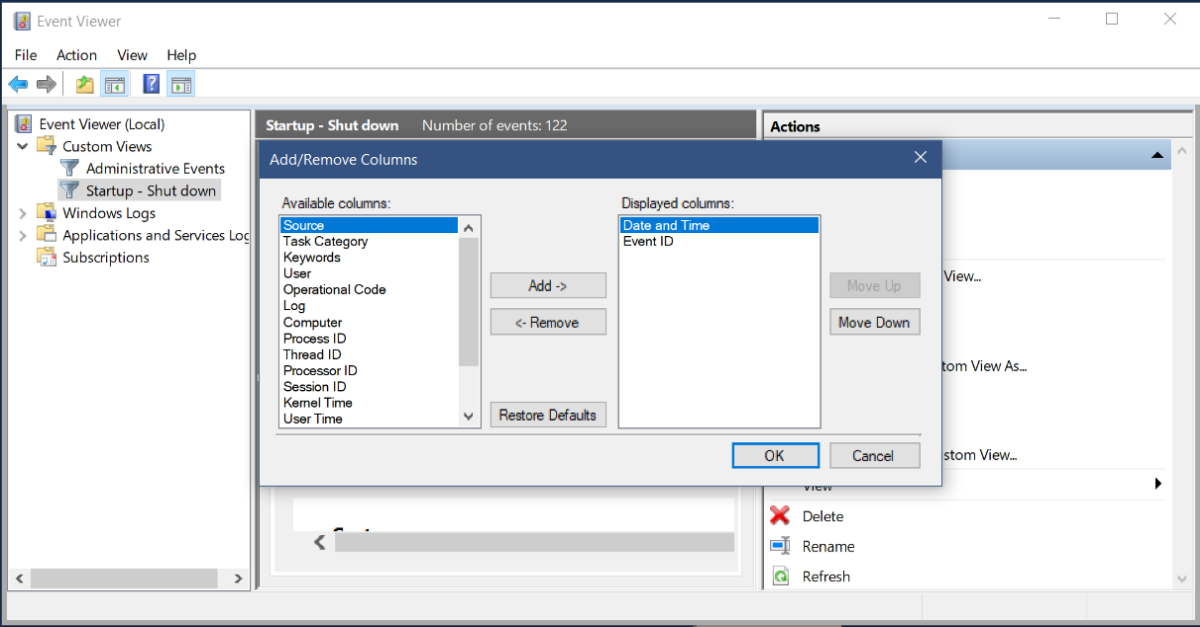
The Event Viewer doesn’t present the most friendly view of events. You can export this log to an XML or CSV file. First, clean it up a bit so that you only have the essential information. Click ‘View’ on the right, and select ‘Add/Remove columns’ from the sub-menu.
Pick the ones you want to remove, or add ones that might be useful e.g. the User column. Make sure you have all the information you need before you export it.
Exporting to XML is easy. Click the Export Custom View option on the right, name your file, and the log will save as an XML file.
Exporting to CSV is slightly complicated compared to this. Click ‘Save all Events in Custom View as’ on the right. In the save window that opens, pull down the ‘Save as type’ dropdown and select CSV. Name the file, and it will save the log as a CSV file. You can view the CSV file in Google Sheets or MS Excel.
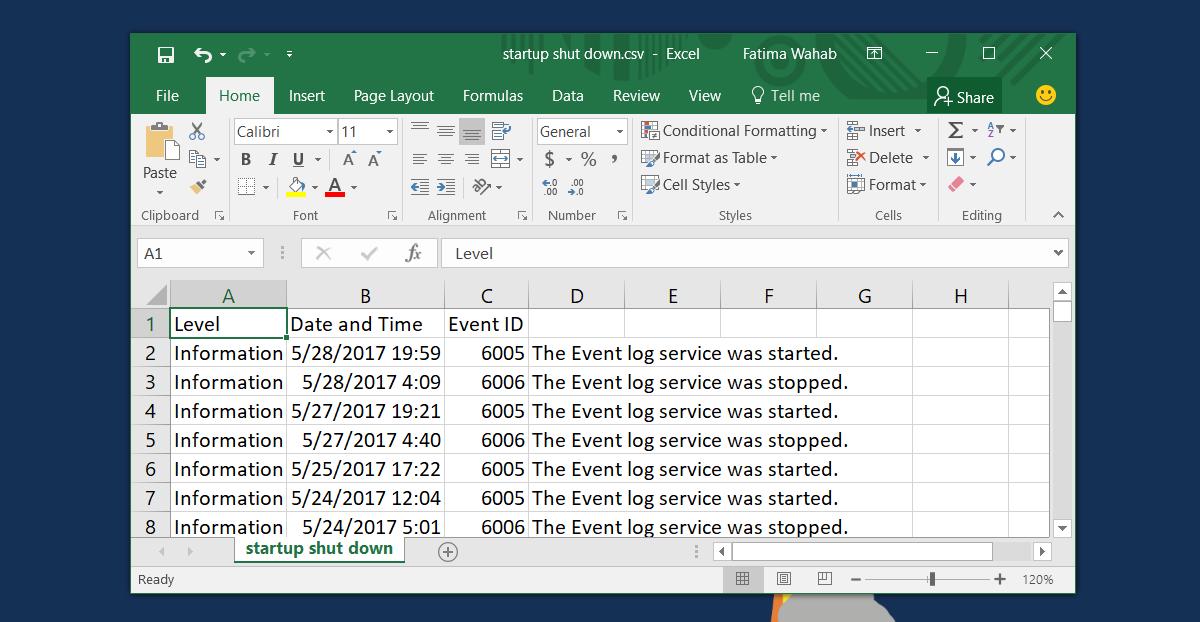
MS Excel and google Sheets have great tools for sorting data. You make more sense of the times, even create a detailed time sheet with either of the two apps.
