Quickly Analyze Sports Videos With Kinovea Video Editor
If you’re a coach, an athlete, a medical expert or simply someone who wants to observe, analyze and describe performance captured on a video, you should give Kinovea a try. Being just under 13MB’s in file space, the abilities of the software can be well recognized. It primarily targets coaches, athletes and medical experts by supporting specific functions. Users can measure line length, speed and distance. Data can be exported to OpenOffice calc, Excel and simple text.
As soon as you open Kinovea, the integrated File Explorer lets you browse your video collection visually just like any simple video editor. All the supported files are displayed as thumbnails. Bookmarks can be saved via a shortcut manager for faster look up. The build-in video controls let you focus on a particular action within the video by exploring the motion frame by frame or in slow motion. The best part about this software is that it would play almost all native formats and codecs.
Users can add enriched content to their videos by using the drawing tool, which lets them add different shapes like lines and arrows with added description to key positions. The build-in line and chronometer tools let you measure distance and time. You can follow motion path and measure speeds by using the semi automated tracking tool. The Dual-screen mode allows you to compare two videos side by side. Dynamic comparison can be done by synchronizing on a common event. Saving back to video or multiple images, and saving the analysis data to a spreadsheet format for further processing are some exporting options available.
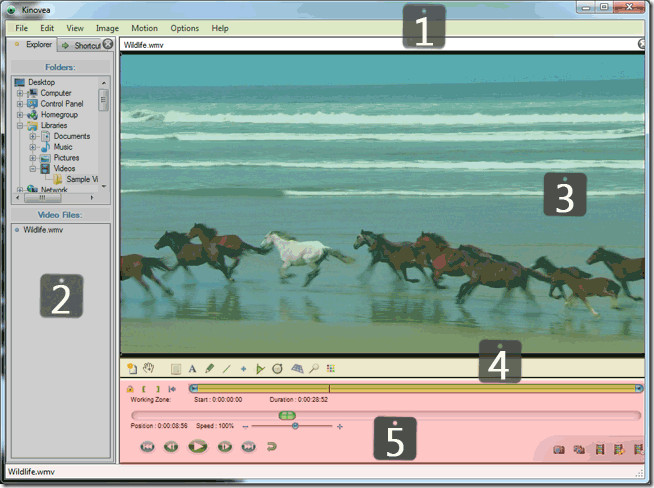
1. Main Menu
Main menu previews the list of basic commands available in Kinovea like choose a video file, list previously opened videos, close specified videos, save working files or key images, save analysis in spreadsheets, file explorer, one or two playback screen, invert video positions and show / hide common controls and more.
2. File Explorer
File explorer has two panels on the left side of the screen. Folder gives you direct view of your system explorer tree. And Videos files are shortcuts allowing you to frequently bookmark folders and files.
3. Video Preview
The video loaded by you will be previewed in this core part of the entire software workplace.
4. Image Controls

In this tab, you can see the key image controls for your video. You can add a key image, move a drawing or image when zoomed, show the comments window, add text label, hand drawing, line or arrow, cross market, angle measure, stopwatch, grid visibility, magnifier visible and color profiles for drawing tools.
Click Add Key Image to add key control to the position of interest. The key images toolbar unfolds and a thumbnail of the current image will appear on the screen. Remember, each image (frame) from the video can be tuned into a key image. Comments can be added one each image by clicking the comment button.
To draw on an image, click any drawing tool and then click anywhere in the image. Simply a drawing is added on the image. You can always change the color and style of the drawing using right-click, move and resize it as well.
5. Playback Controls

You can set the working zone and control the video from this panel. Lock / unlock the working zone start and end. Set the selected image as the start or end of the work place environment. Selection bar, navigation cursor, markers for key images, stop watch, path tracking, synchronization point, navigation controls, loop, save a snapshot or sequence of snapshots and video.
Viewing Videos
To open and play videos, use the file explorer to navigate. The thumbnails panel on the right displays the files that can be opened. Simply double-click on a thumbnail to open the video in a player screen. With the help of selection cursors set a working zone for your project. If you’re working zone is short, the software will automatically switch to Analysis Mode. It will help by extracting the frames composition for faster access and giving you full control on the timeline.
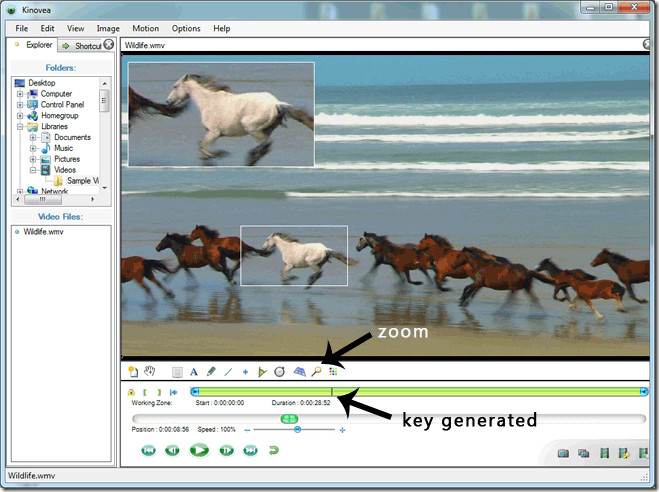
Zoom feature allows you to zoom on certain selected objects in the video. Click zoom and a small screen will appear on the top left of your preview screen. Move the zoomed image by dragging it around using the hand tool. Click on the magnified zone to fix the source. Transform feature comes in to resize the selected zone. You can always move the source zone to focus on other objects or details in the video. Magnification factor can be changed by right-clicking on the source.
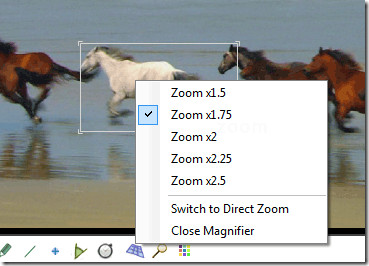
You can change the magnification from 1.5x to 2.5x or simply switch to direct zoom.
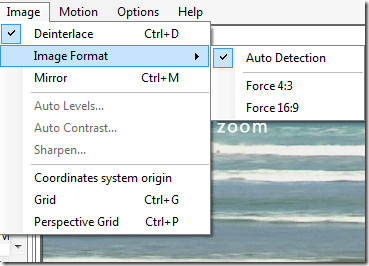
The software automatically tries to detect the aspect radio from the file. If it fails or you want to change the aspect ratio it can be done by navigation to Image > Image format , and choose one of the available presets.
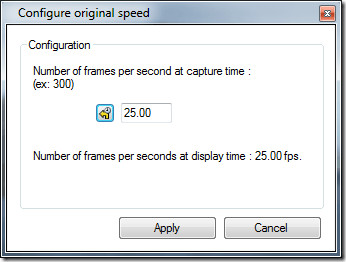
Specify the captured frame rate by right-clicking on the video source and select ‘configure original speed’. It will give you the default frames per second rate of the video but you can always increase it to make the scene slow motion. Make it work like a high speed camera recording!.
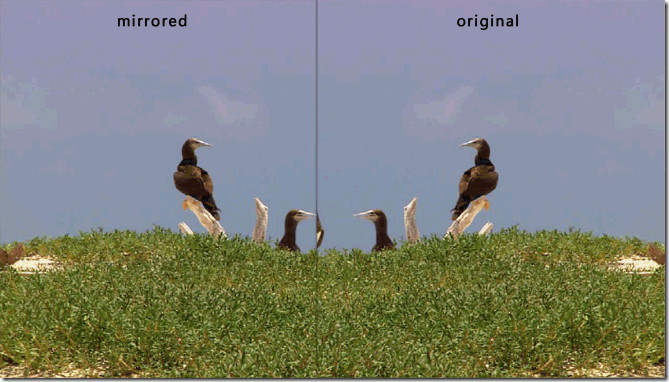
When comparing videos, use the mirror function available in Kinovea. This quick effect can be achieved by navigating to Image > Mirror.
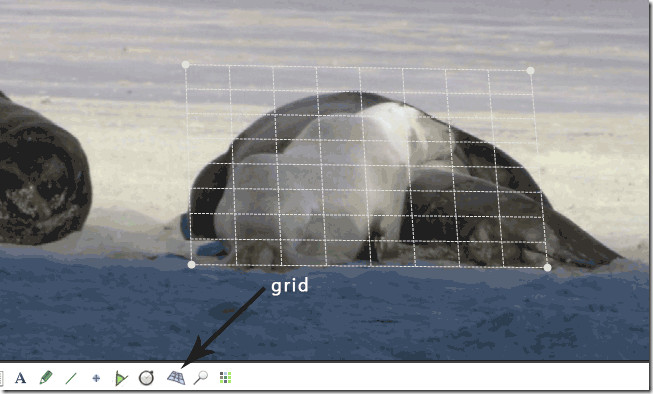
Use overlay grids to make observations on a plane perpendicular to camera axis. Grid can be moved by drag / drop and can be resized by using the circular handles at each corner. Grid colors can be changed by double clicking on the grid overlay to have a better contrast with the video in the background.
Videos can be summarized with the overview function (Motion > Overview). Set the number of images to use for the composition and orientation (left to right or right to left). All playback controls are disabled once in overview. It can be saved by right clicking on the image and using save current image file to. To return the to the regular workplace, go back to Motion > Overview or choose the close button on the screen. Motion video can be played in reverse by navigation to Menu > Reverse. It will simply revert the order of images in the working zone.
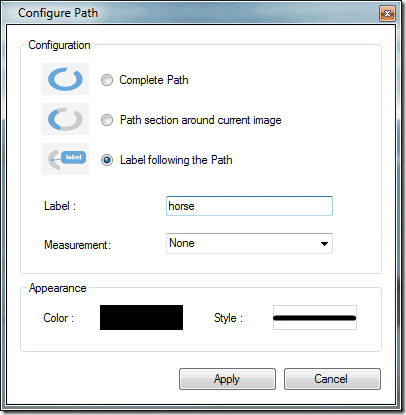
To track an object, right-click an object to track. Move the video forward by using the Play button or hit enter key. Adjust point location when required during the path creation. Once done, to finish tracking, right-click and use Menu > End Path Tracking. Additional information on total distance or speed can be displayed by choosing the criteria.
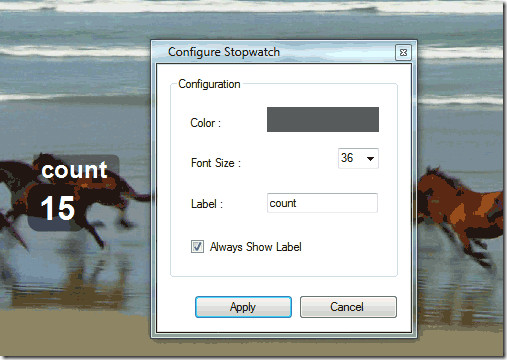
To add stopwatch or timer, click stopwatch button from the drawings toolbar. Click anywhere to add a timer and it will become visible. Right-click on it to configure color, font size and label. To start it simply right-click on it and click ‘start stopwatch’. Play the video and stop the watch proceeding the same method. You can hide the stopwatch using the Hide StopWatch option after the measured event. A number of stopwatch can be separated by simply labeling them.
Distance measurement can be done by using the line tool. Set the physical length of a visible object by a adding a line over it. Right-click on the line and set the calibration measures in terms of centimeters, meters, inches, feet and yards. Distance can be measured over several images by using the tracking tool. The path will be displayed by the total distance between start and present point.
Tracking tool also supports the display of the speed at tracked point. Select Speed in measurement options from the configuration menu. The speed indication is the average speed of the segment between the previous and current point. Preferred speed units can be set from the preferences dialog.
Lastly, all the data from the video in terms of key image positions, path tracking and stop watch values can be exported in a list to an OpenDocument, XML, XHTML or simple text file. (File > export to spreadsheet).

Saving can be done in terms of analysis, still images, videos and special videos. All the saving options are available on the bottom right of your playback controls or from the file menu. Save a single image or sequenced images, videos with key images, tracked objects or added stopwatches, all basic additions you’ve done to your video can be saved with complete analysis.
It works on Windows XP, Windows Vista, and Windows 7. Testing was done on Windows 7 64-bit system.
