Desktop Hunter: Take Screenshots With Defined Image Compression Level
Screenshots play a pivotal role in making your target audience understand the steps involved in configuring or installing an application. When you provide an image with a description, readers can easily comprehend the description as well as verify the sequence of steps involved. As they, “A picture is worth a thousand words”, so true this quote stands. Capturing screenshots is quite easy, and while, in older version of Windows you were limited to Print Screen on your keyboard, the options have evolved in Windows 7 Snipping Tool. However, if Snipping Tool still doesn’t satiate your appetite then third party tools are the way to go. There are various Windows applications that provide a number of screenshot options, and some that even feel somewhat unnecessary. One of those tools you can try is Desktop Hunter. It is a screenshot-taking utility that lets you capture screenshots and save them in multiple image formats such as JPEG, PNG, BMP and GIF. Unlike previously covered tools including Shotty and GreenShot, both of which are quite awesome too, it allows you to set individual compression levels for each image format. You can set custom hotkeys for taking screenshots of a selected region, active window or the complete desktop.
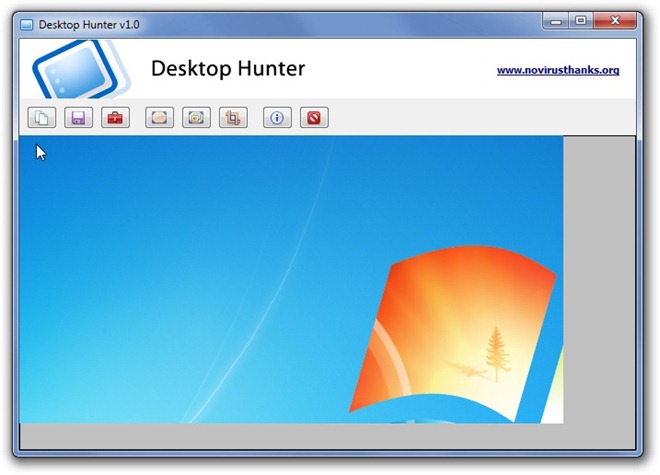
The main interface has Copy To Clipboard, Save, Options, Capture Desktop, Capture Active Window and Capture Selected Region options at the top, while the captured screenshot appears in the main window.
Before you start taking screenshots, it’s advisable to configure the compression levels and select output image format. The Options dialog contains individual compression quality parameters for supported image formats (JPEG, PNG, GIF and BMP). The JPEG Compression level ranges from lower to high, while PNG Compression has a 0-9 scale providing you with 10 compression levels. BMP Format can be saved in 1-bit,4-bit, 8-bit, 15-bit, 16-bit, 24-bit and 32-bit, and GIF Compression has two modes; Normal LZW compression and GIF compatible RLE compression. Under Autosave, you can define the default image format and a custom folder for saving captured images. The Hotkey option lets you set hotkeys for Capture Selected Region, Capture Active Window and Capture Desktop. When you’re done with configuring the settings, click Save.

Desktop Hunter is developed by NoVirusThanks, and we have found it quite a decent alternative to integrated Windows app. The application works on Windows XP, Windows Vista and Windows 7 and is also available as a portable version. Testing was carried out on Windows 7 Ultimate.
