How To Enable Push Notifications For Gmail In Stock iOS Mail App
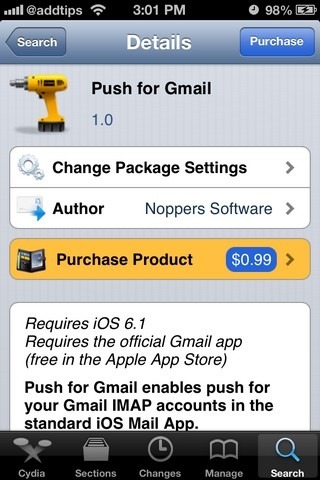
Being a Gmail user on iOS, I never realized the importance of push notifications until Google turned evil a few months back and took away these nifty alerts in a bid to get more iPhone users to switch to the official Gmail app. The Gmail app is pretty good, specially after its recent tabbed inbox update, but it can get a bit cumbersome trying to use multiple email apps on your iDevice, which is bound to happen if you are using services other than Gmail as well. You can try living without push notifications, but getting mails 15 minutes late is never fun and bothers a lot of people. Thankfully, a developer over at the Cydia store has finally taken note of the situation, resulting in the release of a tweak named Push for Gmail. The jailbreak community has come up with solutions to fix other push notifications in the past, but this tweak is a little more specific. As much as we would have loved to see the tweak do all the dirty work automatically, this is not the case and you have to do some manual tinkering before the push notifications start working.


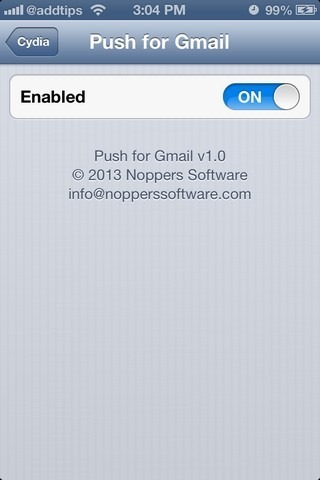
Push for Gmail adds a menu of its own to the stock Settings app, but there aren’t many configuration options in this list. You can just enable or disable the tweak using the provided toggle (enabled by default). Once the tweak has been enabled, it is time for manual configuration. Here are the steps that you need to follow, assuming that the Gmail account you are using is already set up in the stock Mail app.


- Head to the App Store, and download the official Gmail app for iOS. In case you don’t know this already, the app is available for free.
- Now sign in to your Gmail account in the app you just downloaded and once the inbox shows up, exit to SpringBoard.
- Launch the stock Settings app and enter the ‘Mail, Contacts, Calendars’ menu.
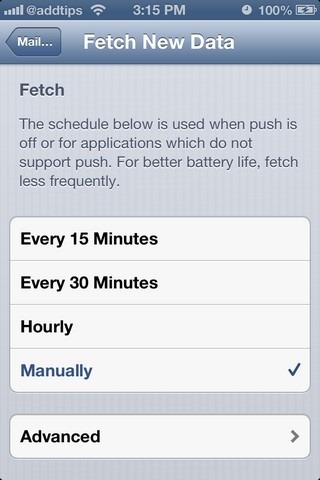
- Go to the ‘Fetch New Data’ menu, and choose ‘Manually’ under ‘Fetch’ options.
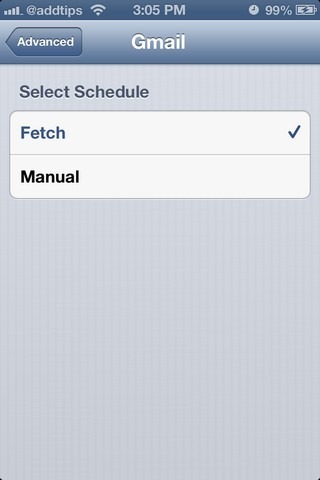
- Hit the ‘Advanced’ button located at the bottom of the same page and select ‘Fetch’ from there.
That’s all you have to do. Every mail you now get on your Gmail account will generate an instant push notification belonging to the stock Mail app, making it possible to forget all about the Gmail app you installed earlier as it won’t have any distracting notifications of its own (you can keep it stowed away in some unused folder, but don’t uninstall it).
Push for Gmail costs $0.99 and can be found in the ModMyi repo.

Exactly what I’ve been looking for. Genius solution. Worth the $.99 without question.