Excel 2010: Using Macro Through Buttons
Excel Macro feature lets you to record actions you perform on worksheet, and run the actions again for future use. But it would be extremely useful if you can run macro with a simple click on button, rather than running it manually. By creating macro-buttons you will be able to associate macros with buttons, and show them on the worksheet for performing different tasks you have recorded with macro. Excel enables you to create custom buttons to link macros with them, this post will elaborates how to create macros and associate buttons them with.
Launch Excel 2010, Create or open a datasheet in which you want to create button for Macros.
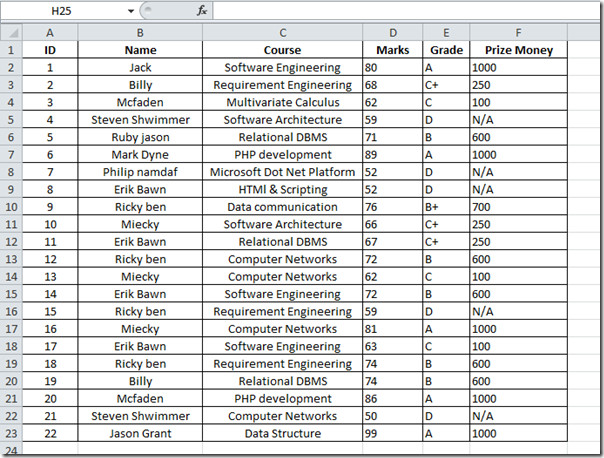
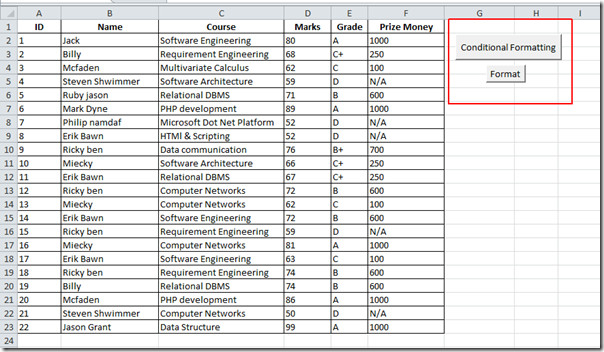
For instance, we will be using a very simple example to illustrate it in detail. We have included a datasheet, containing fields; Name, Courses, Marks, Grade Prize Money.
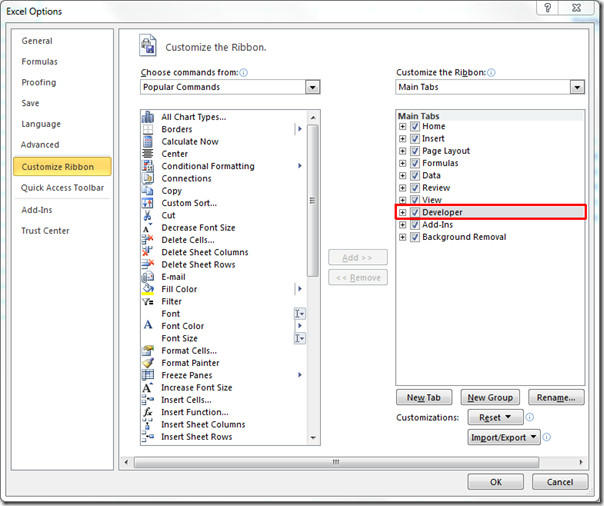
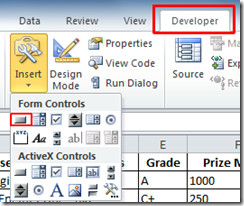
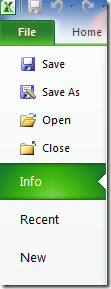
To start off with, we need to make Developer tab apparent on Excel window. In case you don’t find Developer tab, go to File menu, click Options, and in left pane click Customize Ribbon, from right pane enable Developer check-box. Click OK to to see Developer tab on the ribbon.
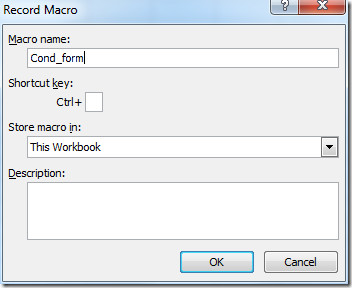
Navigate to Developer tab and click Record Macro.

Now give it an appropriate name, and click OK to start recording macro.
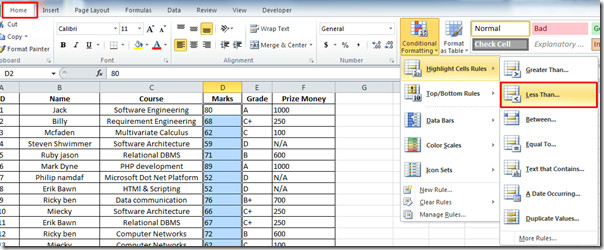
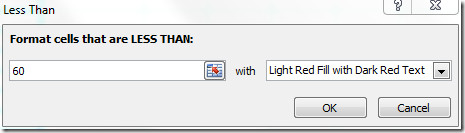
Now navigate to Home tab, and from Conditional Formatting, go to Highlight Cells Rules menu, and click Less Than.
Enter value suitable for your datasheet, as you can see in the screenshot below we have entered 60 (to mark fail students with less than this number). Click OK.
As you can see Conditional Formatting is applied on Marks table.
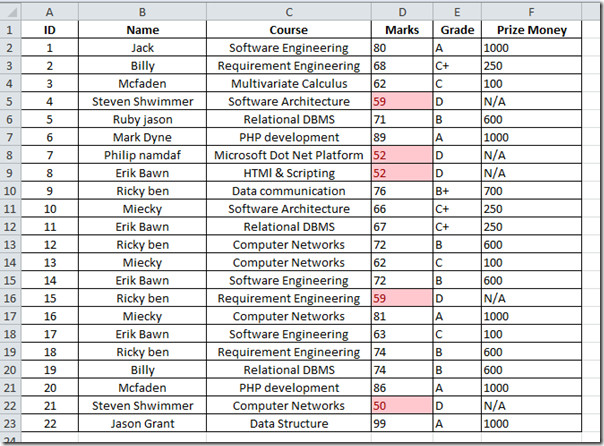
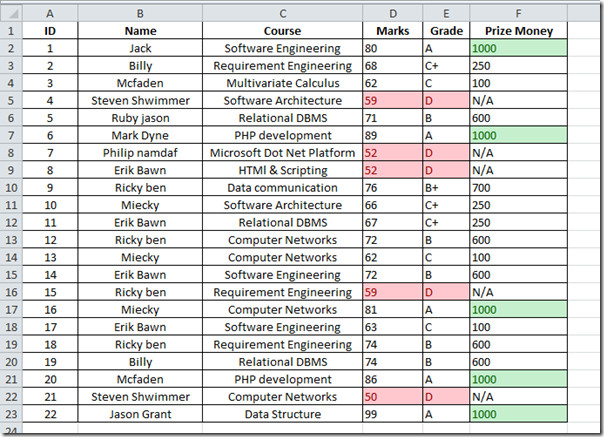
Now follow the same procedure to apply Conditional Formatting on Grade, and Prize Money field.
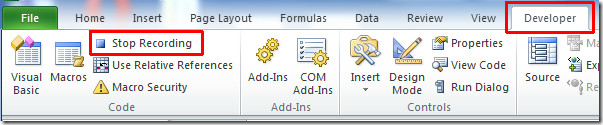
Now we will stop recording Macro, navigate to developer tab and hit Stop Recording.
We will be recording a new macro, for formatting columns as Bold, and center align. Follow the procedure for creating a new macro.
You can see the macro by the name of Bold_Align, it will bold the font and align the text in center.

Now we need to create buttons for each macro, for this navigate to Developer tab, from Insert options, click button image present under Form Controls, as shown in the screenshot below.
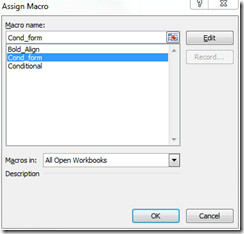
Upon click, you will see pointer change to plus sign, click any where on datasheet to place button. When you will click, a dialog will appear asking you to associate macro with button. Select Cond_form from the list. And click OK.
You will see button appear on the datasheet.
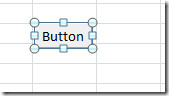
Now give it an appropriate name by clicking on the button (while it is selected) as shown in the screenshot below.
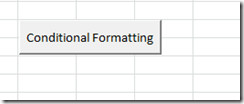
We will be creating another button, to associate Bold_Align macro, and name it Format.
Upon clicking buttons, you will see the changes, as macro run at the back-end.
![Complete]](https://www.addictivetips.com/app/uploads/2010/03/Complete.jpg)
For future use, you need to save the worksheet as macro enabled, for this, go to File menu, and click Save As.
A dialog will appear, from Save as type, click Excel Macro-Enabled Workbook and click Save.

You can also check out previously reviewed guides on SmartArt in Excel 2010 & How to embed Video in Excel 2010.

In case the buttons are in different Worksheet then how will we do it?
Your details helps me to know how to create macro button in Excel 2010
Thank you, following you notes was very easy
what is the process to apply a print button to a worksheet to print a whole worksheet template
Is it possible to assign a custom macro to an existing button on the toolbar? For example, if you wanted a different currency format to be assigned to the $ button.
thank u for a great help
good stuff!
can a macro be ceated … and in the middle of the macro – wait to input data? For example, I was to write a macro that will copy & paste worksheet into a new tab then sort. I’d like the tab to be named a month and year (Jun – 12). Is this possible?
Superb post. Helped me a lot..Thanks
Thank you its very helpful
Great job – saved me a ton of time at work!
Your details helps me to know how to create macro button in Excel 2010.. Thanks..