Prepare Word 2010 Document For Distribution [Prepare Menu]
Microsoft Word 2010 includes Prepare Document feature to give more powerful control over the document content, by using its various options such as; document protection, embed digital signature in the document, add meta data information, check compatibility with previous version of Word, and encryption, you can make your document more resilient and protected. It prepares your document for world-wide distribution or publication by providing options to enforce different actions over the document. You need to follow a tedious procedure to use it in Word 2010 since it is hidden by default. This post will cover, how to make these options apparent and explain core usage of each option it encapsulates.
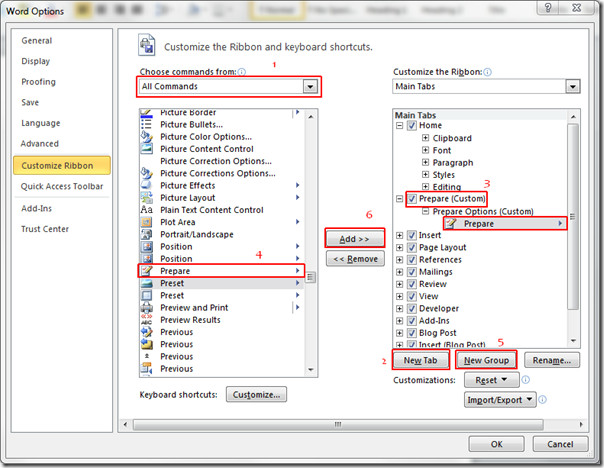
To start off with, we need to make the Prepare commands apparent in Word 2010, for this, launch Microsoft Word 2010, go to File menu, click Options, and in left pane click Customize Ribbon, in right pane select All Commands from Choose commands drop-down options and look for Prepare command. Now from left pane, hit New Tab, change it’s name to Prepare, and then click New Group to create group in the newly created tab, give it an appropriate name. Now click Add >> button to add Prepare command to newly created group. Click OK to close Word Options dialog.
You will see the newly created Prepare tab. Click Prepare drop-down button, for more options as seen in the screenshot below.
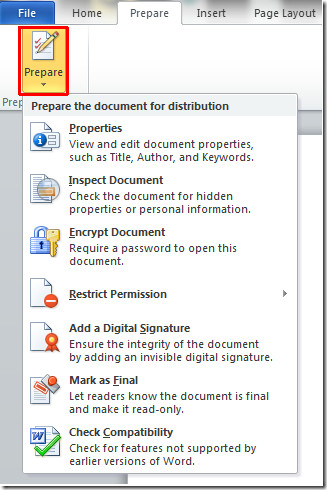
We will briefly discuss every option available in this drop-down menu.
Properties:
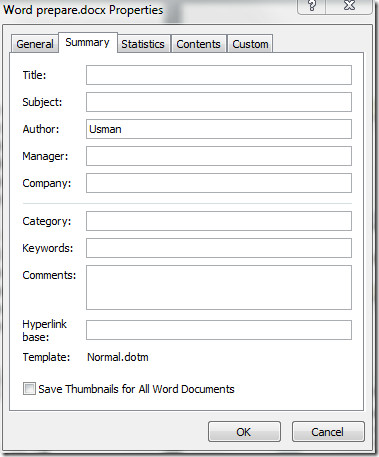
Click Properties for adding meta data, to describe your document in more detail. As seen in the screenshot below, you can add Author, Title, Subject, keywords, Category, Status, and Comments.

Click Document Properties for more options, hit Advance Properties to add more meta data to your document.
Inspect:
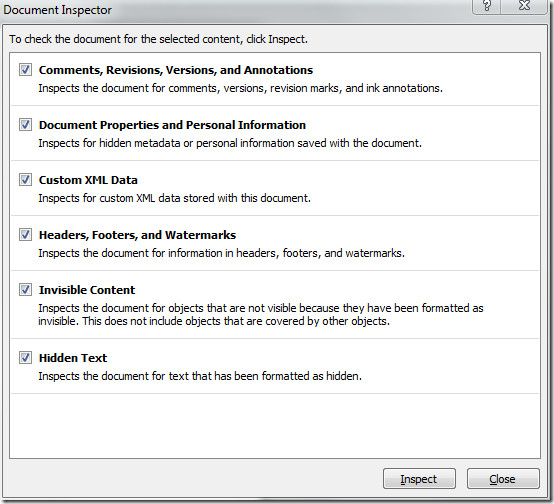
This feature lets you inspect the whole document by enabling different options. It makes sure that there is nothing hidden, that user will find out later, and checks if you have specified any metadata inside the document that you don’t want reader to know. It also checks for any invisible text, XML (eXtensible Markup Language) stored in document, Comments Headers, Footers, Watermarks, Revisions, Versions and Annotations.
Upon clicking Inspect Document, a dialog will appear, asking you the sort of content you want to inspect? If you are dealing with huge document than it might take some time to inspect it completely.
Encrypt Document:
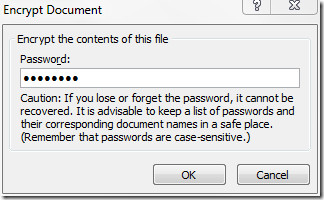
It enables user to protect document, you can enter password that keep your document from any unauthorized use, eventually mitigate the probable of any sort of external vulnerability. This password, if forgotten can never be recovered.
Restrict Permission:
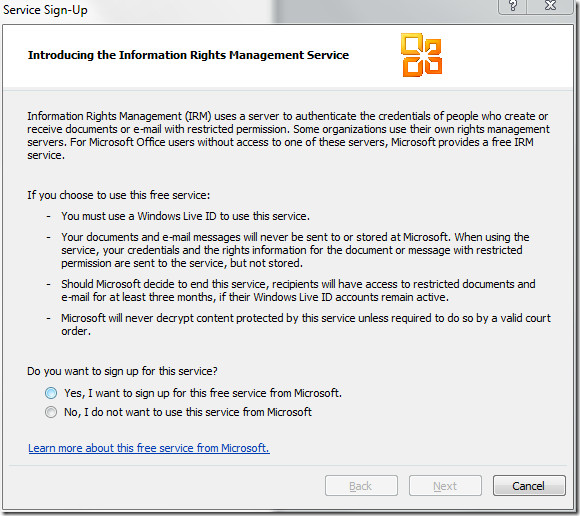
This option facilitates user to restrict the usage of document. You can grant specific rights to the users/readers of this document by restricting them to read it only, forbid printing, prevent any changes or saving the document by any other means.
This feature works in collaboration with RMS (Rights Management Services) for Windows by setting-up credentials first. However without RMS you can still define restrictions, by using trail version from Microsoft. If you are using it for the first time, you need to sign-up.
Add a Digital Signature:
As name implies, it is same as signing the document in traditional way. The slight change is that, it requires digits to mark your document as exclusive. it provides user to verify a document integrity and confidentiality, by digital signing the document, you can make your document more protected from any unauthenticated external use and theft, ultimately reduces the chance of any sort of plagiarism.
You can also make your own digital signature, but the verification process is not carried by any certified third-part or liaison, that’s why checking the authenticity of the document would be a bit difficult for the end-user, still you can verify it on your own computer. The better way to add digital signature is to get a digital ID from Microsoft partner.

Mark as Final:
This feature lets you mark the document as final version. By marking Final, it means that editing is complete, then it set the document to read-only and save the document, eventually disable the typing & editing commands, and proofing marks will be turned off.

Check Compatibility
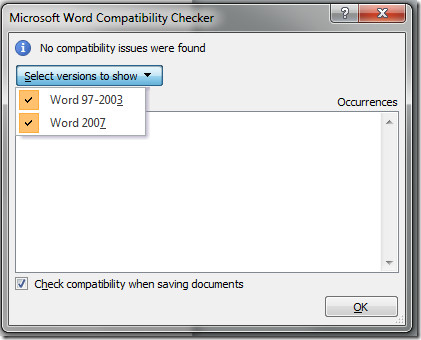
This feature enables user to check compatibility of the document with previous version of Microsoft Word. Through this option, you can see if your document will load properly on previous versions of Word.
You can also checkout our previously reviewed Remember and return to the last line edited in Word 2010 and Insert Audio In Word 2010.

Why is this not on Microsoft website?
Why did Microsoft bury this where it can not be found? Thanks for the help.
Most excellent ! MS own help should be so good…..
Hope to receive some assistance from you if I will have any quesitons.
Superb post ! I will save it in my favorites. thxx