1. Home
  2. Windows Tips
  3. 0x800705b4

How to Fix Error 0x800705b4 (Windows Update) – The Ultimate Guide

Microsoft strongly encourages users to regularly install system updates so that they can maintain the safety of their devices and fix various problems. Unfortunately, Windows Update doesn’t always work as expected. For instance, many users report getting error 0x800705b4, which prevents the updating component from doing its job.

fix 0x80240fff Windows Update error

Error 0x800705b4

Windows Update error 0x800705b4 usually signals a problem with Windows Defender, which means that you have to repair Microsoft’s antimalware solution to be be able to check for system updates. There are other possible problems, which we are exploring in detail below.

There are several approaches toward repairing this issue. However, before getting started, we strongly recommend creating a system restore point.

It allows you to undo all changes and start the troubleshooting process from ground up.

How to fix Windows Update error 0x800705b4

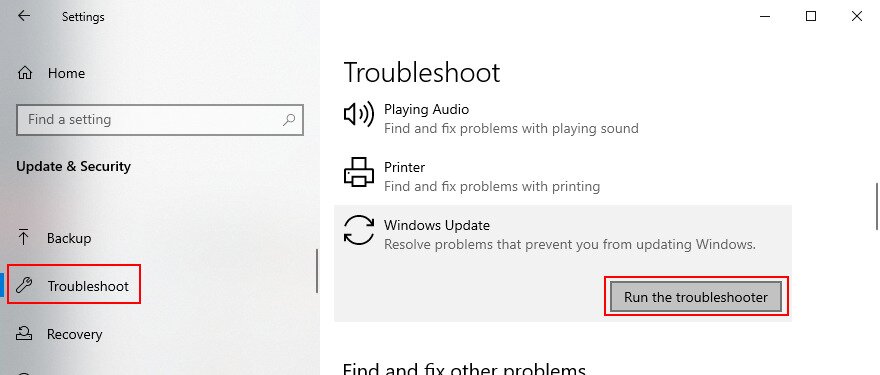
1. Run the Windows Update troubleshooter

You should get started with the simplest solution: using the Windows Update troubleshooter to fix common errors that prevent the system updating component from functioning normally. Here’s how you can use it:

  1. Click the Start button, type Troubleshoot settings, and press Enter
  2. Click Additional troubleshooters
  3. Select Windows Update and click Run the troubleshooterWindows 10 shows how to run the Windows Update troubleshooter
  4. Allow the troubleshooter to scan your PC and detect possible issues. If it finds any solutions, click Apply this fix
  5. Restart your computer
  6. Try to run Windows Update now

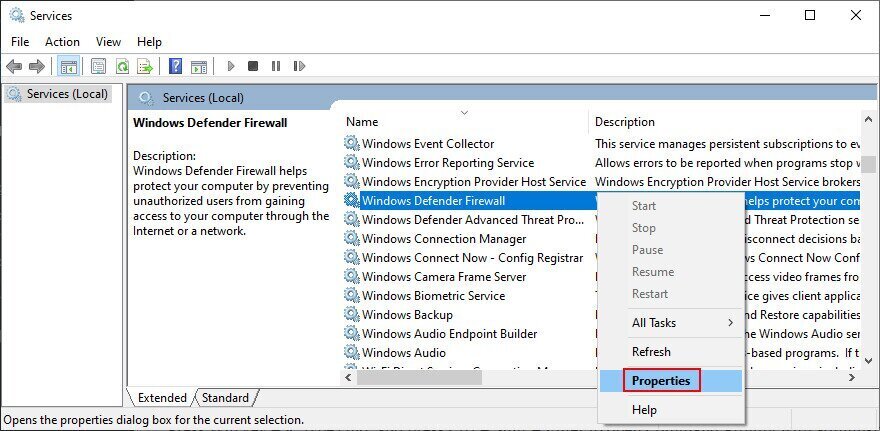
2. Check the Windows Defender Firewall service

Unless you have a third-party security application installed, the Windows Defender service should be running all the time, in order to protect your PC from malware. The easiest way to check this is by accessing the Services app. Here’s how:

  1. Type Win key + R, type services.msc, and press Enter to open Services
  2. Find and double-click Windows Defender Firewall to access its propertieshow to access Windows Defender Firewall properties
  3. Set Startup type to Automatic
  4. If Service status says Stopped, click the Start button
  5. Click Apply and exit

If the buttons are greyed out, you can use Command Prompt:

  1. Press Win key + R, type cmd, and press Ctrl + Shift + Enter to open Command Prompt with administrator rights
  2. Type these two commands (press Enter after each one):
    • netsh advfirewall set domainprofile state on
    • netsh advfirewall set domainprofile firewallpolicy blockinbound,allowoutbound
  3. Exit Command Prompt
  4. Restart your computer
  5. Try to use Windows Update

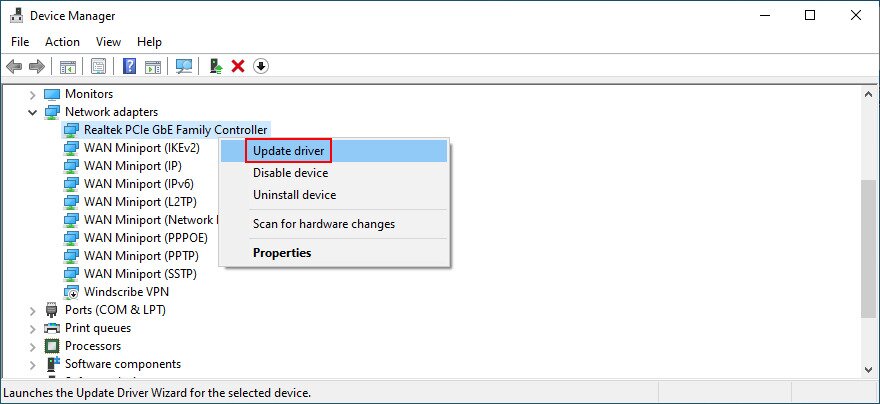
3. Update your drivers

If your device drivers are obsolete, your operating system will eventually fail to work properly. But you can fix this problem by updating all drivers. Here’s how to make it happen:

  1. Right-click the Start button and go to Device Manager
  2. Extend the device categories
  3. Right-click a device and select Update driver. If you’re unsure, we suggest selecting the network and display driversDevice Manager shows how to update network driver
  4. Click Search automatically for drivers and follow the instructions

If Windows doesn’t find newer drivers, you can go to the manufacturer website of each device to find, download, and manually install drivers. However, it can take a long time and you might accidentally install an unsupported driver.

A safer alternative is to turn to a driver updater. It’s the type of application that automatically identifies all old drivers installed on your computer and updates them after downloading newer versions from the web. Plus, it won’t get incompatible drivers.

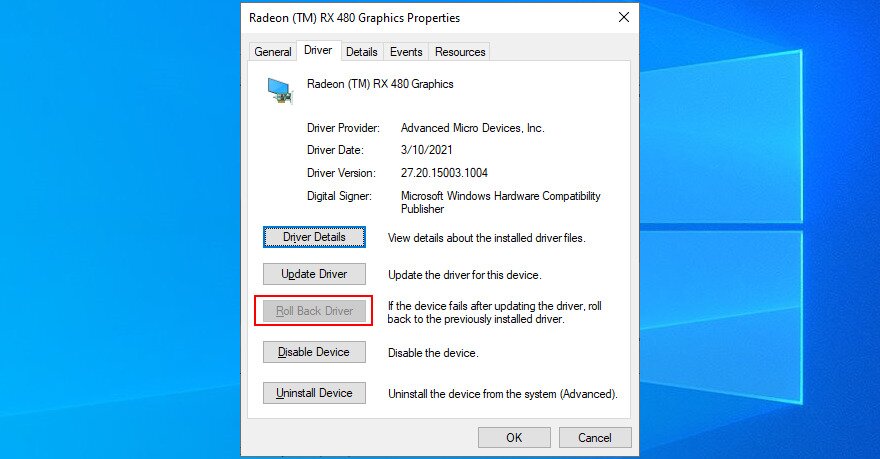
4. Roll back drivers

Incompatible device drivers end up hurting your computer because your devices won’t function anymore. The driver update option won’t work in this case. Instead, you should roll back the unsupported devices before performing an update. Here’s what you need to do:

  1. Click the Start button, search for Device Manager, and press Enter
  2. Right-click a device and go to Properties
  3. Select the Driver tab
  4. Click Roll Back Driver and follow the instructions. If you can’t click the button, it means that no previous driver exists on your PC, so you can’t go through with the rollbackThe Roll Back Driver button is greyed out in Device Manager

5. Uninstall third-party antivirus and firewall software

If you have third-party antivirus or firewall applications installed, they might clash with Windows Defender. It particularly applies to free tools that don’t fully support Windows 10 and its internal components. In this case, you should disable these programs before attempting to run Windows Update.

And, if that doesn’t do the trick, consider removing the software applications from your computer. For example, if you have two or more anti-malware programs set up, their real-time engines are probably not compatible. This eventually results in system stability issues and errors like 0x800705b4.

How to uninstall programs:

  1. Right-click the Start button and go to Apps and Features
  2. Search for the security app in the list
  3. Select the entry, click Uninstall, and then again to confirm
  4. Proceed with the uninstall wizard
  5. Restart your computer and try to run Windows Update now

The Windows 10 default uninstaller is good but not great. If you want a more thorough way to get rid of programs, check out software uninstallers. They are designed to remove not only a program but also any leftover files and registry entries.

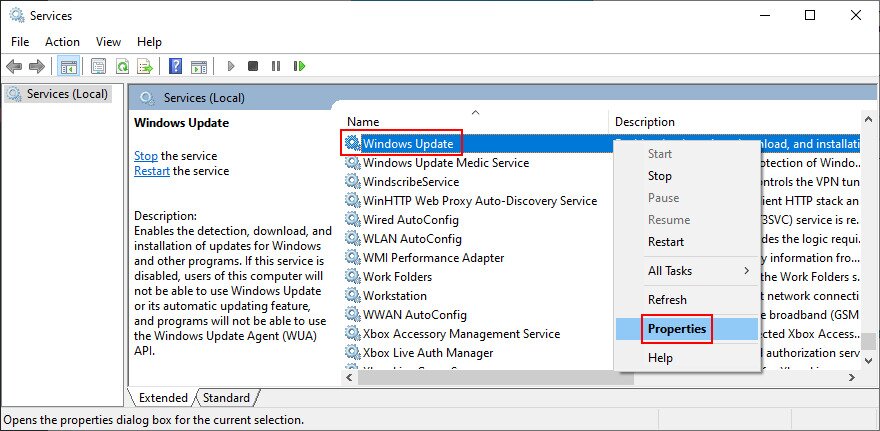
6. Check the Windows Update and other services

Under normal circumstances, the Windows Update service should start running on your computer automatically. However, if that doesn’t happen, you can expect various error codes such as 0x800705b4. Here’s how you can restart the Windows Update service and check its startup type:

  1. Press the Win key, search for Services, and launch this app
  2. Locate and double-click Windows Update to check out its propertiesWindows 10 shows how to access the Windows Update service properties
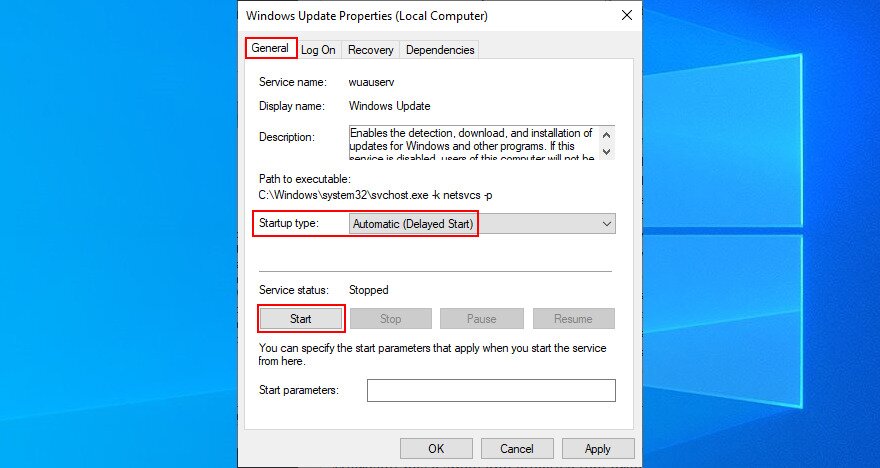
  3. Set Startup type to Automatic (Delayed Start)
  4. Click the Start button if the service is not currently running
  5. Click Apply and return to the main windowWindows 10 shows how to change the Windows Update service properties
  6. Locate the Background Intelligent Transfer Service and App Readiness to set the same options as aboveHow to access Background Intelligent Transfer Service properties
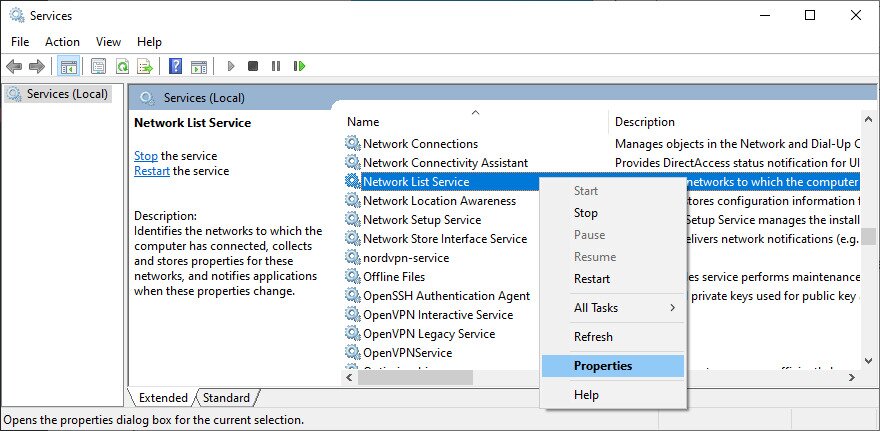
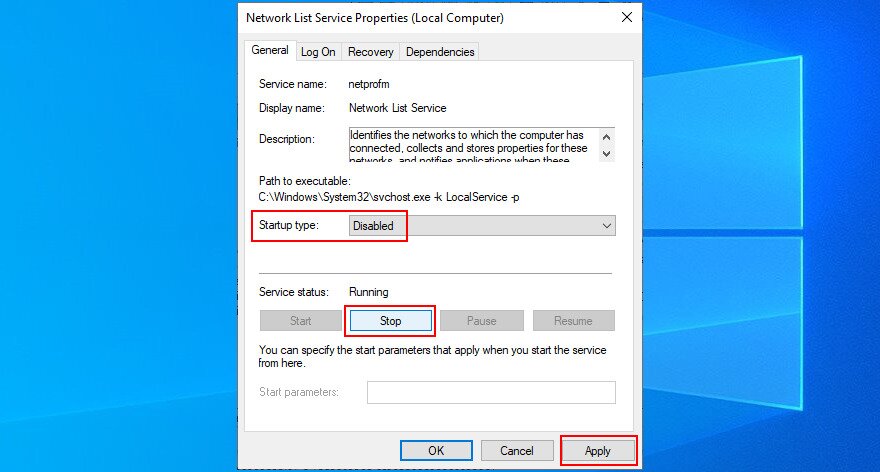
  7. Find and double-click Network List ServiceWindows shows how to access the network list service properties
  8. Set Startup type to Disabled
  9. Click Stop if the service is currently running
  10. Click Apply and exitWindows shows how to disable network list service
  11. Try checking for system updates now

7. Reset the Windows Update components

Perhaps Windows Update needs a jolt by refreshing its components and emptying its cache. You just need to access Command Prompt and enter the exact commands we listed below.

  1. Sign in to Windows 10 using an admin account
  2. Press Win key + R, type cmd, and press Enter
  3. Write the following commands and hit Enter after each one:
    • net stop wuauserv
    • net stop cryptSvc
    • net stop bits
    • net stop msiserver
    • ren C:\Windows\SoftwareDistribution SoftwareDistribution.old
    • ren C:\Windows\System32\catroot2 Catroot2.old
    • net start wuauserv
    • net start cryptSvc
    • net start bits
    • net start msiserver
  4. Reboot your machine and try to check for system updates

8. Start Windows 10 in Safe Mode

You can start Windows 10 in Safe Mode to create a secure environment by turning off any services, processes and drivers that your operating system doesn’t need to work properly. Then, you can try to run Windows Update in Safe Mode to see if it works. Here’s what you need to do:

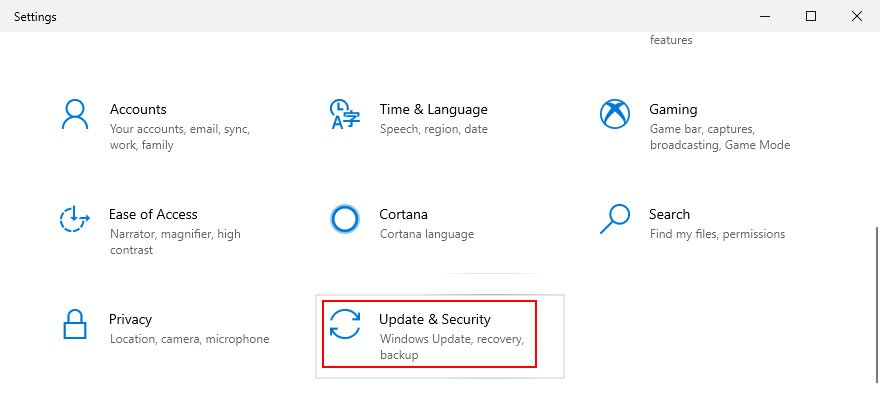
  1. Right-click the Start button and select Settings
  2. Click Update & SecurityWindows 10 shows how to access the Update and Security settings
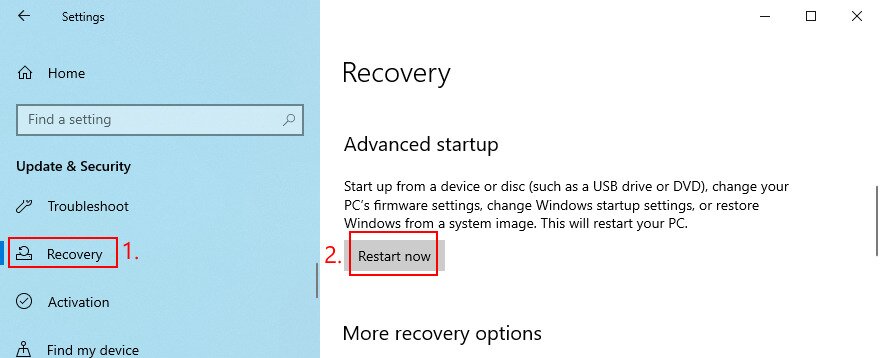
  3. Jump to the Recovery section
  4. At Advanced startup, click Restart nowWindows 10 shows how to restart in Advanced Startup mode
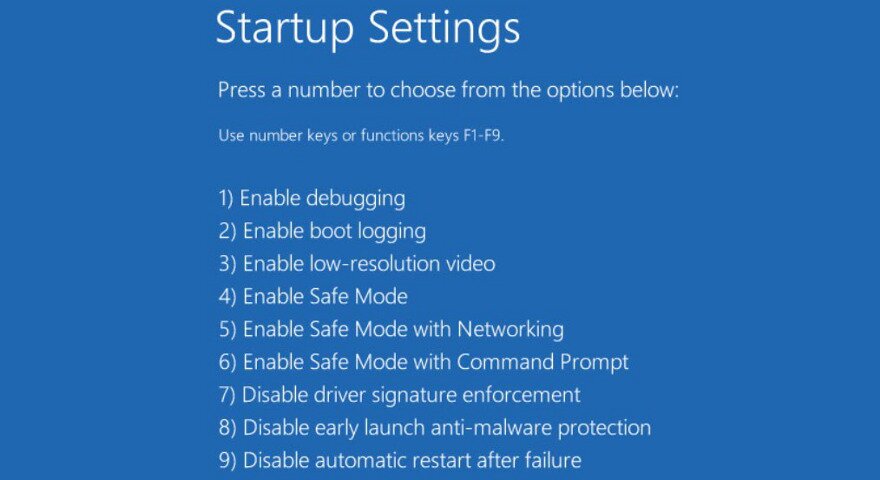
  5. Windows will boot in troubleshooting mode. Go to Troubleshoot > Advanced options > Startup SettingsWindows 10 shows the advanced startup options
  6. Click Restart
  7. Press F5 to enable Safe Mode with networkingWindows 10 shows more startup settings
  8. After the OS starts, try to run Windows Update
  9. If the update is successful, restart your PC as normal to exit Safe Mode

9. Run a clean boot

It’s possible that Windows Update is hampered not only by services, processes and drivers, but also by startup applications. For example, it could happen if you have a third-party antivirus solution that’s scheduled to run every time you turn on your computer. But you can run a clean Windows 10 boot:

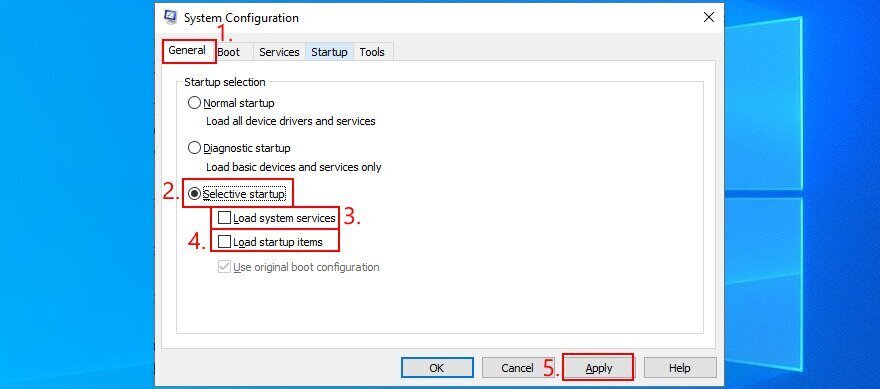
  1. Press Win key + R, type msconfig, and hit Enter to open the System Configuration app
  2. In the General tab, choose Selective startup
  3. Disable Load system services and Load startup items
  4. Click Apply and exitWindows shows how to configure selective startup in System Configuration
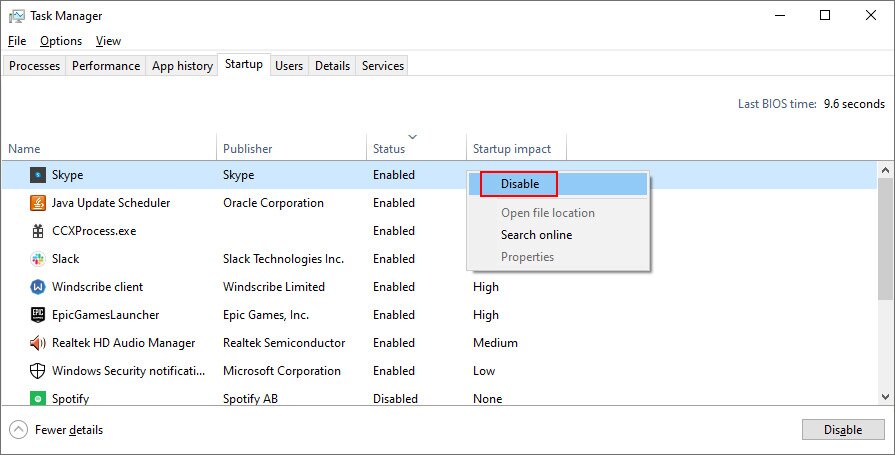
  5. Press Ctrl + Shift + Esc to open Task Manager
  6. Switch to the Startup tab
  7. Disable all programs with the Enabled statusWindows 10 shows how to disable startup processes
  8. Restart your computer
  9. Try to run Windows Update
  10. If it works, restart your PC after the updates
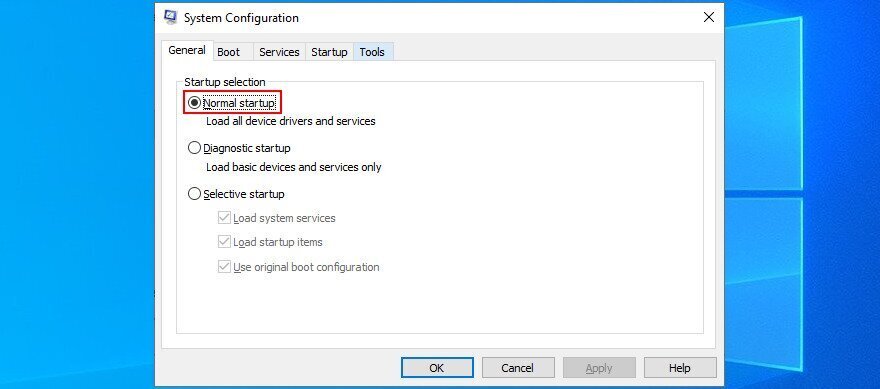
  11. Open System Configuration
  12. Select Normal startup, click Apply, and exit to the desktopWindows shows how to set normal startup mode in System Configuration

10. Restore firewall settings to default

If you have tinkered with the Windows Defender Firewall settings, you might have unknowingly restricted the Internet access of critical files that Windows 10 needs in order to perform updates. It can be challenging to undo one setting at a time, but a simpler solution is to restore everything to default. Here’s how:

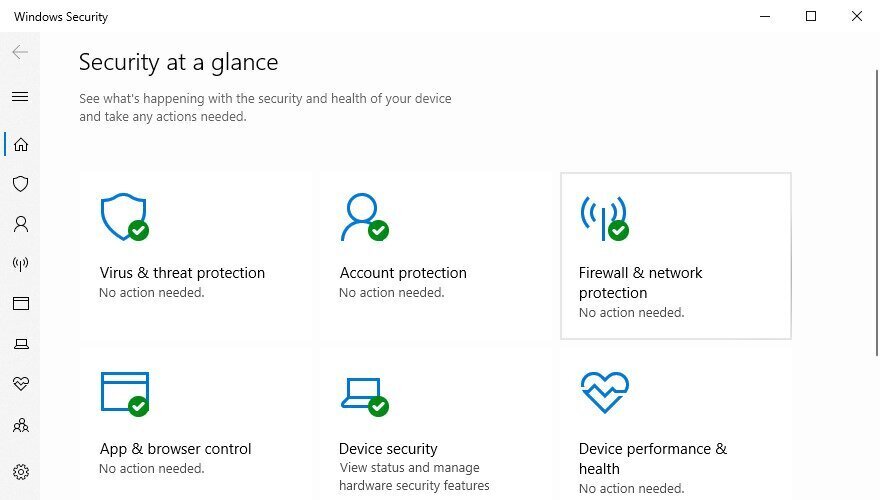
  1. Click the Start button, type Windows Security, and open this app
  2. Select Firewall & network protectionhow to access Firewall and Network Protection from Windows Security
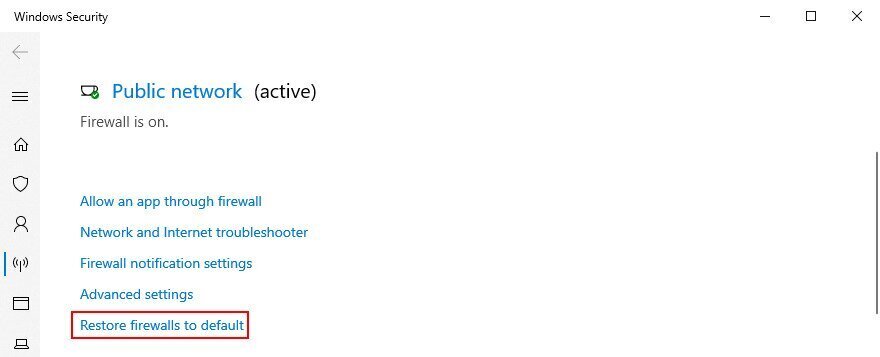
  3. Scroll down to the bottom of the window and click Restore firewalls to defaultWindows Security shows how to restore firewalls to default
  4. Click Restore defaults and Yes to confirm
  5. Try downloading system updates now

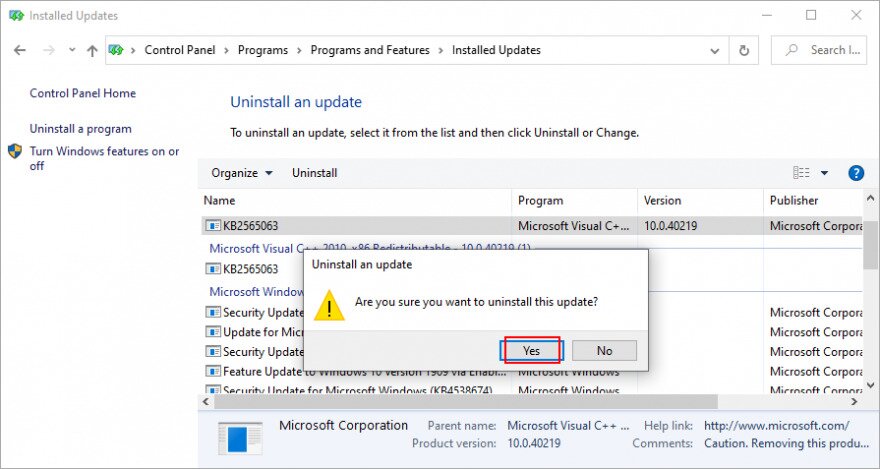
11. Uninstall system updates

It might sound absurd that a system update released by Microsoft could corrupt the very feature used by Windows 10 to check for updates. But it can happen since many system updates are unpredictable. Thankfully, you can resolve this matter by removing the most recent Windows update from your PC.

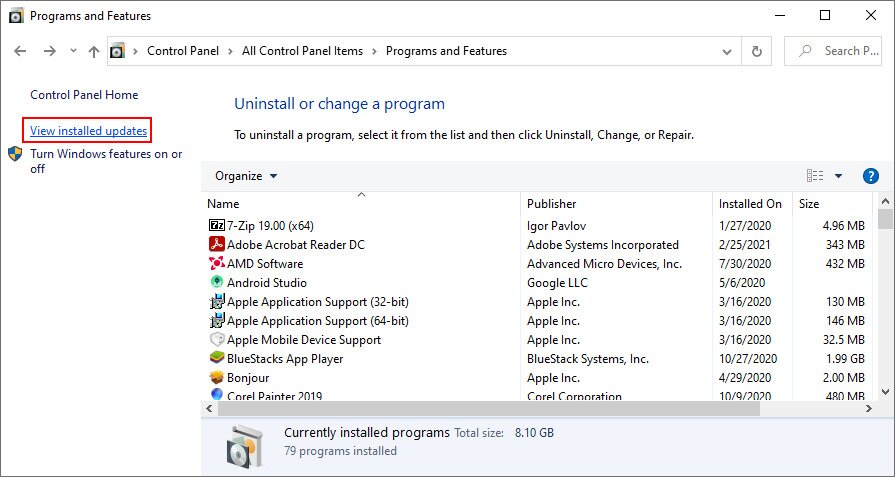
  1. Press Windows key + R, type appwiz.cpl, and hit EnterWindows 10 shows how to run appwiz.cpl
  2. Click View installed updates on the left sideWindows 10 shows how to view installed Windows updates
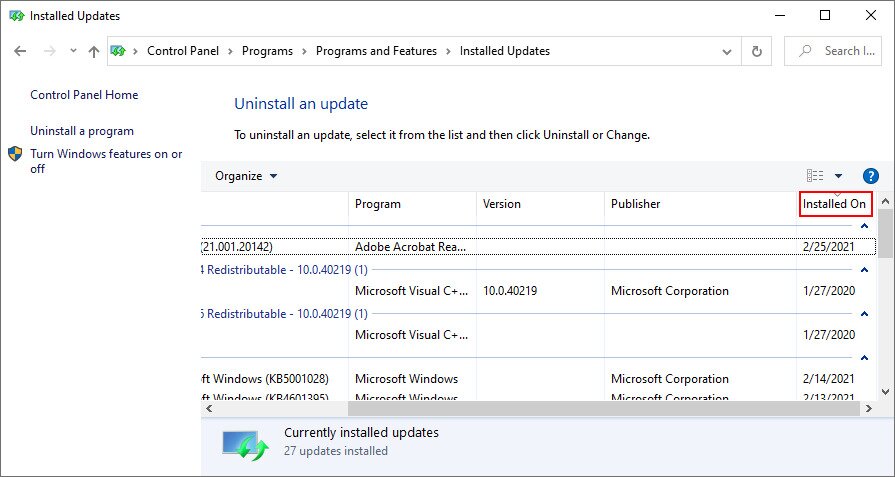
  3. Click the Installed On column to sort the updates (newest first)Windows 10 shows how to sort installed Windows Updates by date
  4. In the Microsoft Windows group, double-click the first update
  5. Click Yes to confirm and follow any further instructionsWindows 10 shows how to confirm Windows updates removal
  6. Restart your PC and check for updates
  7. If it works, make sure to not download the same update again

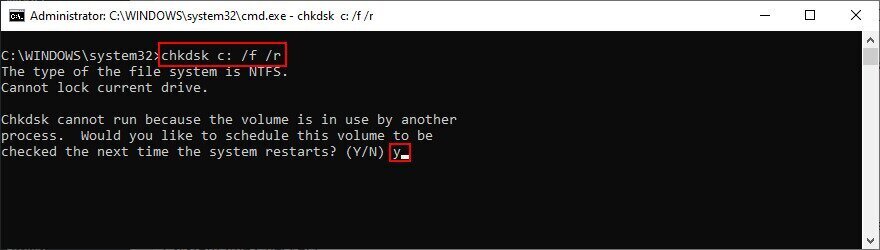
12. Fix hard disk errors

If your HDD or SSD has corrupt files or bad sectors, this could cause Windows Update functionality problems, leading to error code 0x800705b4. However, you can resort to CHKDSK (Check Disk) for help.

How to use CHKDSK:

  1. Press Win key + R, type cmd, and press Ctrl + Shift + Enter to run Command Prompt with elevation rights (click Yes if asked by User Account Control to confirm)
  2. If Windows is installed on the default C: partition, run chkdsk c: /f /r. Else, make sure to use the correct drive letter instead of c:Windows shows how to run chkdsk c: /f /r
  3. When you’re asked to schedule the checkup at the next system startup, type y and press Enter
  4. Restart your computer. CHKDSK will check the disk and fix any errors

13. Repair corrupt system files

If CHKDSK doesn’t work, it’s likely because your operating system has corrupt files, which you can resolve with the help of SFC (System File Checker).

How to use SFC:

  1. Click the Start button, search for Command Prompt, and click Run as administrator
  2. Run sfc /scannow and wait until SFC does its jobWindows shows how to run the sfc scannow command in CMD
  3. Restart your PC and try Windows Update

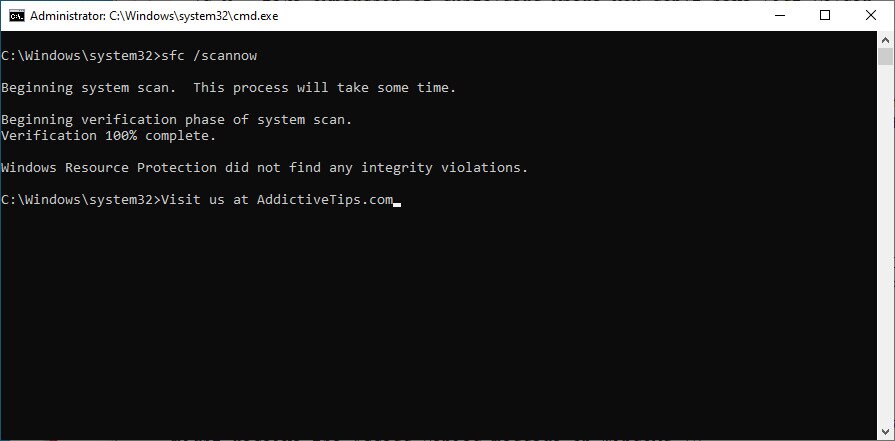
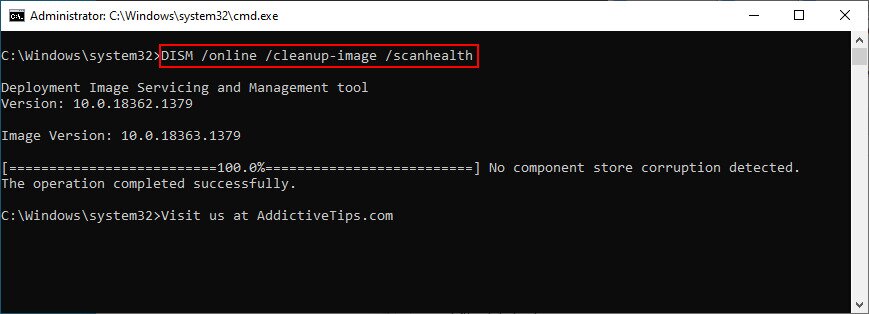
If SFC doesn’t show any problems, you can use DISM to check the component store of the OS image.

How to use DISM:

  1. Launch an elevated instance of Command Prompt
  2. Run DISM /online /cleanup-image /scanhealthWindows 10 shows how to run DISM /online /cleanup-image /scanhealth in CMD
  3. If DISM finds any problems, fix them by entering DISM /online /cleanup-image /restorehealth
  4. After DISM finishes its job, restart your PC
  5. Relaunch Command Prompt as admin
  6. Run sfc /scannow and wait
  7. Restart your PC one last time and try Windows Update now

14. Check your PC for malware

It’s a good idea to run a virus scan on your PC and remove any malicious threats using Windows Defender:

  1. Press the Windows key, search for Windows Security, and hit Enter
  2. Select Virus & threat protectionWindows 10 shows how to select Virus and Threat Protection
  3. Click Scan optionsWindows 10 shows how to access Windows Defender scan options
  4. Choose Quick scan and click Scan nowWindows 10 shows how to run a Quick Scan using Windows Defender
  5. If the scan results don’t show anything suspicious, run a new scan after selecting Windows Defender Offline scan modeWindows 10 shows how to perform a Windows Defender offline scan
  6. Allow Defender to quarantine or remove any infected files. If you think some of the alerts are false positives, make sure to add those files to a whitelist in order to exclude them from further scans
  7. Reboot your computer
  8. Check if you can use Windows Update now

15. Run Windows Update Diagnostic

Published by Microsoft, Windows Update Diagnostic is a tool you can download and consult to find and repair additional Windows Update problems that aren’t already covered by the integrated Windows Update troubleshooter. Here’s how you can use it:

  1. Log in to Windows 10 using an administrator account
  2. Download Windows Update Diagnostic from the official website
  3. Fire up the applicationThe graphical interface of the Windows Update Diagnostic utility
  4. Pick Windows Update and click Next. Follow the given instructions
  5. Once the wizard completes, restart the app
  6. Select Windows Network Diagnostics and click Next
  7. Restart your PC and try to download system updates

16. Verify Group Policy settings

Windows Update needs Group Policy options to be configured in a certain way. Otherwise, you can wake up with errors like 0x800705b4 when trying to download and install system updates. Here’s what you need to do in this case:

  1. Press Win key + R, type gpedit.msc, and press Enter
  2. In Local Group Policy Editor, visit Computer Configuration > Administrative Templates > Windows Components > Windows Update
  3. Right-click Configure Automatic Updates and select PropertiesWindows 10 shows how to configure automatic updates
  4. Choose Enabled and click Apply
  5. Restart your computer

17. Remove external devices

If you started getting Windows Update errors after attaching a new piece of hardware to your computer, that might be the culprit. Some devices don’t fully support Windows 10 computers, even those with plug-and-play features. So you can expect system stability problems because of this, even a failure to check for system updates.

To test this theory and fix the problem at the same time, just unplug any new devices you attached to your PC lately, like a USB flash drive, a webcam adapter, or a Wi-Fi dongle. Then, restart your computer and try to run Windows Update.

18. Check the disk space

Insufficient disk space can lead to all sorts of computer problems because Windows doesn’t have enough room to download files and run processes. You should check the Windows 10 notifications center for any messages concerning low disk space. In this case, you can use a partition manager like Disk Management to increase the Windows drive capacity.

How to use Disk Management:

  1. Click the Start button, type Disk Management, and open this app
  2. Pick a big partition that doesn’t contain Windows
  3. Right-click this drive and select Shrink VolumeWindows shows how to shrink a volume using Disk Management
  4. Specify the new volume size by removing a considerable amount (at least 1GB) and click ShrinkWindows shows how to set the shrink size in Disk Management
  5. Shift your attention to the Windows partition. Right-click the drive and select Extend volume
  6. Set the volume size by adding all the available disk space. Click Extend
  7. Restart your computer

An alternative solution is to remove existing files from the Windows drive, in order to make room for system updates. Try moving files to other partitions or even a removable storage device. Furthermore, you can uninstall large and unused applications and games, upload important files to a storage account, or burn DVDs.

If you still don’t have enough disk space on the Windows drive after going through all this trouble, use a system cleaner like Disk Cleanup to get rid of all junk data that unnecessarily occupies your disk space.

How to use Disk Cleanup:

  1. Before getting started, visit Downloads and Recycle Bin. Make sure to save or restore any files you might need later since these folders will be cleared
  2. Click the Start button, search for Control Panel, and open this app
  3. Click Administrative ToolsWindows shows how to access Administrative Tools from Control Panel
  4. Open the Disk Cleanup utilityWindows shows how to access Disk Cleanup from Administrative Tools
  5. Select the C: drive or where you have Windows installed
  6. At Files to delete, select everything and click Clean up system filesWindows 10 shows how to select files for Disk Cleanup
  7. Once the file scan is over, pick all items again and press OKWindows 10 shows how to select files for Disk Cleanup
  8. Reboot your machine

19. Fix registry settings

Windows Update error 0x800705b4 could be caused by incorrect registry settings, where a registry cleaner can’t help. Here’s how you can fix them:

  1. Press Win key + R, type regedit, and press Enter to open Registry Editor. Click Yes if prompted by User Account Control
  2. Open the File menu and click ExportHow to create a registry backup
  3. Set a name and destination to save a registry backup file
  4. Click Save
  5. Visit the following address in Registry Editor:
    Computer\HKEY_LOCAL_MACHINE\SOFTWARE\Microsoft\Windows\CurrentVersion\WindowsUpdate\Auto Update
  6. If the EnableFeaturedSoftware entry exists, make sure that Data is set to 0x00000001 (1). Else, perform the following actions:Registry Editor shows the EnableFeaturedSoftware entry
    • Double-click the EnableFeaturedSoftware entry
    • Set Value data to 1
    • Set Base to Hexadecimal
    • Click OK
  7. If the EnableFeaturedSoftware entry is not there:
    • Open the Edit menu
    • Choose New > DWORD (32-bit) Value
    • Set the EnableFeaturedSoftware name and double-click it to access properties
    • Set Value data to 1
    • Set Base to Hexadecimal
    • Click OK
  8. Now, visit this location in Registry Editor:
    HKEY_LOCAL_MACHINE\SOFTWARE\Microsoft\WindowsUpdate\UX

    • Double-click the IsConvergedUpdateStackEnabled
    • Set Value data to 0
    • Set Base to Hexadecimal
    • Click OK
  1. Check out this address next:
    HKEY_LOCAL_MACHINE\SOFTWARE\Microsoft\WindowsUpdate\UX\Settings

    • Double-click UxOption
    • Set Value data to 0
    • Set Base to Hexadecimal
    • Click OK
  2. Lastly, go here:
    HKEY_LOCAL_MACHINE\SOFTWARE\Policies\Microsoft\SystemCertificates

  3. If CopyFileBufferedSynchronousIo exists, check that its Data is set to 0x00000001 (1). Else, double-click the entry:
    • Set Value data to 1
    • Set Base to Hexadecimal
    • Click OK
  4. If CopyFileBufferedSynchronousIo doesn’t exist:
    • Open the Edit menu
    • Choose New > DWORD (32-bit) Value
    • Set the CopyFileBufferedSynchronousIo name
    • Set Value data to 1
    • Set Base to Hexadecimal
    • Click OK
  5. Exit Registry Editor and restart your PC

20. Check your Internet connection

If your Internet connection is unstable, it could prevent Windows Update from functioning correctly, resulting in error 0x800705b4. Here are some suggestions to fix your Internet connection and improve its speed:

  • Use the Internet Connections troubleshooter
  • Flush your DNS servers
  • Change your DNS servers
  • Reboot your router
  • Connect to a 5Ghz wireless network
  • Switch from wireless to wired mode
  • Terminate all applications with Internet access
  • Check your VPN or proxy settings
  • Run an Internet speed test

21. Use System Restore

If you can’t find the source of the problem, consider rolling back Windows 10 to a restore point that was recorded before you started experiencing Windows Update issues. However, it means that all applications installed after the restore point was taken will no longer exist on your PC, so you will have to reinstall them.

How to roll back Windows 10:

  1. Press the Win key, type Control Panel, and launch this app
  2. Go to the Recovery areaWindows 10 shows how to access Recovery from Control Panel
  3. Choose a restore point or explore more by clicking Show more restore points. After selecting a checkpoint, you can click Scan for affected programs to see which applications you will have to reinstallWindows 10 shows a couple of system restore points
  4. Click Next and proceed with the wizard steps
  5. Your PC will restart to complete the restore

22. Reset Windows 10

Unfortunately, System Restore often fails to work, throwing various errors on the screen. When that happens, you can reset Windows 10 to the factory options, which is usually a foolproof solution. You can keep your personal files on the PC, so you don’t need to perform backups. However, all applications will be uninstalled and you will have to configure all your computer preferences.

How to reset Windows 10:

  1. Right-click the Windows 10 Start button and go to Settings
  2. Select Update & Security > RecoveryWindows 10 shows how to access the Update and Security settings
  3. Click Get started below Reset this PCWindows 10 shows how to reset this PC
  4. Choose Keep my files and follow the remaining instructionsWindows 10 shows the PC reset options

Windows Update error 0x800705b4 can be fixed

In conclusion, if you get error 0x800705b4 when trying to check for system updates, it usually signals a problem with Windows Defender. However, it can indicate other problems, as well.

Get started by running the Windows Update troubleshooter, checking the Windows Defender Firewall service, updating your old drivers or rolling back any incompatible drivers, uninstalling third-party antivirus and firewall software, as well as by checking the Windows Update and other services.

You can reset the Windows Update components, start Windows 10 in Safe Mode, run a clean system boot, reset firewall options to default, uninstall malfunctioning system updates, fix hard disk errors and damaged system files, run a malware scan, use the Windows Update Diagnostic tool, and check Group Policy settings.

It’s also a good idea to unplug peripheral devices, add more disk space or remove existing files, fix Windows Update registry settings, check the quality of your Internet connection and make it faster, or roll back Windows 10 to a stable point when Windows Update still worked. If everything fails, you can reset Windows 10 while keeping your personal files.

How did you fix Windows Update error code 0x800705b4? Did you use a solution that’s not listed here? Let us know in the comments below.

Leave a Reply

Your email address will not be published. Required fields are marked *

This site uses Akismet to reduce spam. Learn how your comment data is processed.