Are You Experiencing 0x80080005 Windows Update Error? (FIXED)
0x80080005 is an error code reported by many users when trying to run Windows Update. It prevents your operating system from downloading and applying the latest updates, which could cause serious issues on the long term.
For example, you might have trouble updating Microsoft Store apps without the latest system updates. The error can be triggered by a software or hardware error. It usually has to do with your computer or network connection settings, which means that you should be able to easily solve them using the solutions below.
How to fix Windows 10 update error 0x80080005
Before starting the troubleshooting process, make sure to create a system restore point on your PC. If you encounter additional problems along the way, you can undo them by rolling back Windows 10 to the restore point.
Furthermore, you should try running Windows Update to confirm the error:
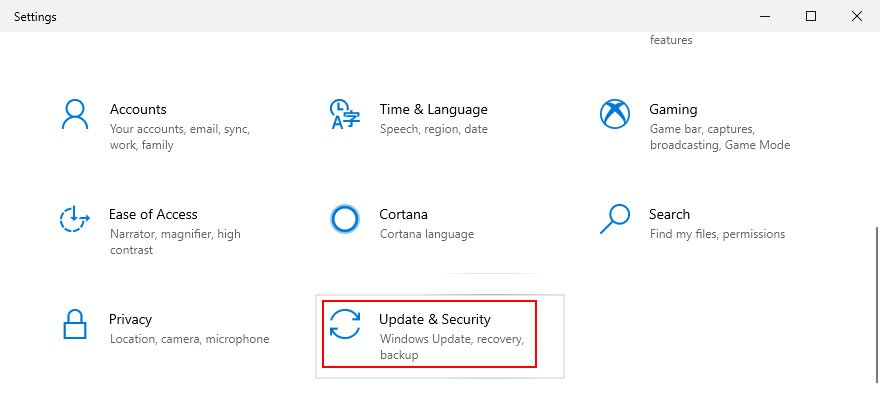
- Right-click the Start button and go to Settings

- Select Update & Security

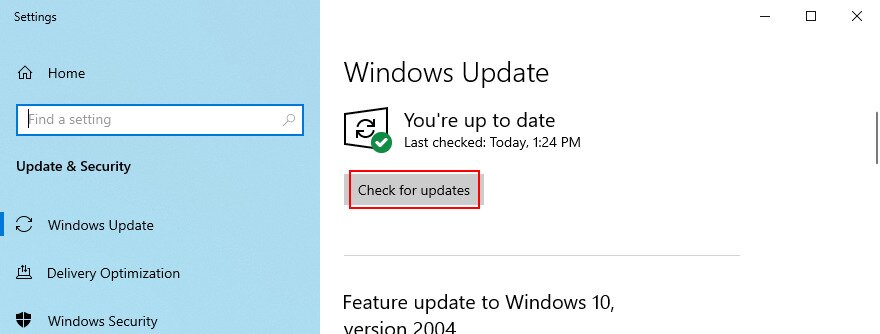
- Click Windows Update on the left side
- Click Check for updates


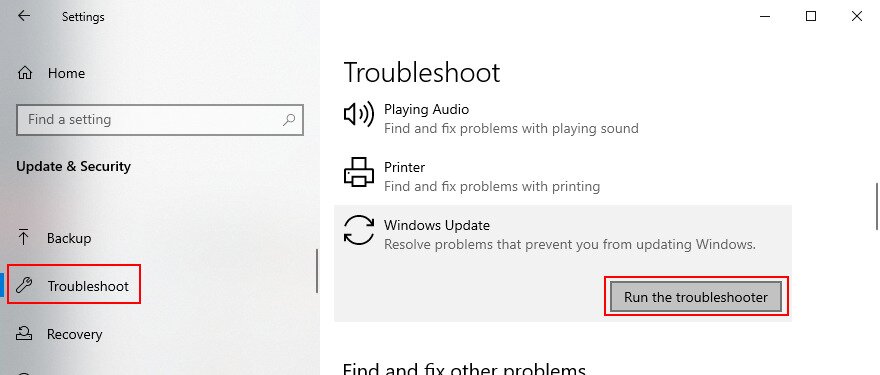
1. Run the Windows Update troubleshooter
You can start with an easy solution: use the Windows Update troubleshooter. It’s designed to identify and repair common problems that prevent your operating system from getting updated. Here’s how to use it:
- Click the Start button, search for Settings, and open this app
- Go to Update & Security
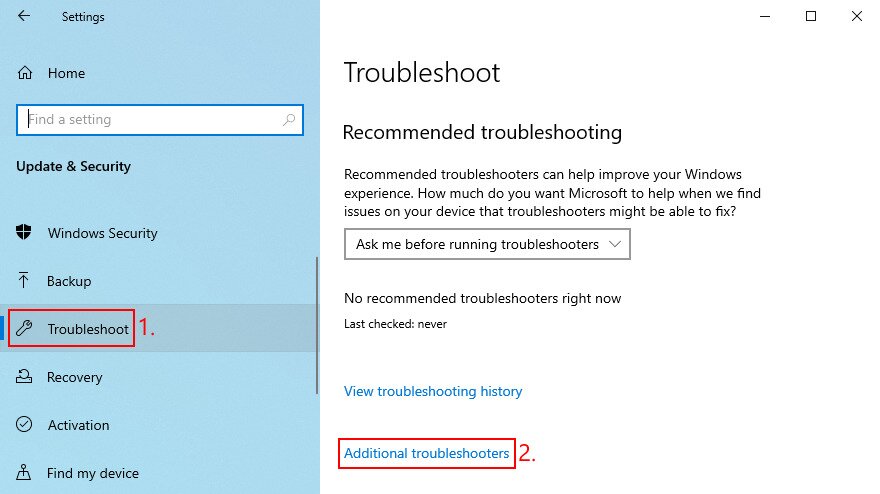
- Jump to Troubleshoot on the left side
- Click Additional troubleshooters

- Select Windows Update and click Run the troubleshooter

- Follow the wizard steps and apply any fixes
- Restart your PC and try to run Windows Update now
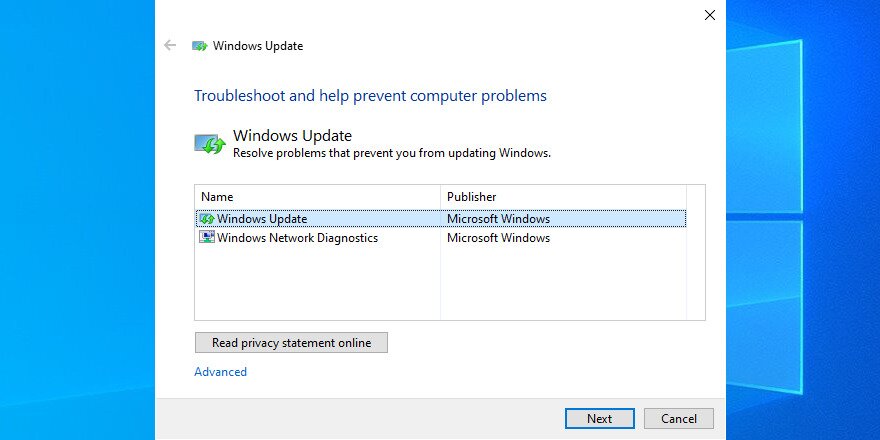
2. Use Windows Update Diagnostic
If the built-in troubleshooter didn’t do the trick, you can turn to Windows Update Diagnostic. It’s a tool made by Microsoft to diagnose and repair Windows Update problems, which must be separately installed. Here’s how to use it:
- Make sure to sign in to Windows 10 with an administrator account
- Download Windows Update Diagnostic from the official website
- Launch the app
- In the wizard, select Windows Update and click Next

- Follow the step-by-step instructions
- When it finishes, relaunch Windows Update Diagnostic
- Select Windows Network Diagnostics and click Next
- After the wizard applies fixes, restart your PC
- Try to run Windows Update now
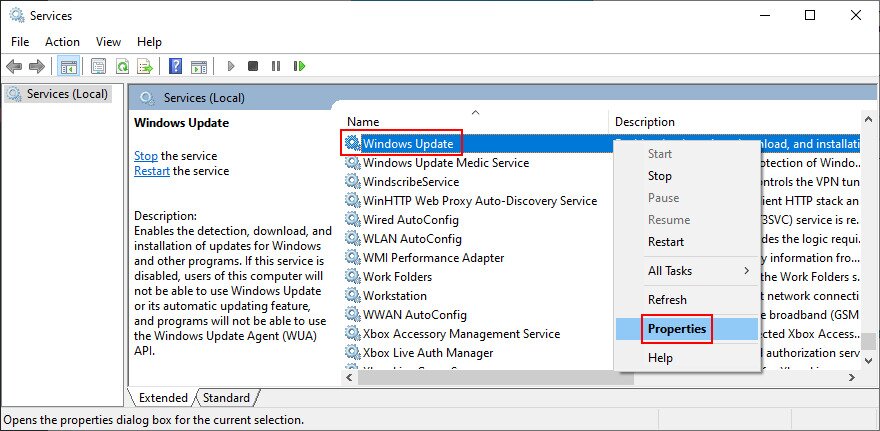
3. Restart the Windows Update service
Windows Update is controlled by a service that should automatically start at system boot and run at all times. If, for some reason, that doesn’t happen, then you can expect error codes like 0x80080005. Thankfully, you can easily fix this issue:
- Click the Start button, search for Services, and launch this app
- Find and double-click Windows Update to view its properties

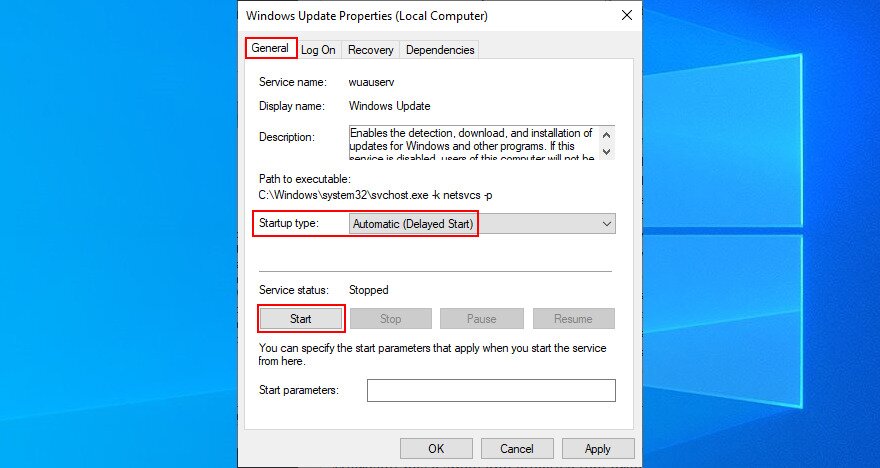
- Stay in the General tab
- Set Startup type to Automatic (Delayed Start)
- If the service is stopped, click the Start button
- Click Apply to commit changes and exit to the Services main window

- Find Background Intelligent Transfer Service and App Readiness to perform the same actions

- Try to run Windows Update

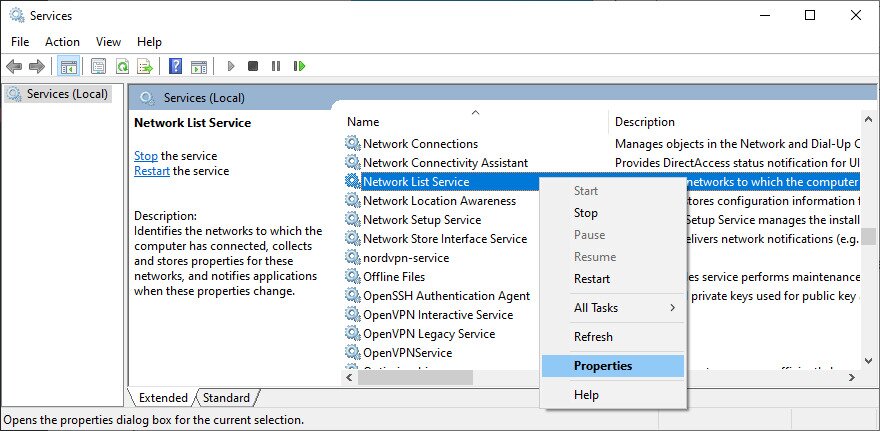
4. Disable Network List Service
Network List Service is required, but some users report that it causes Windows Update issues that led to error 0x80080005. Here’s how to turn it off:
- Press Win key + R, type services.msc, and press Enter

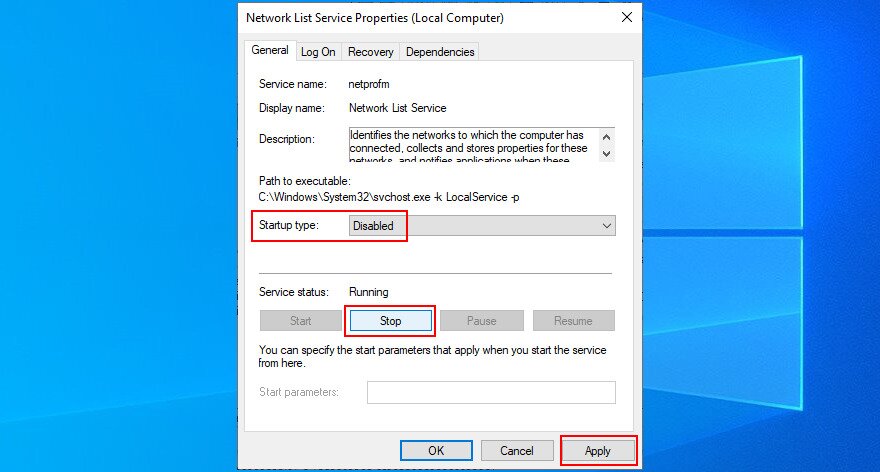
- Locate and double-click Network List Service

- Set Startup type to Disabled

- If the service is running, click Stop
- Click Apply and exit
- Try running Windows Update now

5. Check Group Policy settings
It’s possible that Windows Update error code 0x80080005 was triggered by incorrect settings in Group Policy. Here’s how to check and fix this issue:
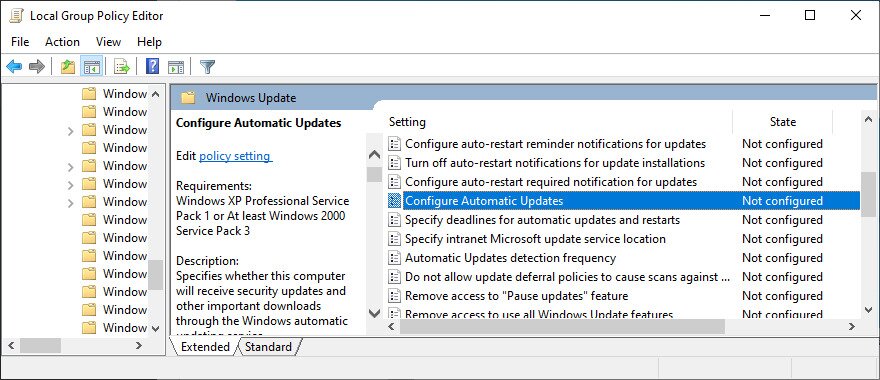
- Press Win key + R, type gpedit.msc, and press Enter to open Local Group Policy Editor

- Go to Computer Configuration > Administrative Templates > Windows Components > Windows Update
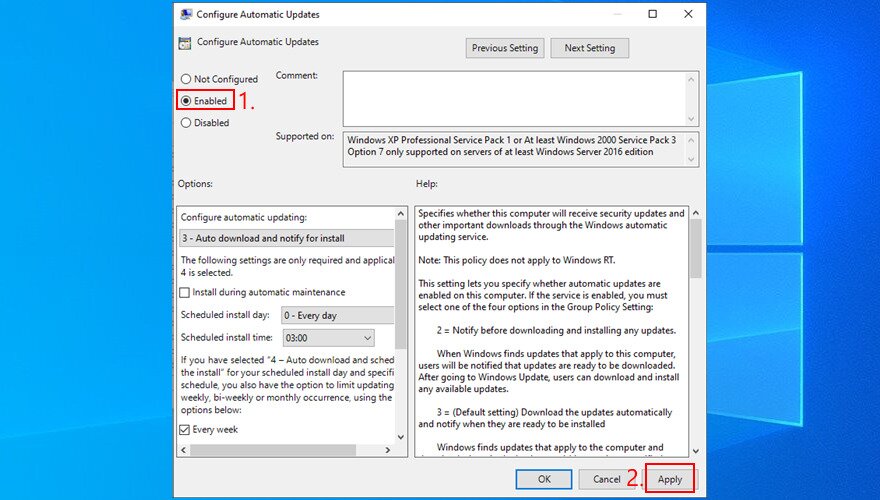
- Locate and double-click Configure Automatic Updates to view its properties

- Select Enabled and click Apply

- Reboot your PC
- Try running Windows Update

6. Reset Windows Update
You can quickly reset the Windows Update components to clear the cache and fix common problems that could lead to error 0x80080005. To make this happen, you just have to use Command Prompt. Here’s what you should do:
- Make sure to log in to Windows 10 with elevation rights
- Click the Start button, search for Command Prompt, and hit Enter
- Copy and paste the next commands (press Enter after each line of text):
-
net stop wuauserv
-
net stop cryptSvc
-
net stop bits
-
net stop msiserver
-
ren C:\Windows\SoftwareDistribution SoftwareDistribution.old
-
ren C:\Windows\System32\catroot2 Catroot2.old
-
net start wuauserv
-
net start cryptSvc
-
net start bits
-
net start msiserver
-
- Exit Command Prompt and restart your PC
- Try to run Windows Update
7. Unplug all peripheral devices
Any external devices that you recently plugged into your computer could have caused error code 0x80080005 due to compatibility or driver issues. Think about any new pieces of hardware you purchased or received as a gift, such as USB pen drives, Wi-Fi adapters, or webcams with plug-and-play features.
To handle this matter, shut down your computer and unplug all peripheral devices, except for your keyboard and mouse. Then, boot the operating system and run Windows Update to confirm that you’re not getting the error anymore.
You have two options at this point: replug all devices and detach them whenever you need to run Windows Update, or single out the guilty piece of equipment to either fix it or stop using it.
8. Run a clean boot
A clean Windows 10 boot means turning off all unnecessary components that may cause software problems, such as drivers, services, and processes. It can help you rule out issues that led to Windows Update error 0x80080005. Here’s what you need to do:
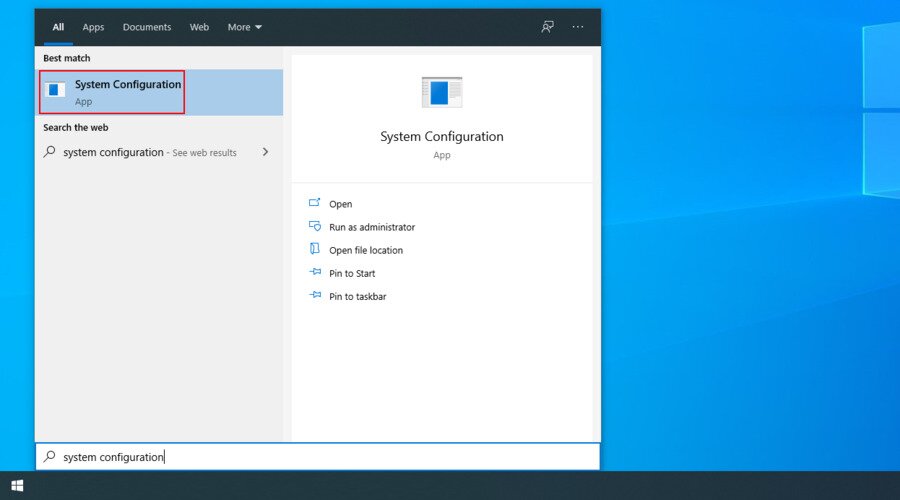
- Press the Windows key, search for System Configuration, and hit Enter

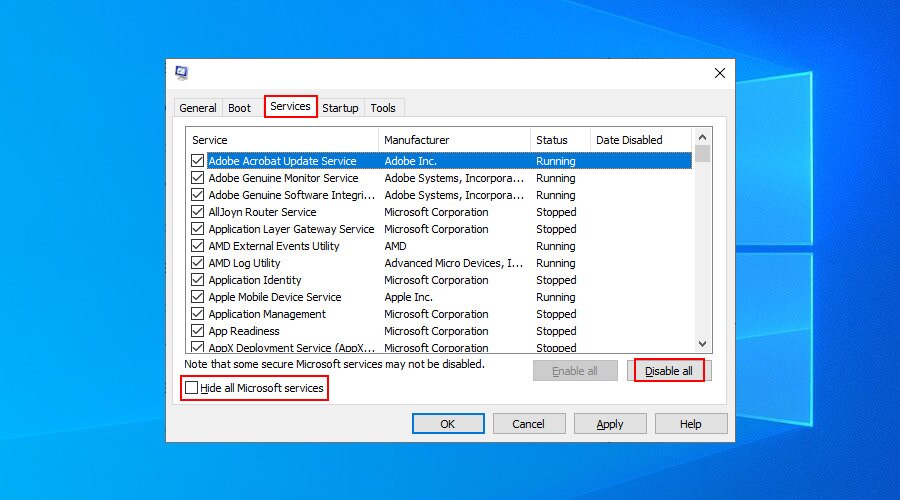
- Switch to the Services tab
- Uncheck Hide all Microsoft services and click Disable all

- Exit System Configuration
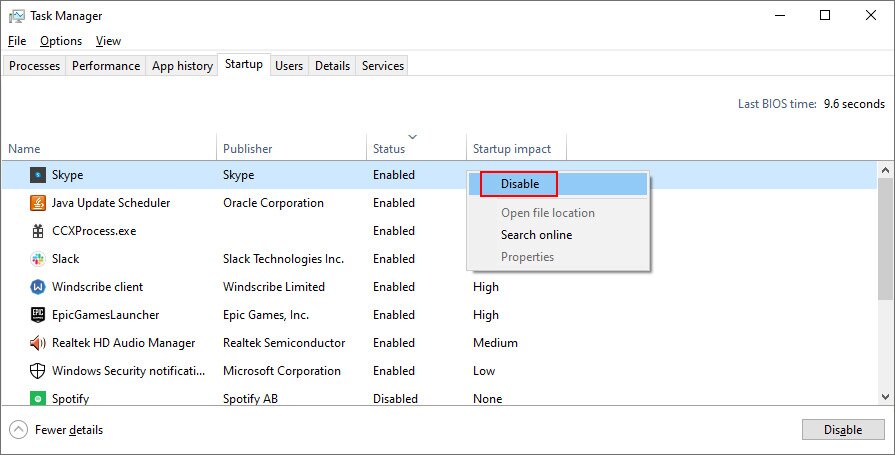
- Right-click the taskbar and select Task Manager

- Switch to the Startup tab
- Click the Status column to sort all apps by status (Enabled first)
- Select the first app and click Disable

- Do this for all apps with the Enabled status
- Restart your PC
- Try running Windows Update now

9. Turn off your firewall
It’s unlikely, but Windows Update could be blocked by your firewall. It usually happens when you change the default firewall settings or install a third-party firewall application that makes it happen.
To stay on the safe side, you can temporarily turn off the firewall to give Windows enough time to install updates. Just make sure to restart it afterward. Otherwise, you will leave your computer exposed to malware.
How to deactivate and re-activate Windows Firewall:
- Sign in to Windows 10 with administrative rights
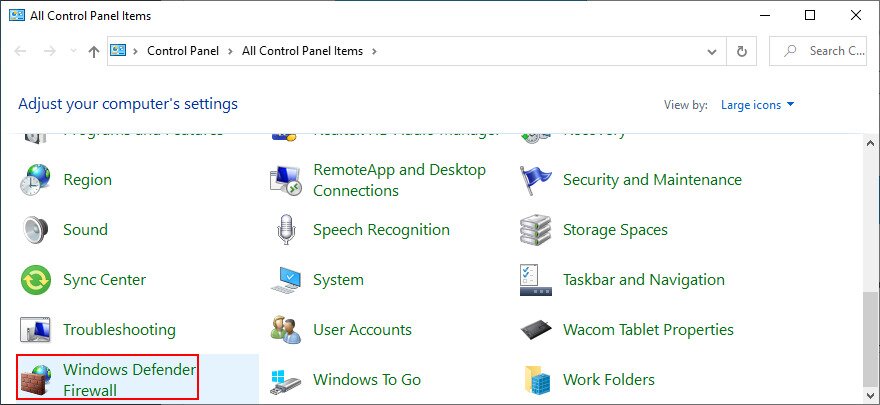
- Click the Start button, search for Control Panel, and open this app
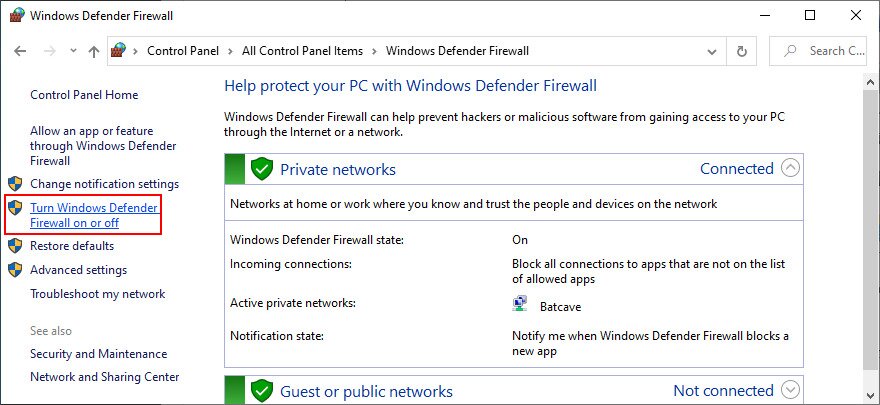
- Find and click Windows Defender Firewall

- Click Turn Windows Defender on or off on the left panel

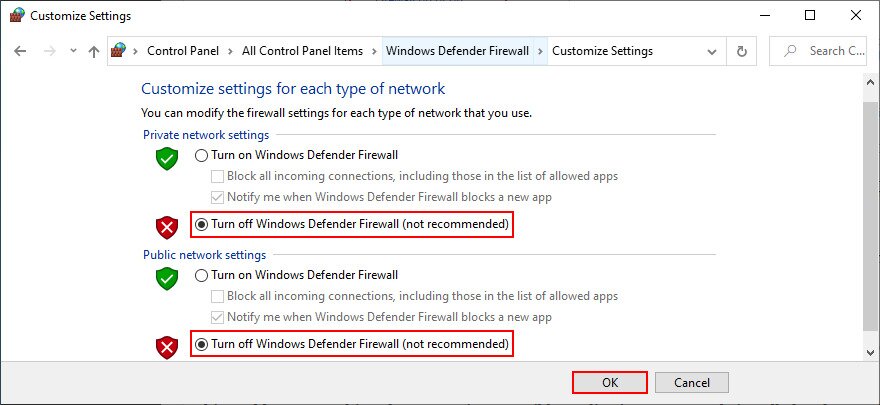
- Select Turn off Windows Defender Firewall (not recommended) at Private network settings and Public network settings

- Click OK to confirm
- Try running Windows Update
- After the update is complete, go back to Control Panel > Windows Defender Firewall
- Select Restore defaults on the left side

- Click Restore default and Yes to confirm

If you have a third-party firewall that takes over Windows Firewall, adapt the steps above to temporarily turn it off.
10. Uninstall third-party software
In the previous solution, we mentioned that a third-party firewall with incorrect settings could block Windows Update and, subsequently, trigger error codes like 0x80080005. However, it’s also possible that the firewall application is built poorly or doesn’t fully support your Windows edition.
It applies not only to firewall apps but also any programs with Internet access. This includes Internet security solutions, VPN services, web browsers, or torrenting clients.
If you started experiencing Windows Update errors right after adding a new piece of software to your PC, that could be the guilty party. But you should be able to fix this problem by uninstalling it.
How to uninstall recent software:
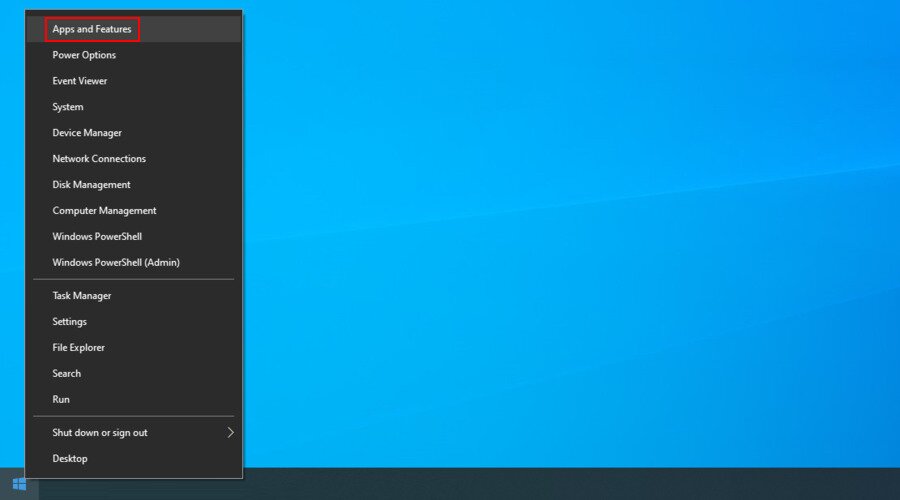
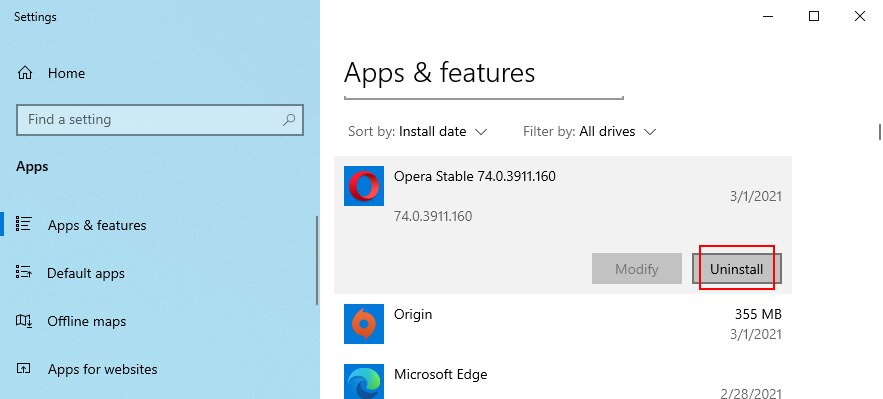
- Right-click the Start button and select Apps and Features

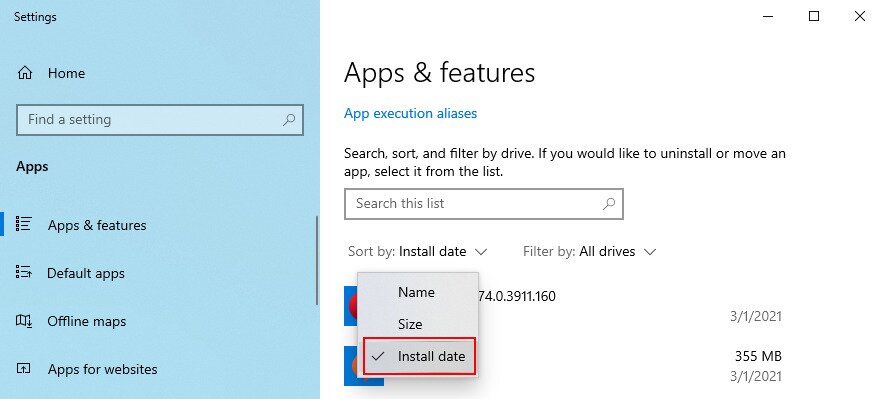
- In the Apps & features section, set Sort by to Install date (newest first)

- Pick the first program in the list and click Uninstall

- Click Uninstall again to confirm and proceed with the wizard steps
- If you recently installed multiple fishy programs, make sure to remove all of them
- Reboot your PC and try running Windows Update
The Windows 10 built-in uninstaller is not that effective. If you prefer a more thorough solution that removes not only programs but also any leftover files and registry entries, use a third-party app uninstaller.
11. Uninstall system updates
Not only software applications can cause Windows Update issues but also a faulty system update. It’s not uncommon for Microsoft to push unreliable updates that affect the computers of millions of users. In some cases, this could even lead to error code 0x80080005.
But you can fix it by uninstalling the most recent Windows updates. Here’s how:
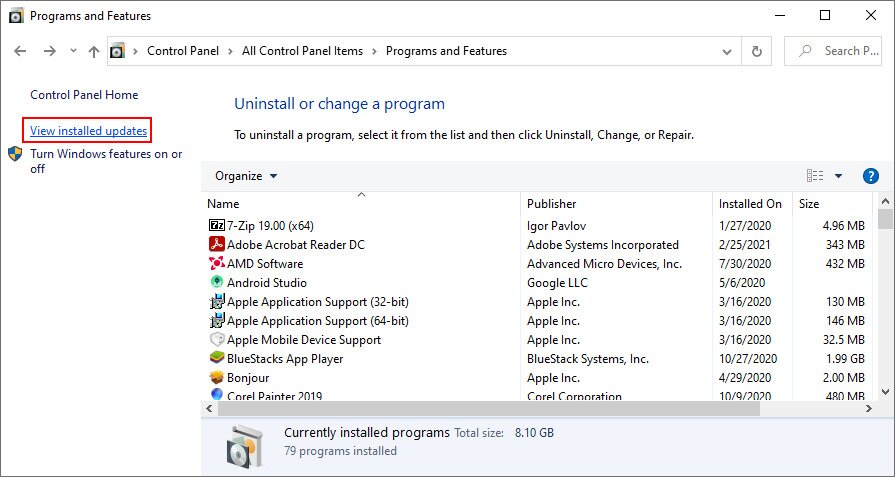
- Press Win key + R, type appwiz.cpl, and press Enter

- Click View installed updates

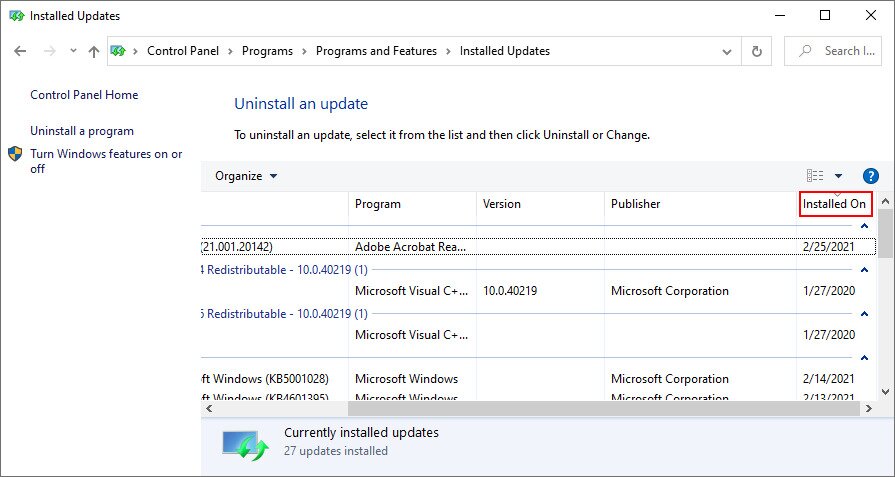
- Click the Installed On column to sort the updates by time (newest first)

- Double-click the first entry in the Microsoft Windows category
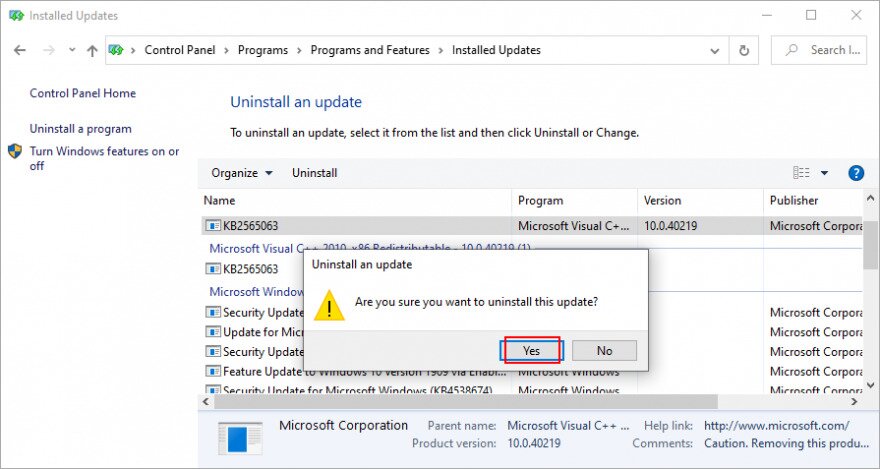
- Click Yes to confirm and proceed with the removal

- Restart your PC and try to run Windows Update now
- If Windows Update works now, make sure to avoid installing the same update that was giving you trouble

12. Check the disk space
If there isn’t enough free disk space on your computer, Windows Update might not be able to carry out its activities, like downloading files or running background processes. You can tell if you get the insufficient disk space message in the notifications center.
To fix this problem, you can increase the disk space on the C: drive (or wherever you have Windows installed) by turning to a partition manager. However, if you don’t want to install any third-party tools, Disk Management should do the trick.
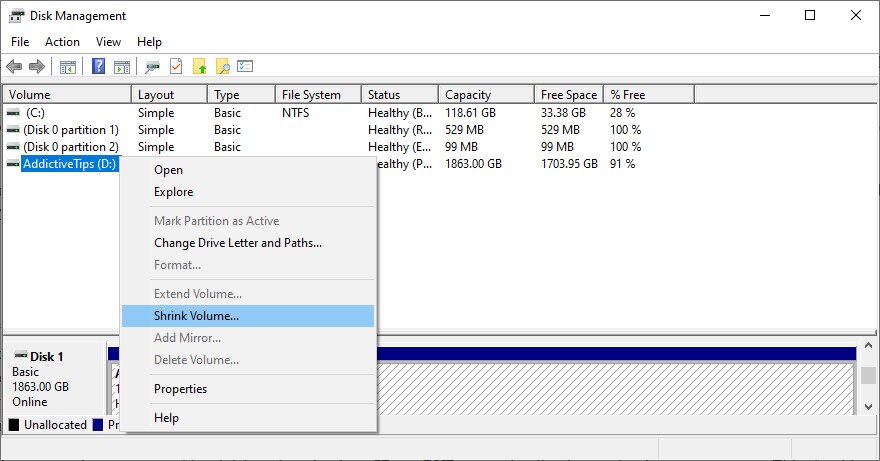
How to use Disk Management:
- Right-click the Start button and select Disk Management
- Select a large drive that doesn’t contain Windows (like D:)
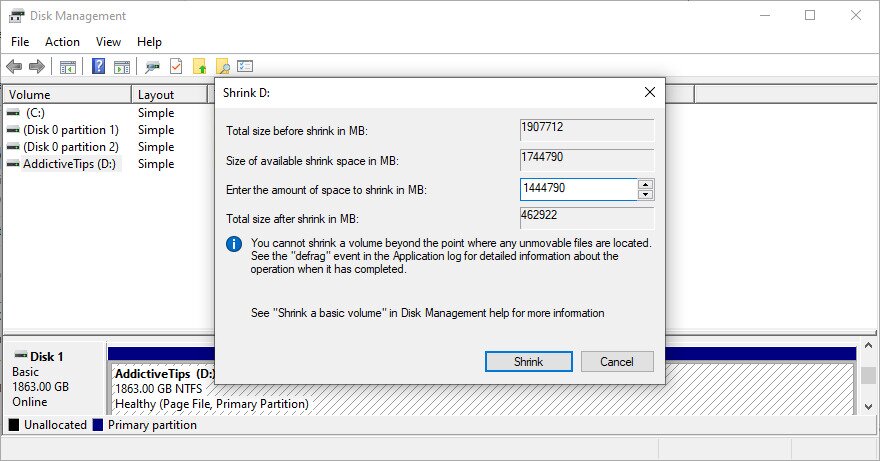
- Right-click D: and select Shrink Volume

- Write the new volume size and click Shrink

- Return to the main window
- Right-click the C: drive (or where you have Windows installed) and choose Extend Volume
- Set the new volume size and click Extend
- Try to run Windows Update now
If your hard disk is not big enough to allocate disk space from one partition to another, a workaround is to remove files from your PC to make room for Windows Update. Move personal photos and videos to an external hard disk, burn them to DVDs, or upload them to cloud storage accounts.
You can also uninstall large games and applications, as well as get rid of junk files with the help of a system cleaner. Or, if you don’t want to install anything extra, check out the Windows Disk Cleanup utility.
How to use Disk Cleanup:
- Sign in to Windows 10 with admin rights
- Go to Downloads and Recycle Bin to back up or restore any files you would like to keep since these folders will be emptied
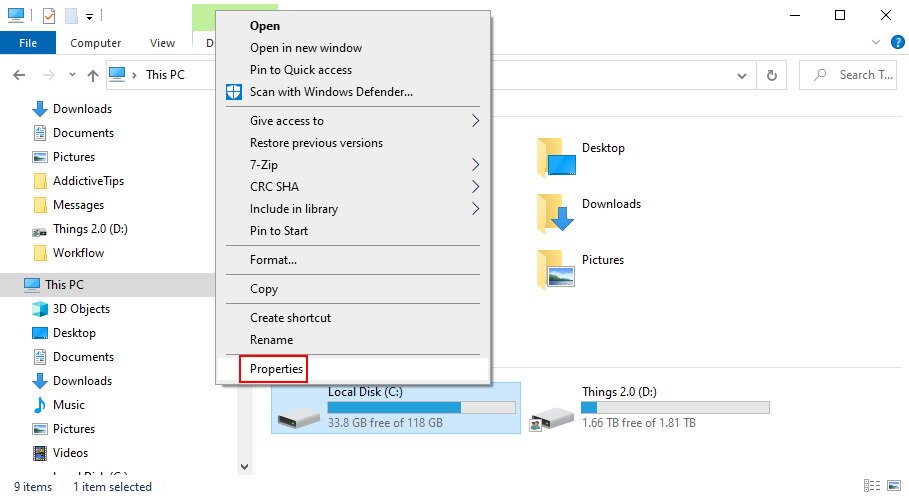
- Press Win key + E to open File Explorer
- Select the C: drive or where you have your OS installed
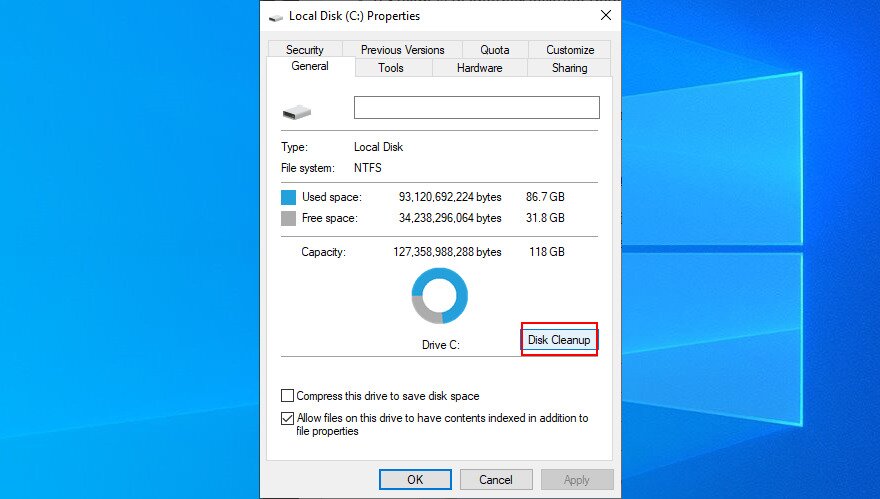
- Right-click the drive and go to Properties

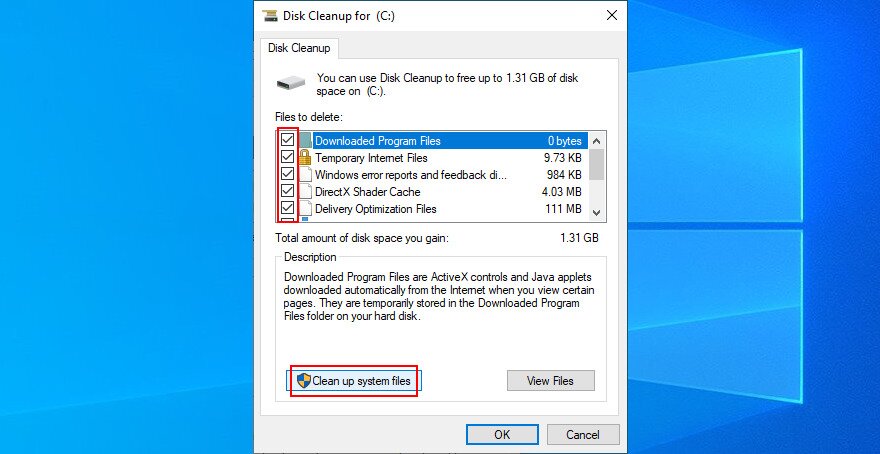
- In the General tab, click Disk Cleanup

- At Files to delete, select everything and click Clean up system files

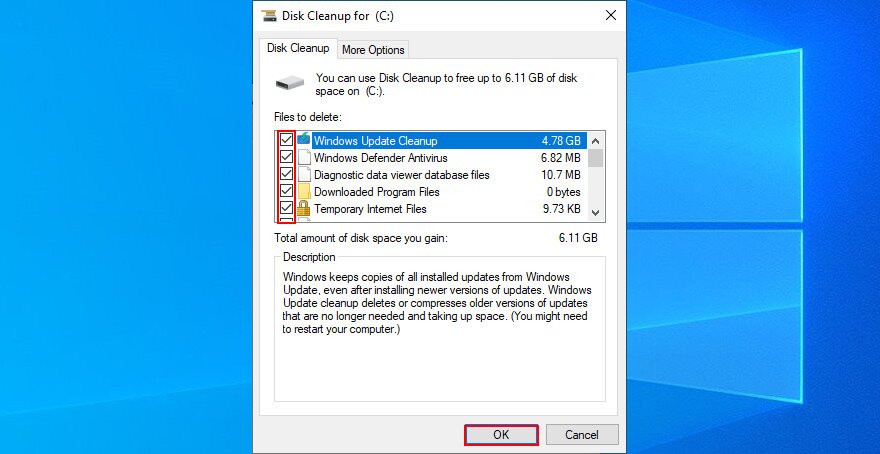
- Once the file search is over, choose all items again and press OK

- Restart your PC when the cleanup is over
- Try to run Windows Update now
13. Check the network drivers
It’s common for driver issues to interfere with all applications and system utilities that require Internet access, including Windows Update. For instance, if your network device is not working properly, it could be the reason why you keep getting error code 0x80080005. It’s also possible that your network driver is obsolete or incompatible with your operating system. Here’s what you need to do:
How to quickly reinstall the network device:
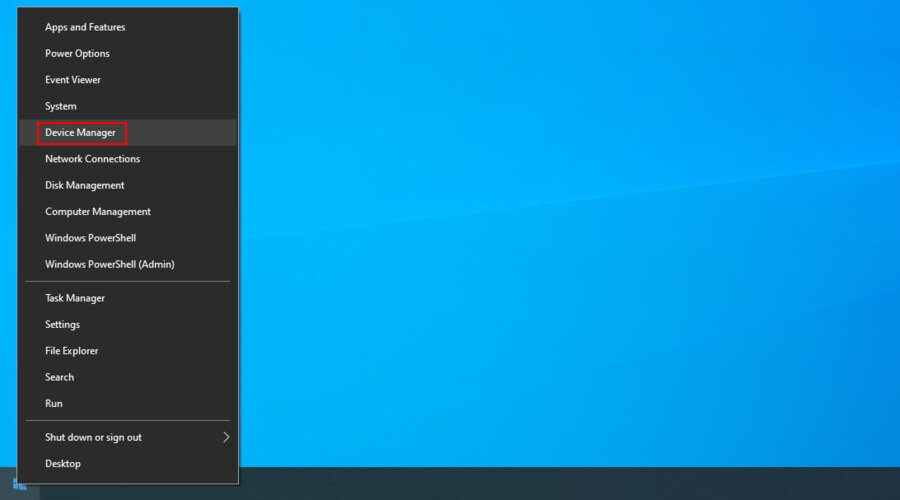
- Right-click the Start button and go to Device Manager

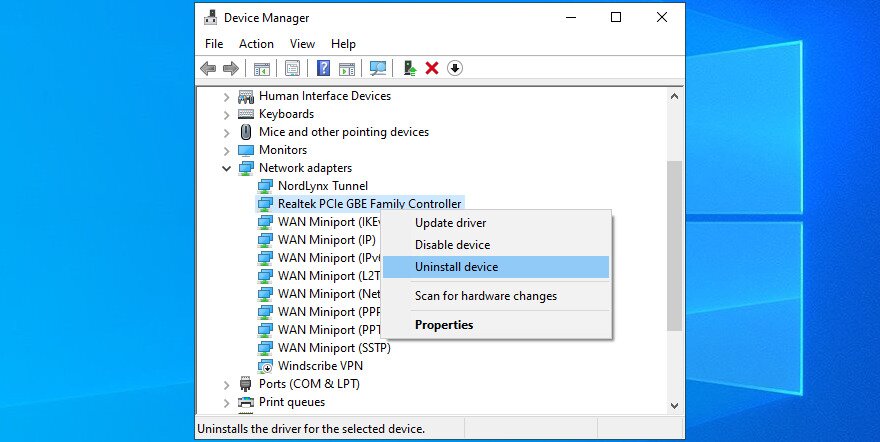
- Open the Network adapters category
- Select and right-click your main network device, then click Uninstall device

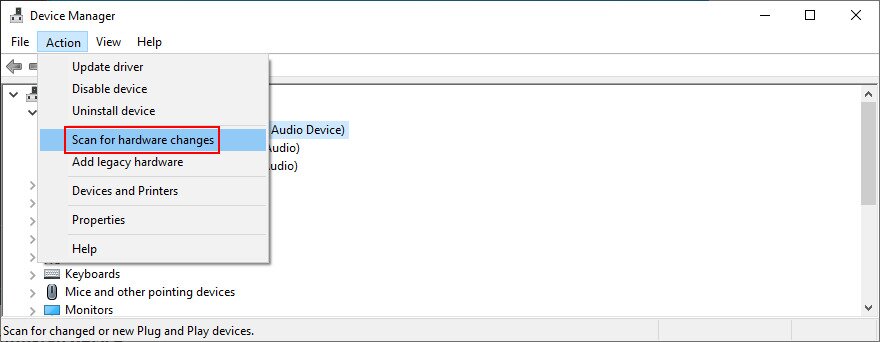
- Open the Action menu and click Scan for hardware changes

- Restart your computer. Windows will auto-reinstall the missing network device
- Check for Windows Update errors
How to update your network driver:
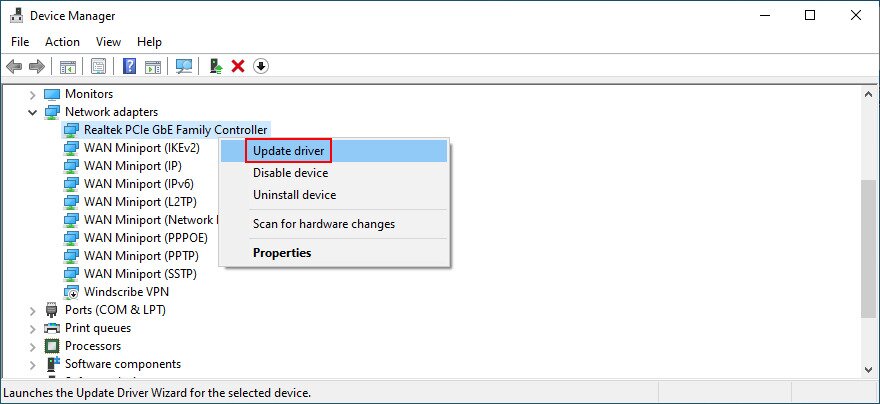
- Return to Device Manager
- Right-click your network device and select Update driver

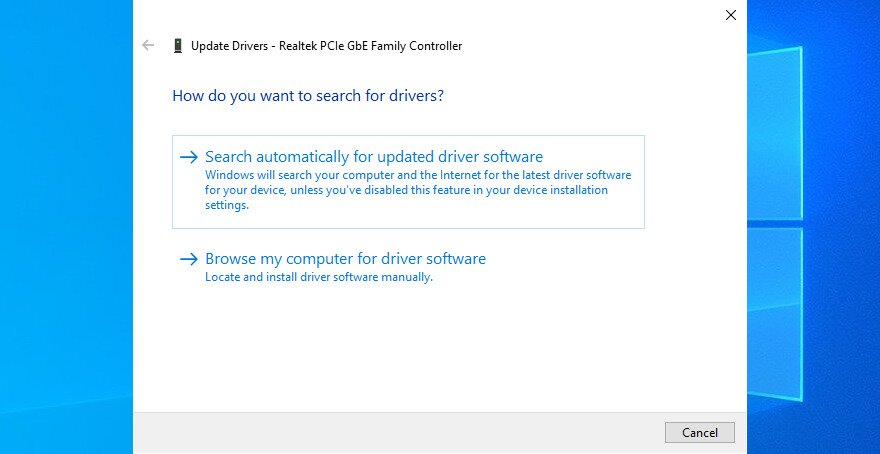
- When prompted with two options, click Search automatically for updated driver software

- Wait a bit until Windows checks for updates. If it doesn’t find anything, exit
If Windows fails to find a network driver, we suggest turning to a driver update tool. It identifies all outdated drivers on your PC and finds newer versions on the web that are compatible with your operating system. Furthermore, it can automatically download and install all drivers.
How to roll back an incompatible network driver:
- Go back to Device Manager
- Right-click your network adapter and go to Properties
- Switch to the Driver section
- Click Roll Back Driver and follow the on-screen steps
- If the button is greyed out, it means that no previous network driver exists on your PC, so you can’t complete the rollback
- If the rollback was successful, reboot your machine and try to run Windows Update
14. Repair hard disk and system errors
Data corruption in the hard disk or operating system can be devastating to all system utilities, including Windows Update. If you have a missing or damaged file that’s critical for the updater component, it’s no wonder that you get error codes like 0x80080005.
To fix HDD errors, you can use CHKDSK (Check Disk). When it comes to damaged system files, use SFC (System File Checker). Lastly, for more serious problems with the component store of the Windows image, turn to DISM (Deployment Image Servicing and Management).
How to use CHKDSK:
- Click the Start button, search for Command Prompt, and click Run as administrator
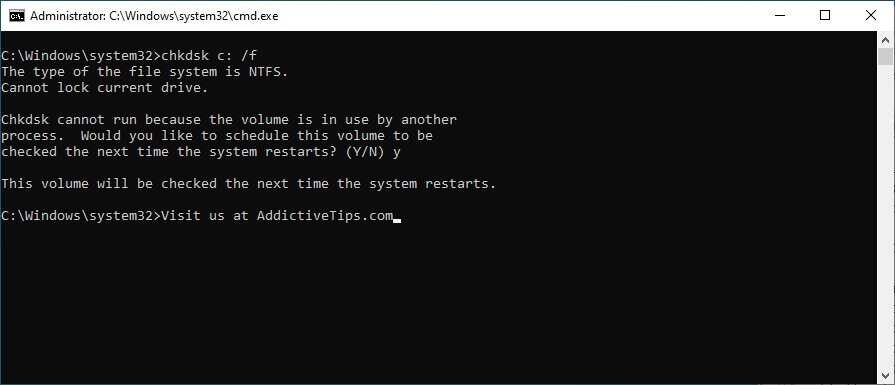
- Type
chkdsk c: /fif your operating system is installed on the C: drive. If it’s not, replacec:with the correct partition letter. Press Enter
- When asked to confirm the CHKDSK scheduling at the next system boot, type y and hit Enter
- Reboot your PC
- During restart, CHKDSK will scan your hard disk and fix any errors
- After boot, try running Windows Update
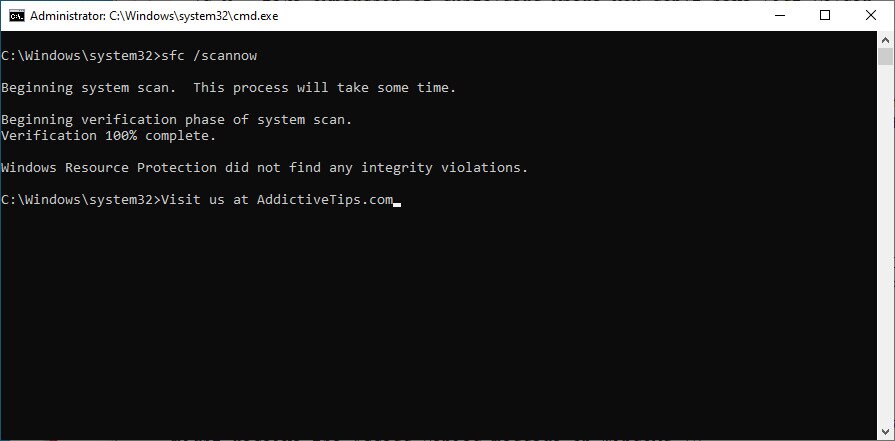
How to use SFC:
- Press Win key + R, type cmd, and press Ctrl + Shift + Enter to run CMD as admin. Click Yes if prompted by UAC (User Account Control)

- Type
sfc /scannowand press Enter
- Patiently wait while SFC performs the system scan and fixes any issues
- Restart your PC
- Run Windows Update and check if you still get error 0x80080005

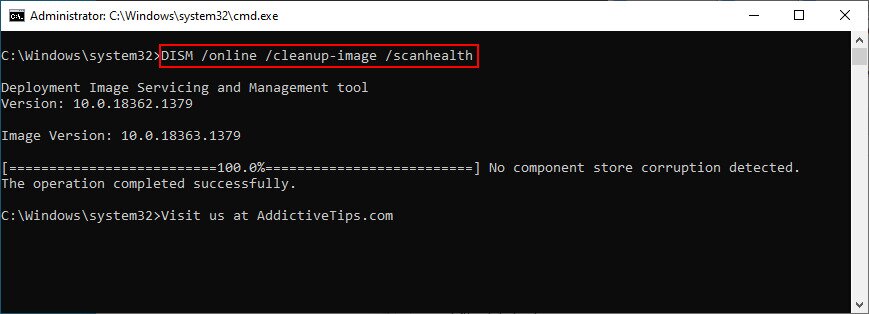
How to use DISM:
- Launch Command Prompt as admin
- Run
DISM /online /cleanup-image /scanhealthto check the health of your operating system
- If DISM finds any issues, type
DISM /online /cleanup-image /restorehealthand press Enter to fix them - Reboot your PC after the process is complete
- Open CMD as admin again
- Run SFC (
sfc /scannow) - Restart your computer one last time
- Try to run Windows Update now
15. Run a malware scan
If your antivirus solution failed to fend off malware attacks, then an infection could have affected the entire operating system and its utilities, including Windows Update. You need to immediately perform a computer scan and remove any viruses from your PC.
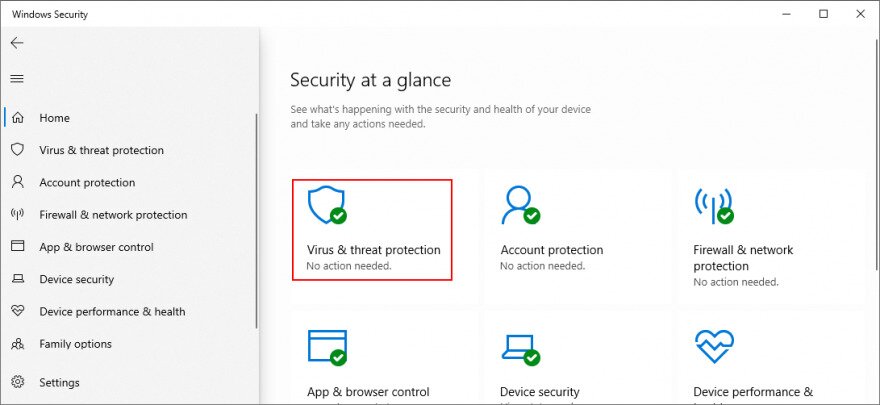
How to run Windows Defender:
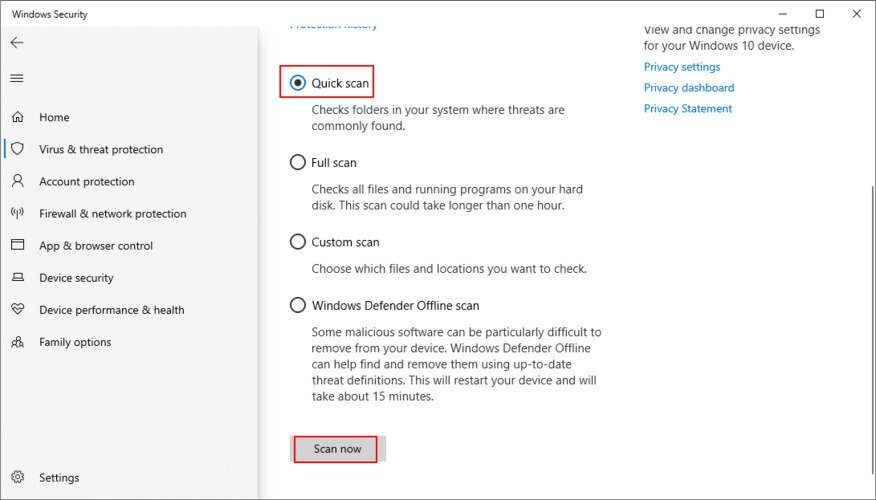
- Click the Start button, search for Windows Security, and press Enter

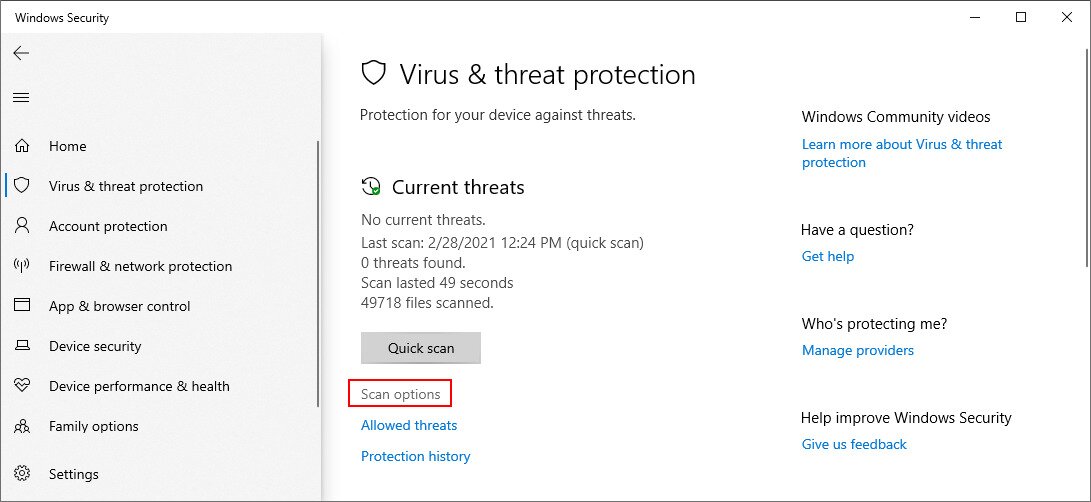
- Jump to Virus & threat protection

- Click Scan options

- Select Quick scan and click Scan now

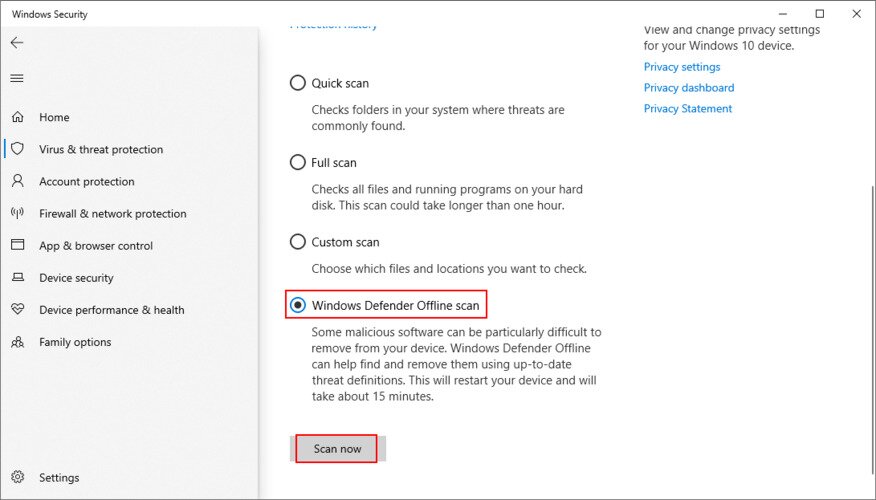
- Wait until Windows runs the scan. If it doesn’t find anything, select Windows Defender Offline scan and click Scan now

- Once the threats have been eliminated from your PC, restart
- Try to run Windows Update now

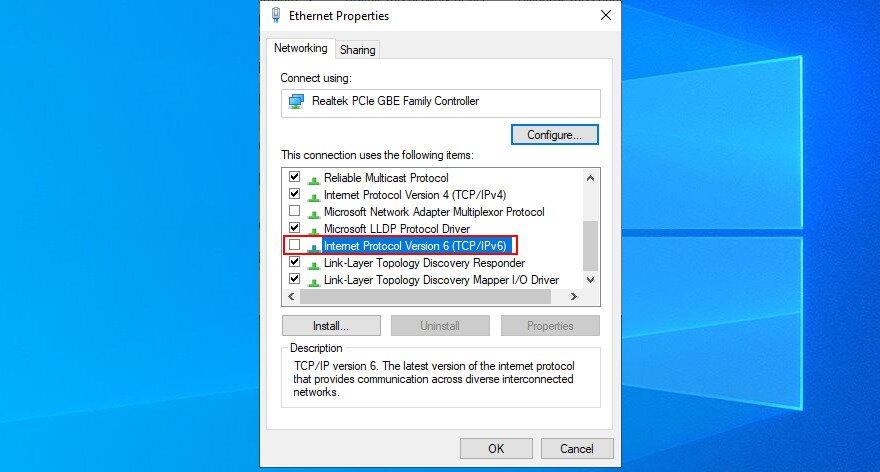
16. Turn off IPv6
It’s a bit unusual, but IPv6 connectivity may conflict with Windows Update if your network doesn’t support IPv6. In turn, this can lead to error codes like 0x80080005. Unless you’re absolutely sure that your ISP supports IPv6 (you can contact it and ask), it’s safer to disable IPv6 connections on your PC.
How to disable IPv6 on Windows 10:
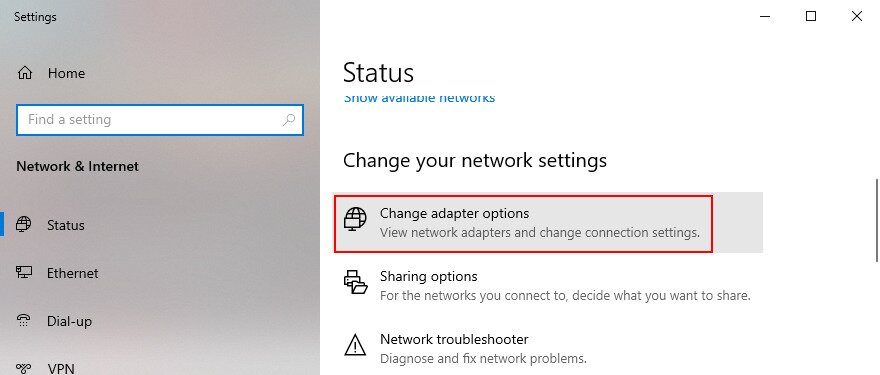
- Click the network icon in the system tray and visit Network & Internet settings
- Go to Change adapter options

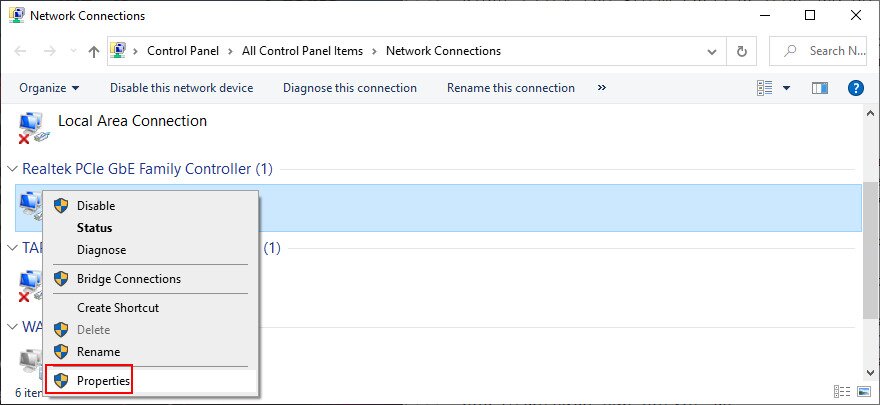
- Select your Internet connection, right-click it, and choose Properties (you need admin rights)

- Remain in the Networking tab
- Find and uncheck Internet Protocol Version 6 (TCP/IPv6)

- Click OK and exit
- Try to run Windows Update now
It’s also a good idea to turn disable IPv6 connectivity from your router’s admin panel.
17. Fix registry settings
You can also fix the 0x80080005 Windows Update error code by fixing several system registry settings using a registry cleaner or by manually making modifications. Don’t worry since you don’t need any previous experience, as long as you follow the instructions below.
- Click the Start button, search for Registry Editor, and open this app
- If prompted by User Account Control, click Yes
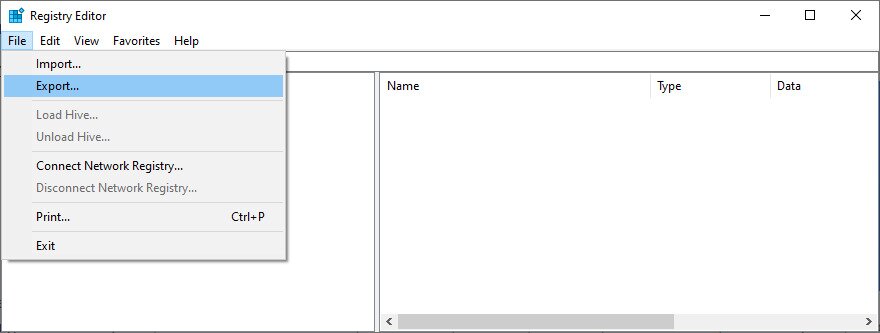
- Create a full backup in Registry Editor:

- Open the File menu
- Select Export
- Set a new file name and indicate a destination
- Click Save to save the current registry settings as backup (.reg format)
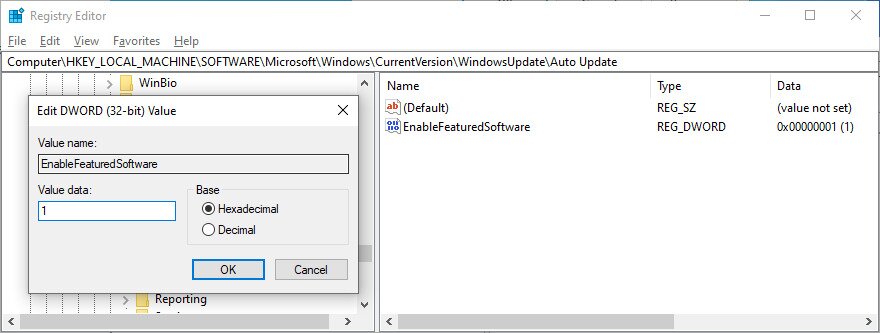
- Copy and paste the following address to visit this location:
Computer\HKEY_LOCAL_MACHINE\SOFTWARE\Microsoft\Windows\CurrentVersion\WindowsUpdate\Auto Update
- If you spot the EnableFeaturedSoftware entry, check if Data is 0x00000001 (1). Otherwise:
- Double-click the entry
- Set Value data to 1
- Set Base to Hexadecimal
- Click OK
- If the EnableFeaturedSoftware entry doesn’t exist:

- Open the Edit menu
- Select New > DWORD (32-bit) Value
- Set the name to EnableFeaturedSoftware
- Double-click the entry
- Set Value data to 1
- Set Base to Hexadecimal
- Click OK
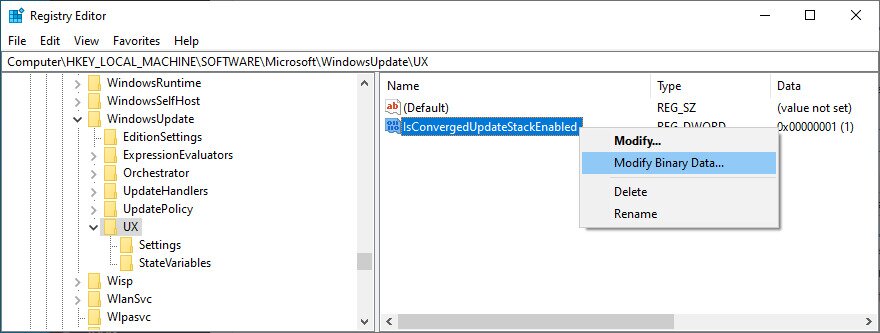
- Go to the following location:
HKEY_LOCAL_MACHINE\SOFTWARE\Microsoft\WindowsUpdate\UX
- Find and double-click IsConvergedUpdateStackEnabled

- Set Value data to 0
- Set Base to Hexadecimal
- Click OK
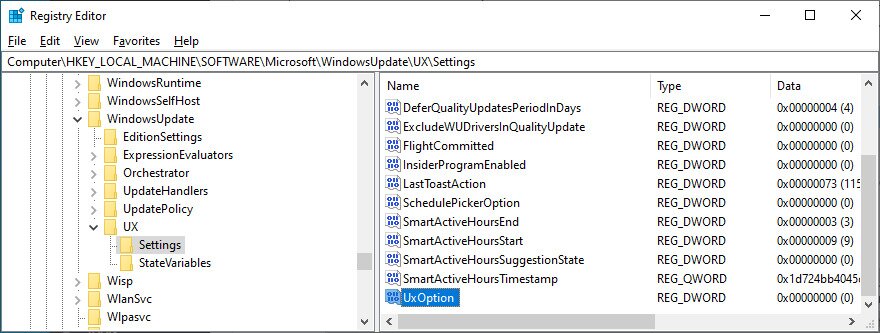
- Now, visit this address:
HKEY_LOCAL_MACHINE\SOFTWARE\Microsoft\WindowsUpdate\UX\Settings
- Locate UxOption

- Double-click the entry
- Set Value data to 0
- Set Base to Hexadecimal
- Click OK
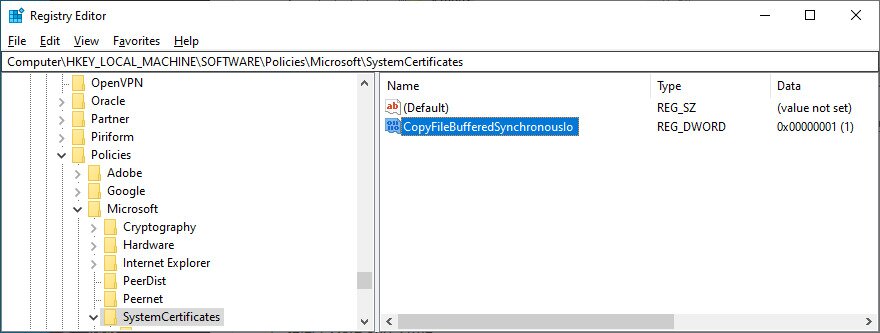
- Finally, visit this location:
HKEY_LOCAL_MACHINE\SOFTWARE\Policies\Microsoft\SystemCertificates
- If you spot the CopyFileBufferedSynchronousIo entry, make sure that its data is set to 0x00000001 (1). If it’s not:

- Double-click the entry
- Set Value data to 1
- Set Base to Hexadecimal
- Click OK
- If CopyFileBufferedSynchronousIo doesn’t exist:
- Open the Edit menu
- Select New > DWORD (32-bit) Value
- Set the entry name to CopyFileBufferedSynchronousIo
- At Value data, write 1
- Set Base to Hexadecimal
- Click OK
- Exit Registry Editor and restart your computer
- Try to run Windows Update now
If, for any reason, you need to roll back the changes you made in the registry, just double-click the .reg backup file you previously created to restore the original registry configuration.
18. Fix Windows startup problems
The Windows advanced troubleshooting mode gives you the possibility to fix boot issues that might prevent your operating system from working properly by running Startup Repair. It’s worth a shot when it comes to repairing Windows Update errors. Here’s how to use it:
- Make sure to save any ongoing projects
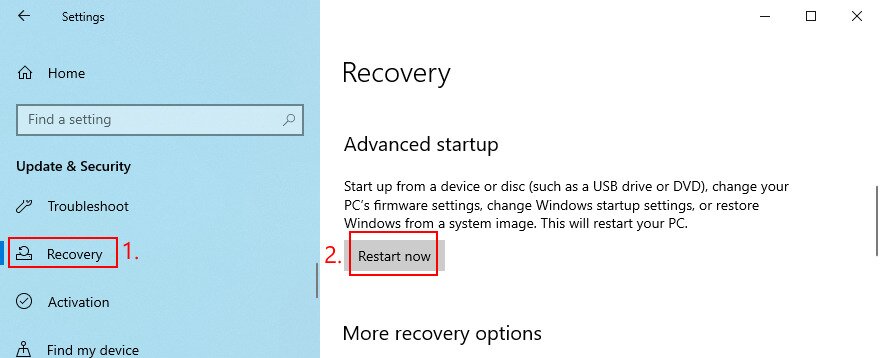
- Right-click the Start button and go to Settings
- Select Update & Security
- Jump to Recovery on the left side
- At Advanced startup, click Restart now

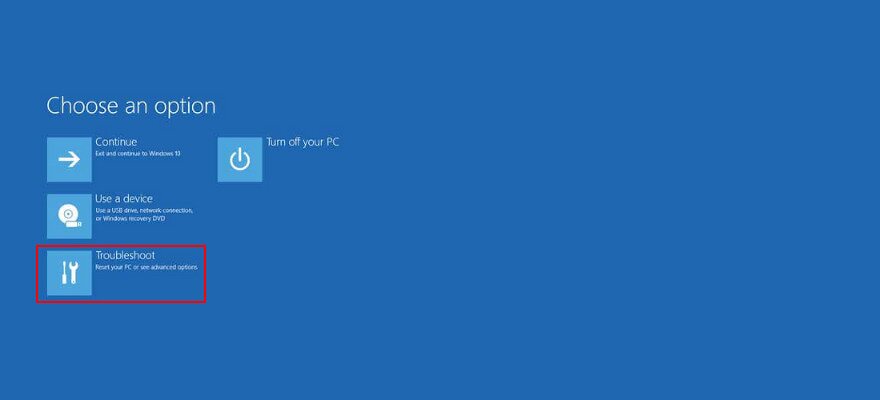
- Windows will restart in Troubleshoot mode. When the screen turns blue and loads various options, go to Troubleshoot

- Select Advanced options > Startup Repair

- Select your admin account and enter your password
- Follow the step-by-step instructions to fix startup problems
- After Windows starts, try running the system updater

19. Roll back Windows 10
For any other unforeseen software events that you can’t identify but may have damaged Windows Update, turn to System Restore. If you have created a restore point before starting to receive error code 0x80080005 on each attempt to update the OS, you can roll back Windows 10 to that state. Here’s how:
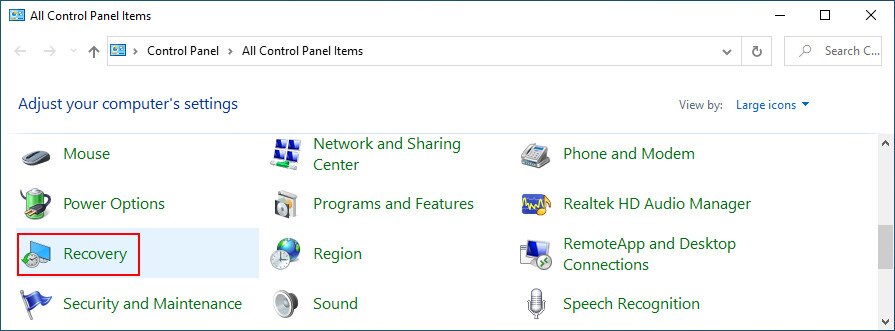
- Click the Start button, search for Control Panel, and open this app
- Select the Recovery section

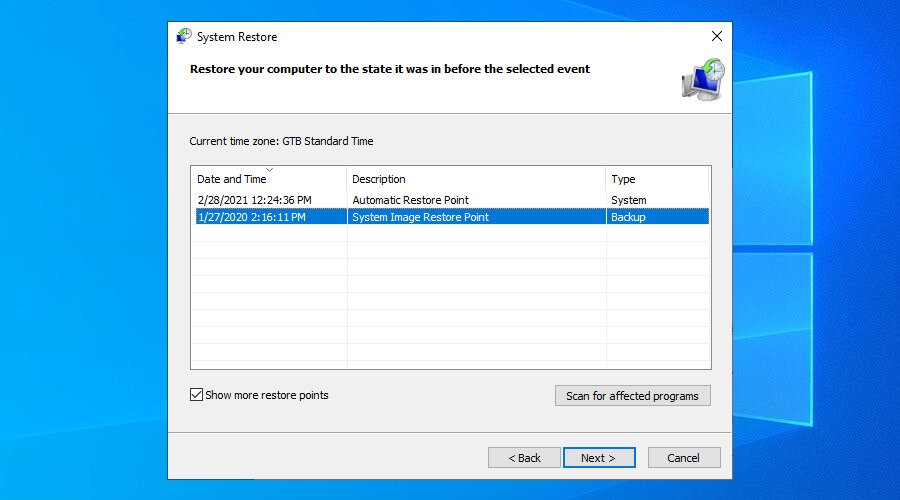
- Pick a restore point from the list or select Show more restore points to go back further
- To view which applications will be removed from your PC, click Scan for affected programs
- Click Next and follow the on-screen instructions

- After your PC restarts, try to run Windows Update
20. Reset Windows 10
Unfortunately, System Restore fails to work on many occasions. After exhausting all the previous solutions and still getting hampered by error code 0x80080005, it’s time to reset Windows 10.
Your files, downloads, and game saves will be left untouched. However, all your applications will disappear from your PC. Here’s what you need to do:
- Right-click the Windows 10 Start button and select Settings
- Visit the Update & Security section
- Jump to Recovery
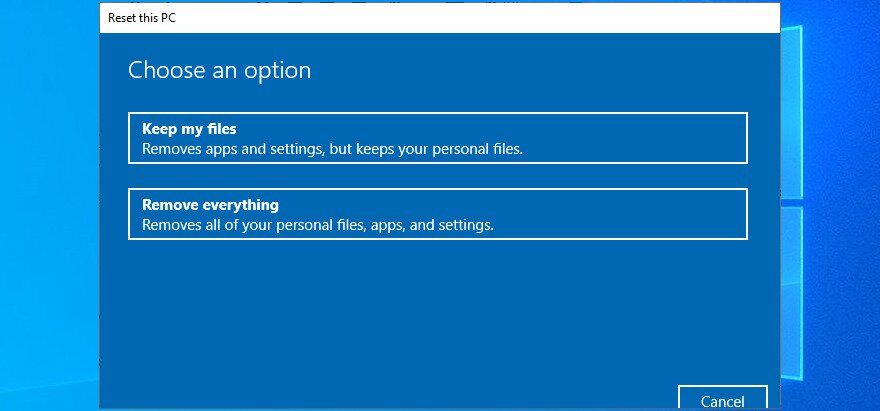
- At Reset this PC, click Get started

- When prompted with two options, select Keep my files

- Follow the on-screen steps to reset Windows 10
- Once the task is complete, run Windows Update to install all required updates

Windows Update error 0x80080005 can be fixed
To sum up, 0x80080005 is an error code that pops up on the screen when trying to run Windows Update. It’s typically caused by a hardware or software problem that can be resolved.
Start by running the Windows Update troubleshooter and using the Windows Update Diagnostic tool. If these fail, restart the Windows Update and dependent services, turn off Network List Service, check Group Policy settings, reset Windows Update components, and unplug all peripheral devices.
You can also run a clean boot, temporarily deactivate your firewall, uninstall recent third-party software and system updates, check the disk space and network drivers, as well as repair any hard disk and operating system errors.
It’s also a good idea to run a computer scan to remove any malware, disable IPv6 connectivity if you don’t use it, fix registry settings and Windows startup problems, and roll back Windows 10 to a previous checkpoint. If everything fails, it’s time to factory reset Windows 10.
How did you manage to get rid of 0x80080005?
Did we miss any important steps? Let us know in the comment area below.
