How to Fix WDF_VIOLATION Error on Windows 10 (Full Guide)
WDF_VIOLATION is a Blue Screen of Death error that can be caused by various problems at the software or hardware level. It immobilizes your computer and keeps you from working, studying or playing.
If you have recently done something new on your PC, like installing an application or plugging in a new device, the event might have sent Windows over the edge, resulting in the WDF VIOLATION stop code.

On the bright side, you can fix BSOD errors by following the easy instructions below.
How to fix WDF_VIOLATION on Windows 10
Resetting Windows 10 to factory settings is the last resort. Before jumping to that conclusion, you should try the following solutions since they will give you fewer headaches.
Keep in mind that it’s a good idea to create a system restore point on your computer if you haven’t done so recently. It allows you to effortlessly roll back the OS to a stable state in case you encounter additional problems.
1. Unplug new hardware components
If you have recently bought a new piece of hardware and connected it to your computer unit, it could not be fully compatible with your operating system. Or maybe it doesn’t have the correct driver installed.
Whatever the case may be, try unplugging it and restarting your computer to see if you get any more BSOD errors. It could be anything, from a brand new USB flash drive to a Wi-Fi adapter or webcam.
Also, if the device is USB-enabled, you might want to check your USB ports. It’s possible they suffer from hardware failure, which could affect your entire operating system. Try plugging the devices into different ports.
2. Use BlueScreenView
BlueScreenView is a lightweight, portable, and free application that provides a user-friendly graphical interface for examining the minidump files created by blue screen errors. So, you can use it to examine the .dmp file left behind by the WDF VIOLATION stop code.
- Download BlueScreenView from the official website
- Restart Windows right after you get the WDF VIOLATION error
- Launch BlueScreenView
- Open the DMP file created by WDF VIOLATION
- Examine the driver files involved in the error
- Locate the driver files in Device Manager to reinstall and update them (steps in the next solution)
3. Check your drivers
More often than not, devices fail to work properly due to outdated or incompatible drivers. In time, this can cause all sorts of computer problems, including blue screen errors.
To solve this problem, you can easily reinstall the devices and let Windows set up the correct drivers, as well as update the drivers to the latest version.
How to quickly reinstall drivers:
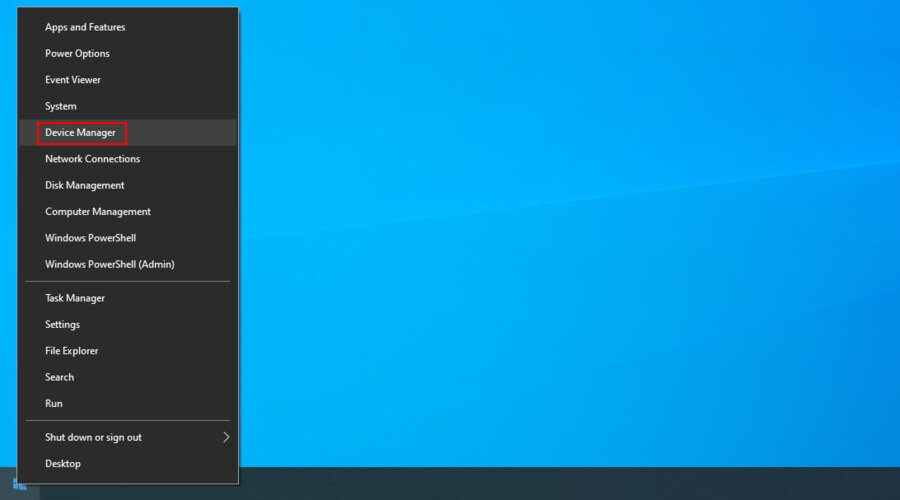
- Right-click the Start button and select Device Manager

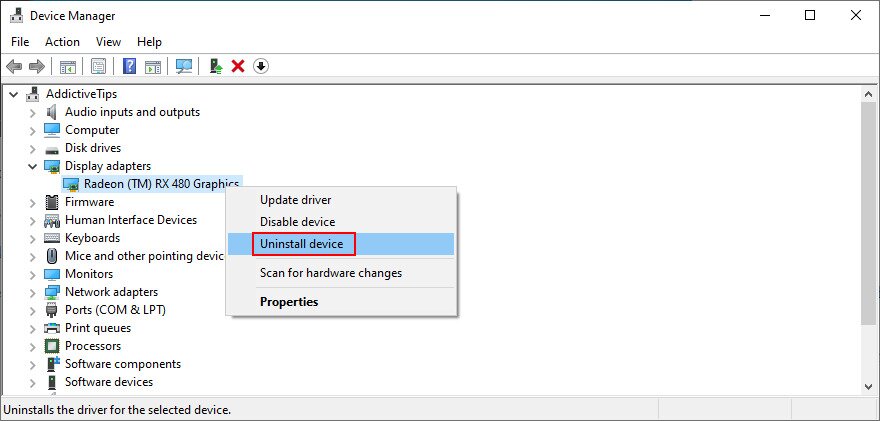
- Expand the categories of devices and look for any entry with a yellow exclamation point
- Select and right-click that entry and click Uninstall device

- Follow the on-screen instructions to remove the device
- Do this for all devices with a yellow exclamation point
- Restart your PC
Don’t worry about ending up with missing device drivers because Windows will reinstall them correctly after restarting your computer.
How to update drivers:
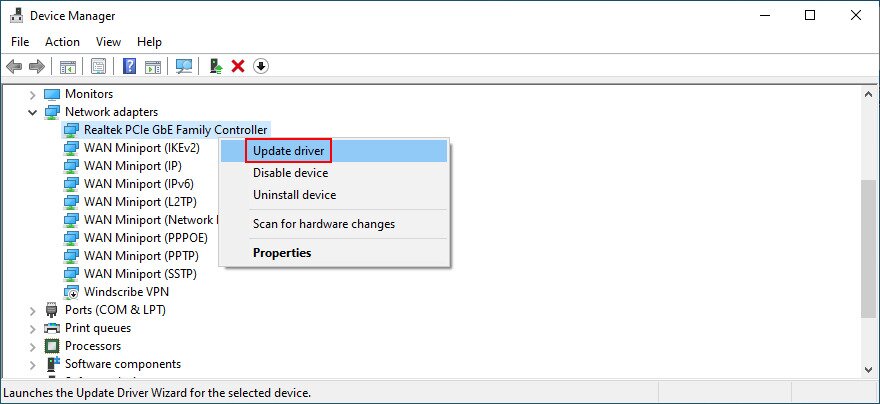
- Go to Device Manager, right-click a device in the list and select Update driver

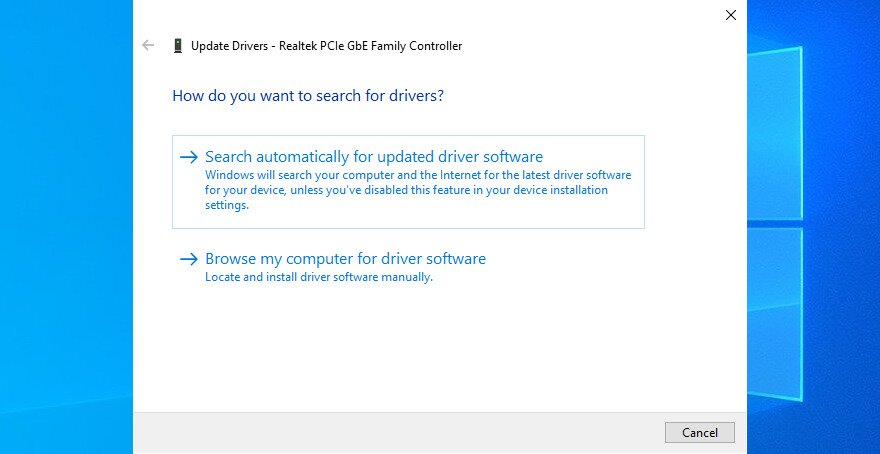
- Click Search automatically for updated driver software

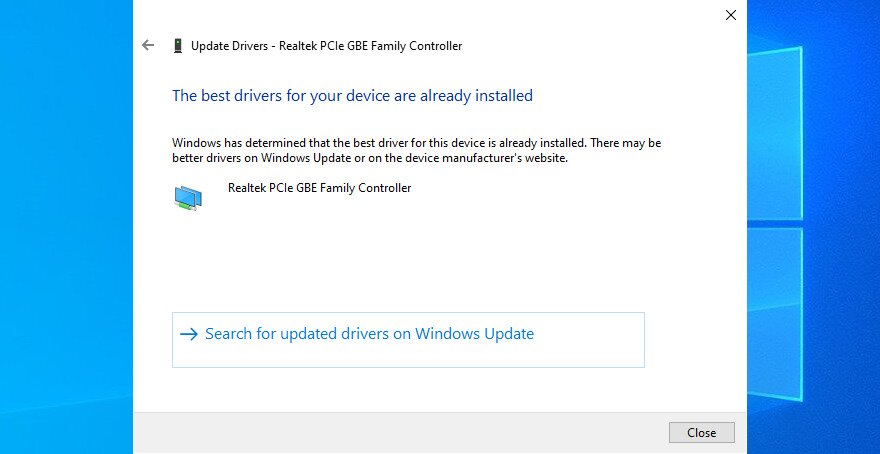
- If you see the The best drivers for your device are already installed message, click Search for updated drivers on Windows Update

- Do this for all drivers
- Restart your computer
If Microsoft is unsuccessful at retrieving newer drivers through Windows Update, then you should turn to a third-party driver updater for help. It can automatically detect obsolete drivers on your PC and download the newer version.
4. Check your system memory
A faulty RAM card can be fatal to your computer and operating system. And it could also lead to BSOD errors like WDF VIOLATION or PFN LIST CORRUPT, both of which are often related to memory issues.
How to use Windows Memory Diagnostic:
- Make sure to close all active applications
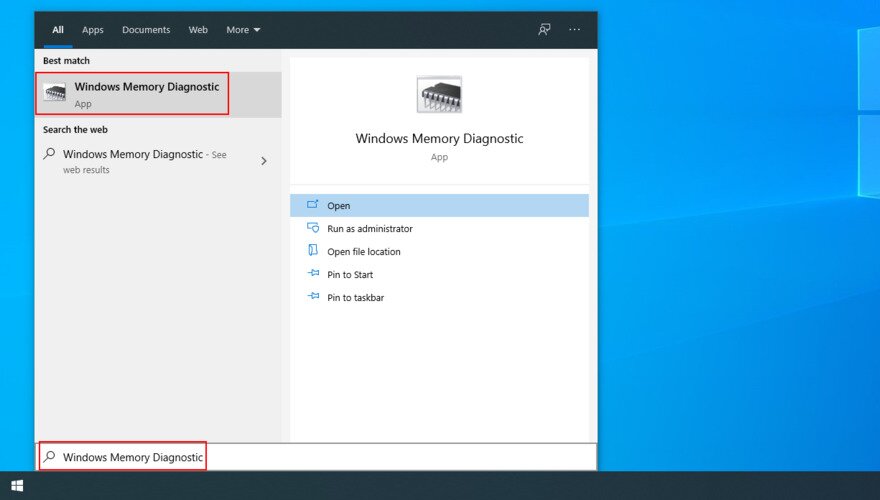
- Click the Windows 10 Start button, type Windows Memory Diagnostic, and open this app

- Click Restart now and check for problems

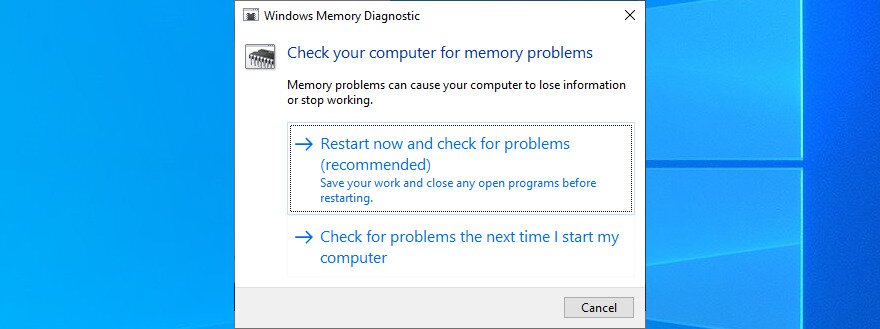
Windows Memory Diagnostic will do its job during reboot, finding and repairing any system memory errors on its own. Once it finishes, you can check if you still receive that nasty BSOD error.
5. Use System Restore
If you have recently made significant changes to the computer that you’re not aware of, you could have triggered the WDF VIOLATION stop code. For example, you could have installed a software application that made too many changes to the system registry.
Luckily, Windows has Recovery mode, which allows you to undo any modifications at the software level. This also covers programs and registry modifications, so keep in mind that any newly installed apps will disappear after the rollback.
It might be a good idea to verify their registration data to make sure you will be able to activate premium licenses once you reinstall those programs.
How to use System Restore
- Sign in to Windows 10 as the administrator
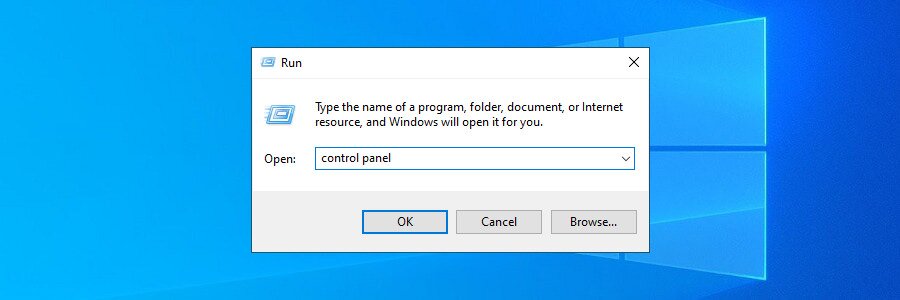
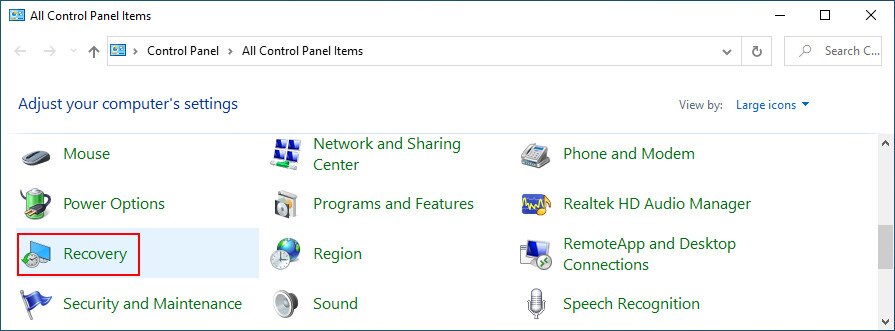
- Press Win key + R, type control panel, and hit Enter

- Click Recovery

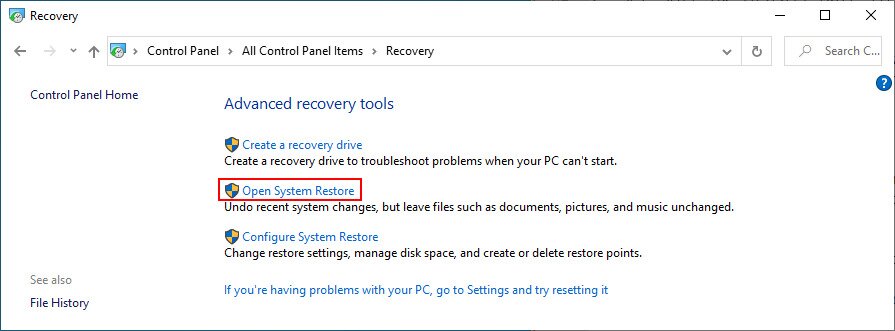
- Click Open System Restore

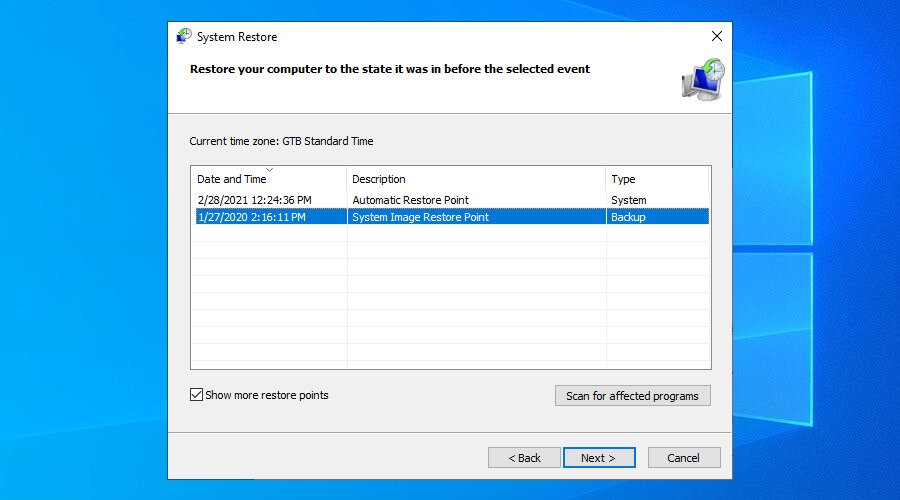
- Choose a restore point from the list. If you want to see the exact applications that will be affected, click Scan for affected programs

- Click Next and proceed with the on-screen instructions
- Reboot your computer and check for BSOD errors
6. Run a malware scan
Cyber-attacks can be powerful enough to take down your computer’s entire defenses and mess up your system settings. Some malware agents can even cause blue screen error like WDF VIOLATION.
So you should count on your security software solution to run a malware scan and remove any pests from your PC.
How to use Windows Defender:
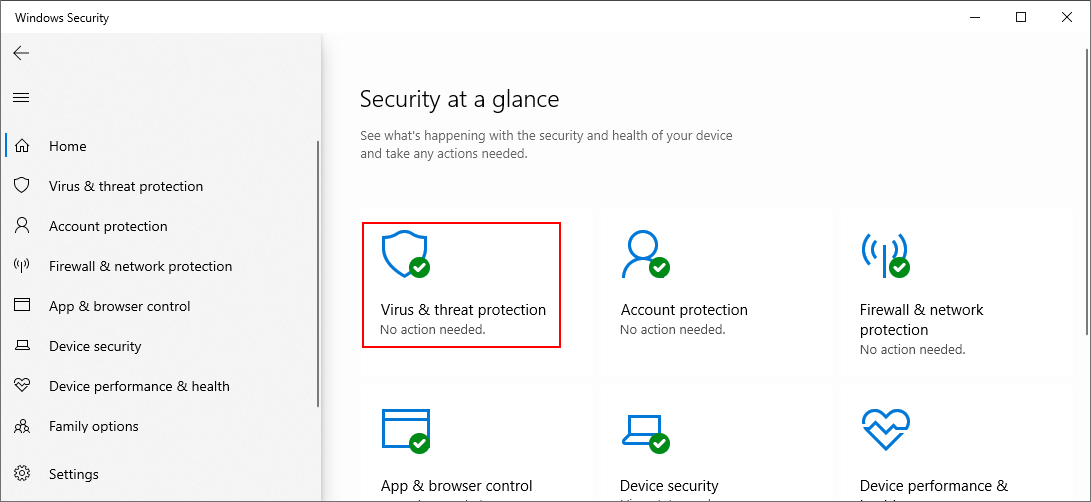
- Click the Start button, type Windows Security, and open this app

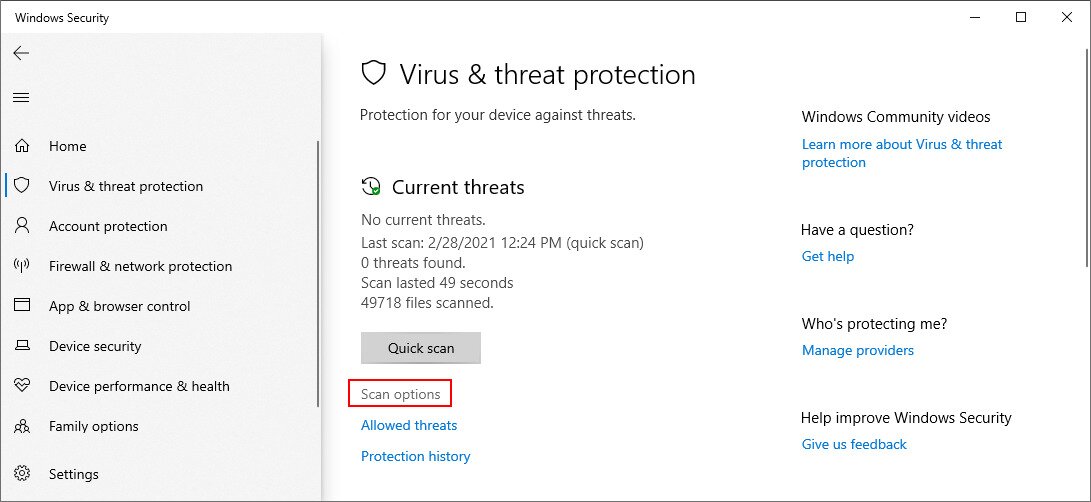
- Go to Virus & threat protection
![Windows 10 shows how to select Virus and Threat Protection]()
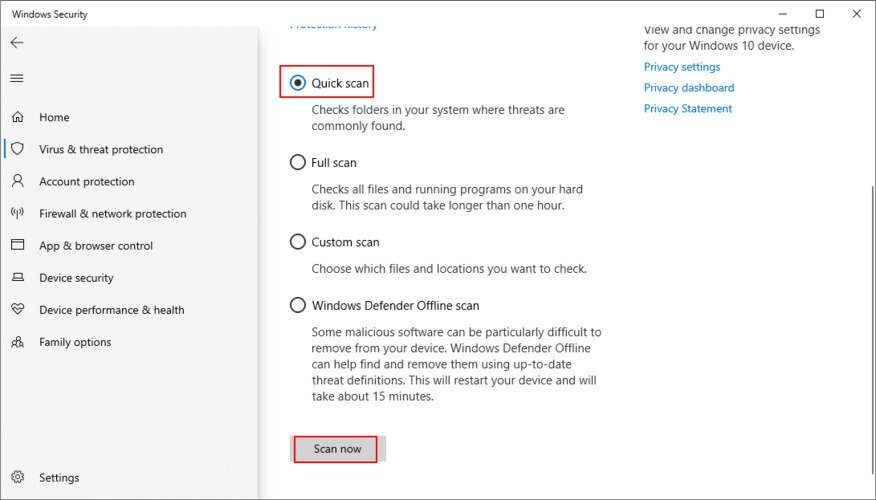
- Click Scan options

- Select Quick scan and click Scan now

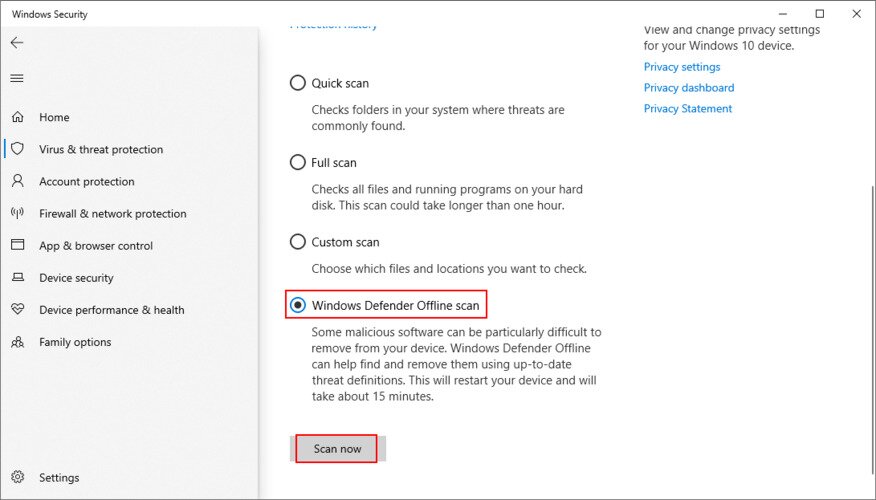
- Run another scan using Windows Defender Offline scan


If you have a third-party security application installed that overrides Windows Defender, make sure to adjust the steps above correctly.
7. Uninstall suspicious programs
Even if an application’s official page claims that it’s fully compatible with your operating system, that’s not always the case. In fact, some programs make too many modifications to the system registry, resulting in blue screen errors.
If System Restore mode is unavailable, the next best thing is removing the recent or suspicious program from your computer.
How to remove recent apps:
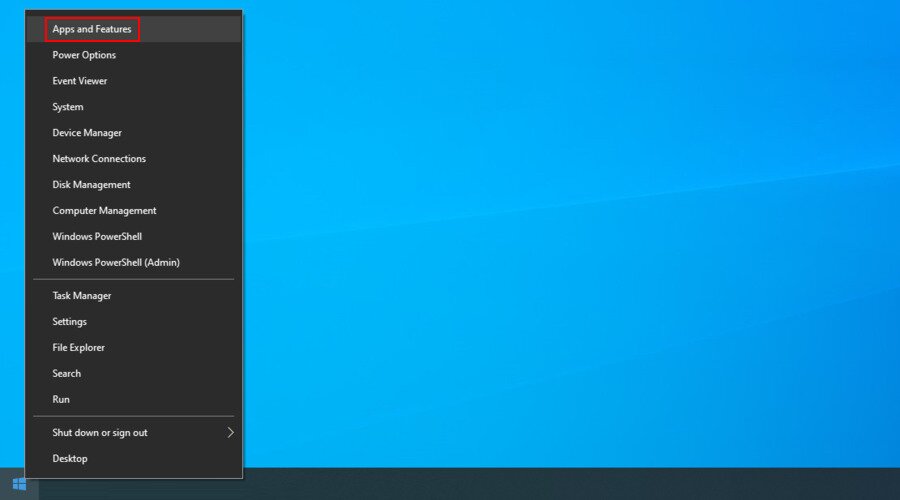
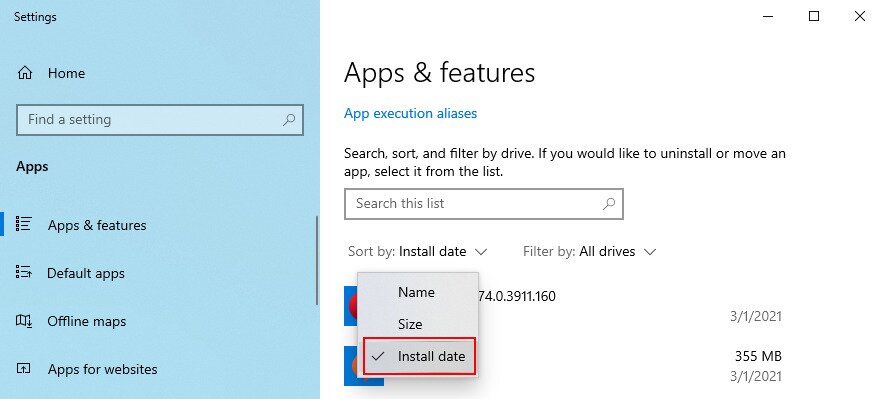
- Right-click the Start button and select Apps and Features

- Set Sort by to Install date (newest first)

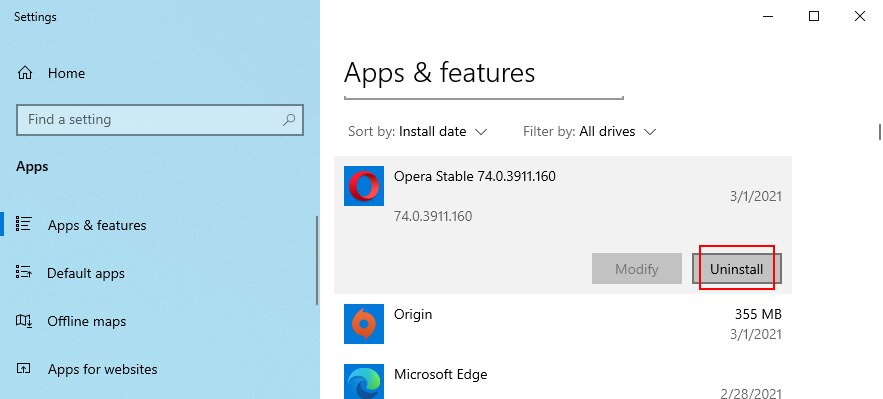
- Pick the first app in the list and select Uninstall

- Remove the program by following the on-screen steps
- Restart your PC
- If you still get BSOD errors, uninstall the next app in the recent list
A programs uninstaller is more thorough than the Windows integrated tool because it not only removes an application but also any leftover files and registry entries which may harm your computer.
8. Clear up your disk space
If your HDD is full, Windows will not have enough disk space to run critical processes and services in the background. In turn, this can cause hardware failure as well as blue screen errors like WDF VIOLATION.
But you can solve this problem by just making more room on your hard drive. This means deleting large and unnecessary files, uninstalling big programs that you don’t use anymore, or copying photos and videos to an external hard disk.
As far as junk files are concerned, you can resort to a system cleaner or Disk Cleanup, a simple and effective utility built into the operating system.
How to use Disk Cleanup:
- Sign in to Windows 10 with elevated rights
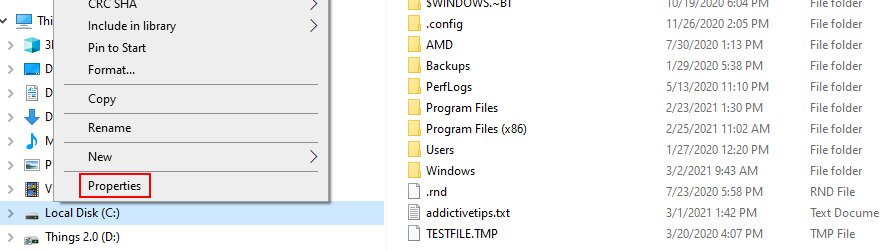
- Launch your file navigator, right-click the partition where Windows is installed (it’s usually C:), and go to Properties

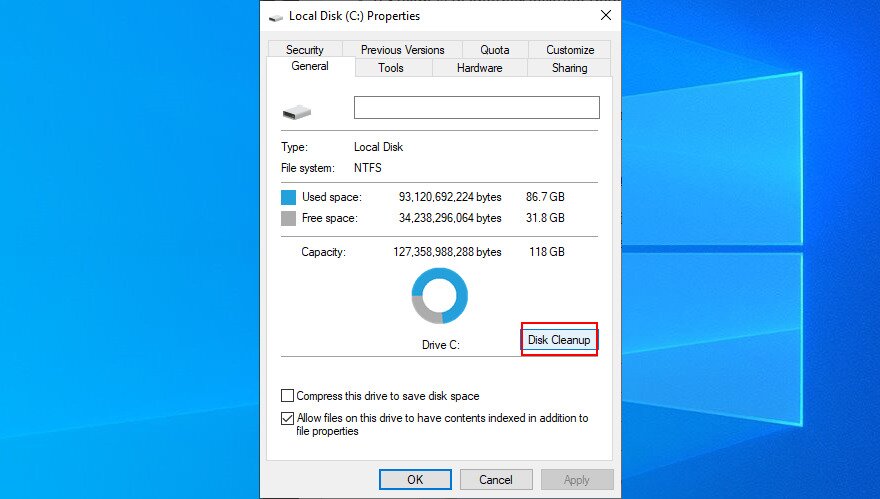
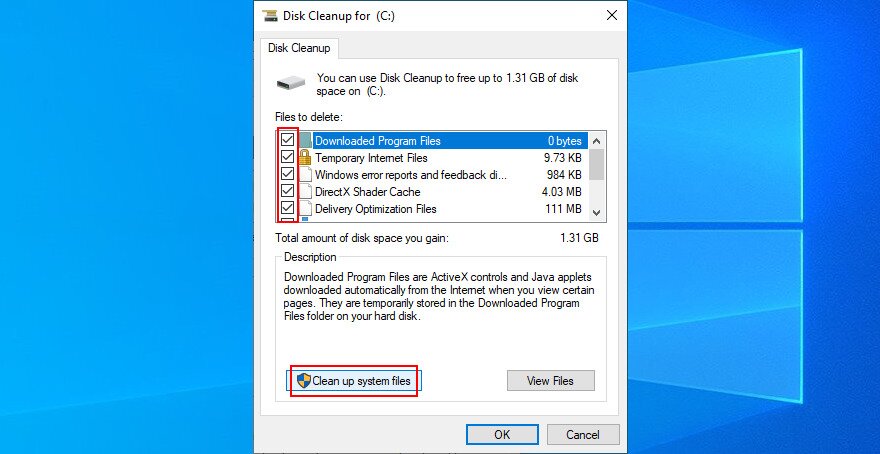
- Switch to the General tab and click Disk Cleanup

- Select everything in the Files to delete list and click Clean up system files

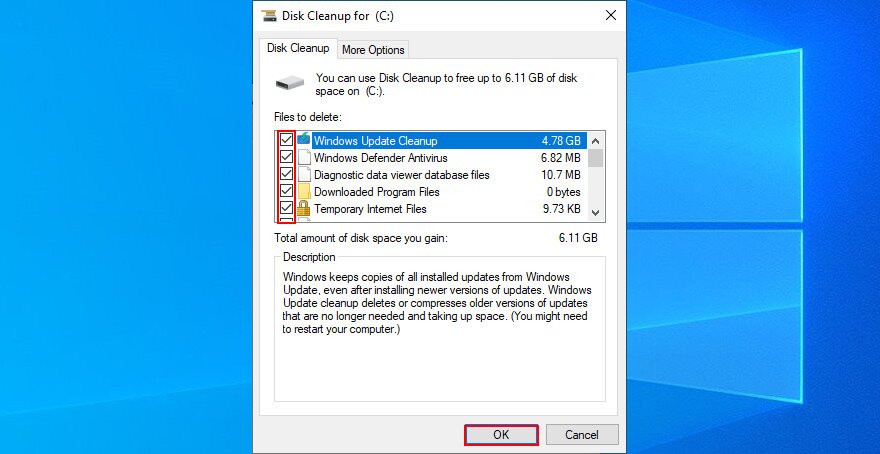
- As soon as the file scan is complete, select everything again, click OK and Delete Files to confirm

- Restart your PC and check for BSOD errors
9. Repair corrupt files
Hard disk corruption can be fixed using CHKDSK (Check Disk) while damaged system files can be restored with the help of SFC (System File Checker).
However, if the component store of the system image is corrupt, then you have to turn to DISM (Deployment Image Servicing and Management) to fix it.
It’s not necessary to install any third-party software since Windows 10 comes bundled with these three tools. You just need to launch a Command Prompt window with elevated rights. Furthermore, you should save any ongoing projects and terminate running applications.
How to use CHKDSK:
- Press Ctrl + R, type cmd, and press Ctrl + Shift + R to run CMD as admin

- Type
chkdsk c: /f. If you have Windows installed in another drive than C:, replacec:in the code with the correct letter. Press Enter - Type y when CHKDSK asks you to schedule the task at the next system boot and press Enter
- Restart your computer

How to use SFC:
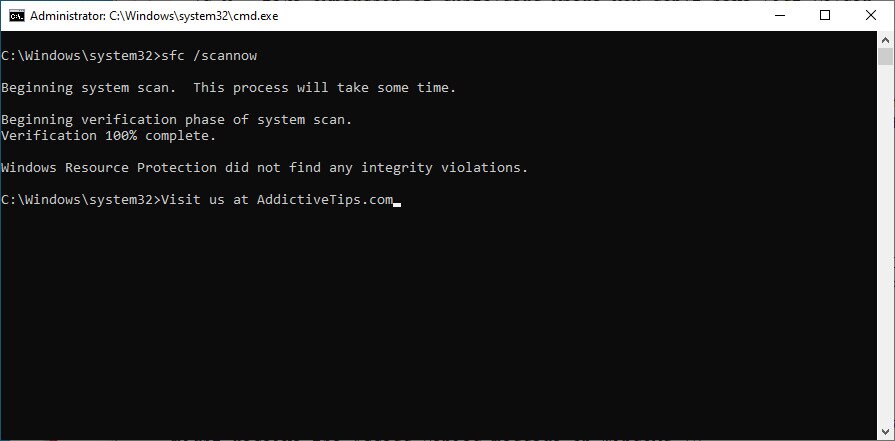
- Run CMD as admin
- Type
sfc /scannowand press Enter
- Wait until SFC scans your system and fixes any errors it finds
- Reboot your PC
How to use DISM:
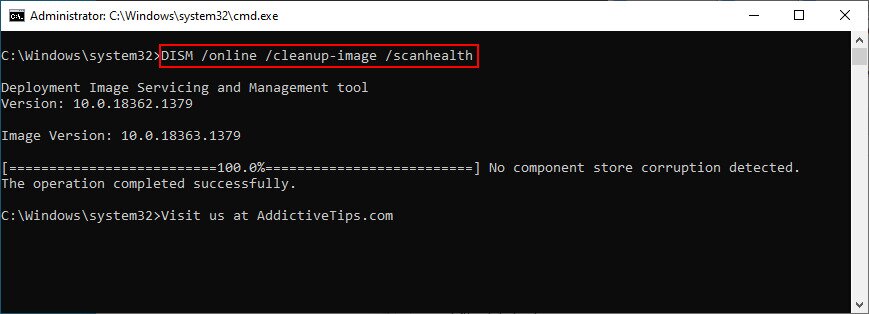
- Launch Command Prompt as admin
- Type
DISM /online /cleanup-image /scanhealthand press Enter
- If it reports any issues, fix them by running
DISM /online /cleanup-image /restorehealth - Restart your computer and run CMD as admin
- Type
sfc /scannowand press Enter - Restart your computer
10. Reset BIOS settings to default
If you have made any changes to your BIOS recently, perhaps you messed up something and accidentally triggered the WDF VIOLATION stop code. No need to worry, though, since you can easily reset BIOS settings to default.
- Restart your computer
- Before Windows loads, quickly press the hotkey shown on the bottom of the screen to enter BIOS mode
- Go to the Advanced section

- Set Reset Configuration Data to Yes
- Save the BIOS settings and exit with F10
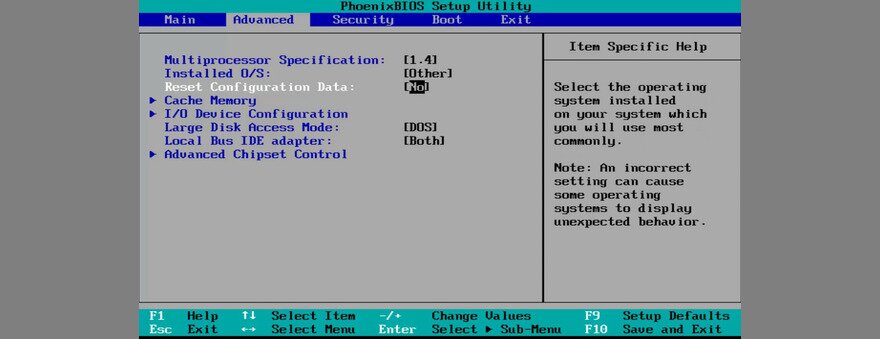
The instructions might be different on your machine, depending on your BIOS version. Just make the necessary adjustments and you’ll be good to go.
11. Update BIOS to the latest version
While we’re on the topic of BIOS, it wouldn’t hurt to update it to the newest version. It’s not that complicated and it could help stop Blue Screen of Death error messages, too.
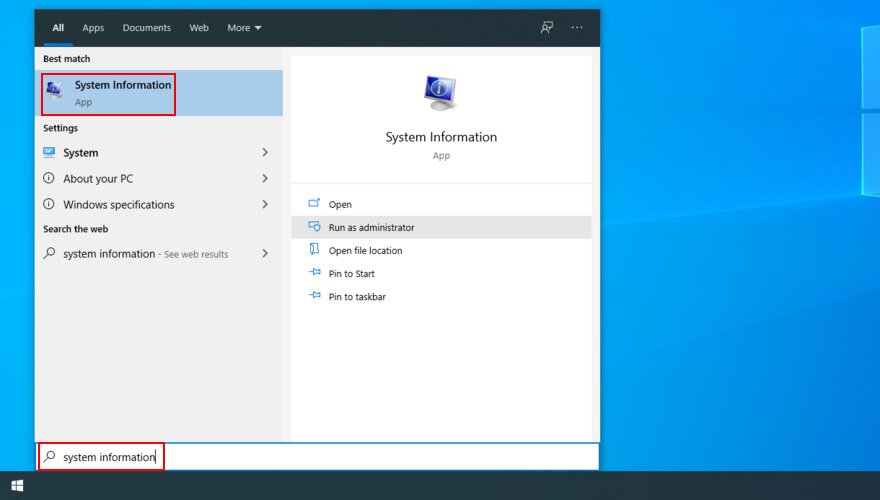
It’s just a matter of figuring out your BIOS version for update.
- Press the Win key, type System Information, and launch this app

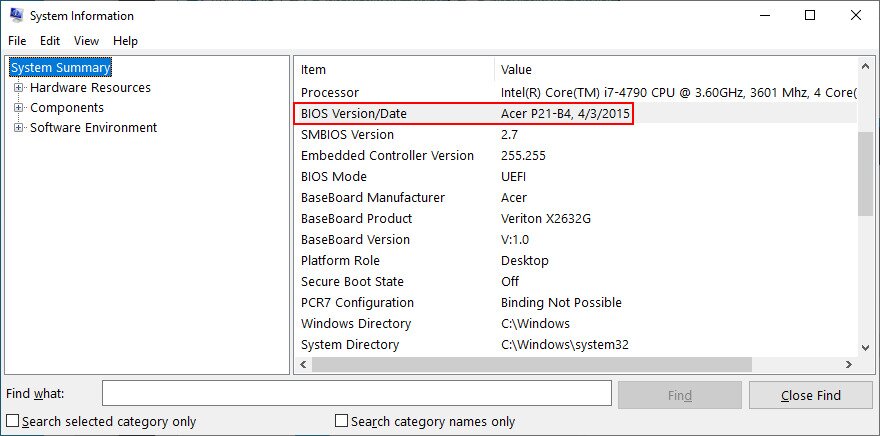
- Go to System Summary and write down the BIOS Version/Date

- Access the website of your BIOS manufacturer and look for a newer version
- Download the BIOS update and transfer it to a USB pen drive
- Reboot your computer and enter BIOS
- Make sure to back up your current BIOS version to the flash drive
- Launch the BIOS update, follow the on-screen instructions, and wait until the task is over
- Whatever you do, don’t turn off or restart your computer during this time
- Start Windows as normal and check for BSOD errors
12. Run a clean boot
If you have a hard time attempting to troubleshoot the blue screen error because it gets immediately triggered, you can try running a clean Windows 10 boot.
It deactivates all non-essential drivers, processes and services to create a safe environment where you can further investigate the stop code.
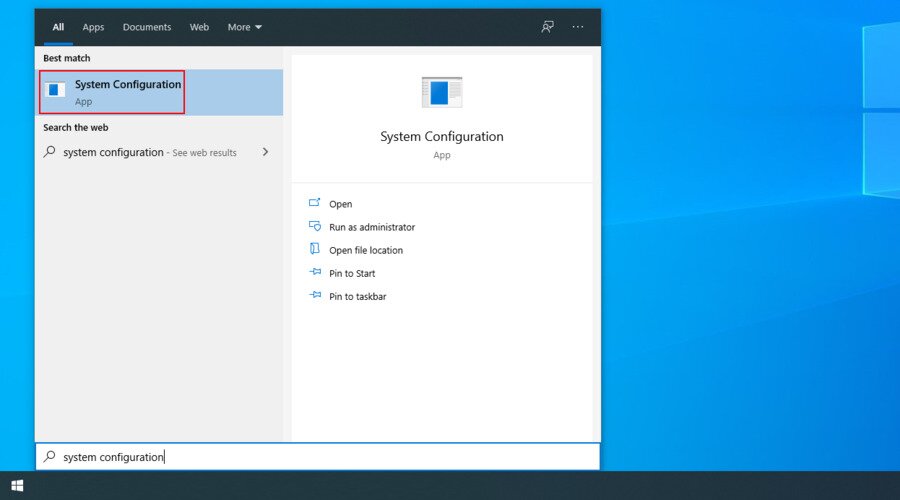
How to clean boot Windows 10:
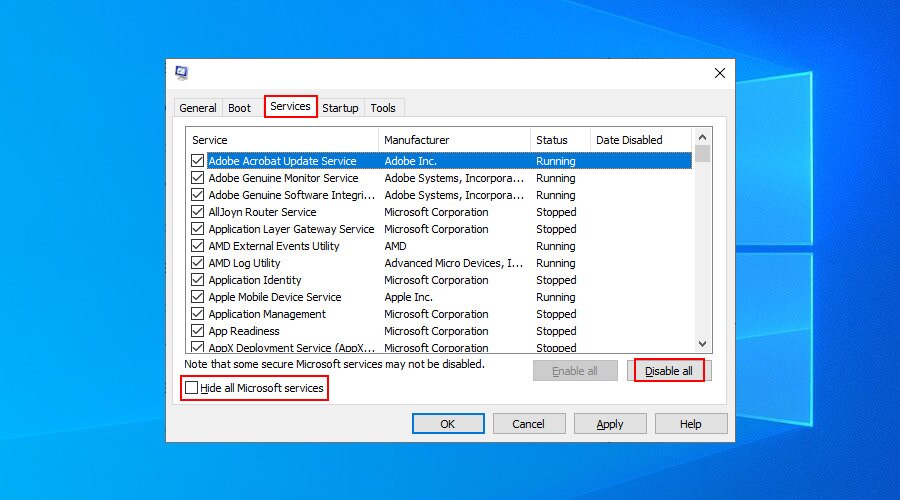
- Click the Start button, type System Configuration, and open this app

- Select the Services tab, uncheck Hide all Microsoft services, and click Disable all

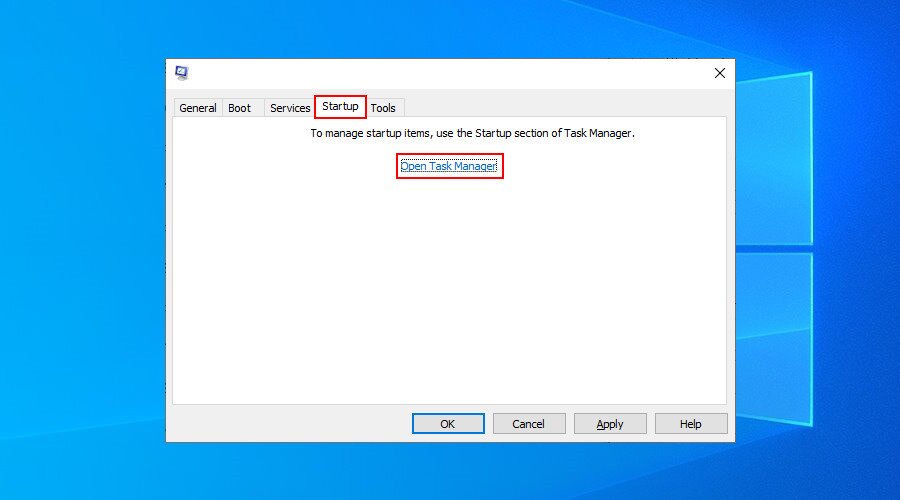
- Switch to the Startup tab and click Open Task Manager

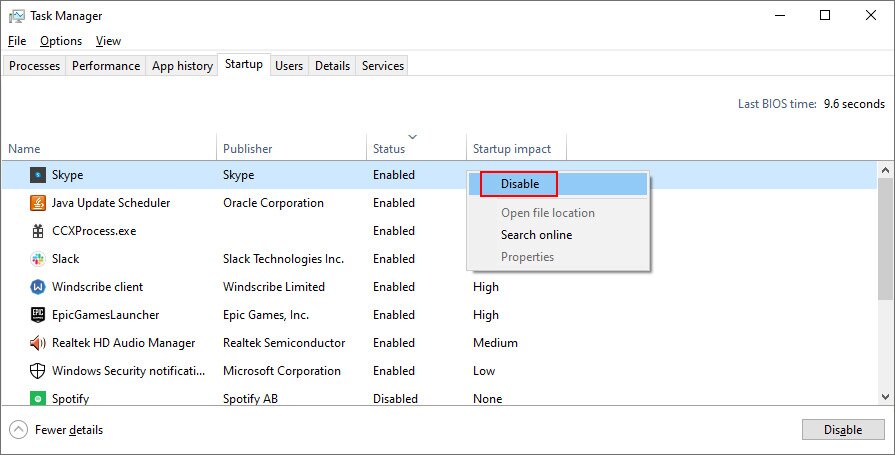
- Disable all startup programs

- Reboot your PC
Stop Code WDF_VIOLATION: Conclusion
There’s no need to panic over the WDF VIOLATION stop code since you can try a wide range of solutions on your own, without asking for an expert’s advice.
For instance, you should detach new hardware components from your computer, use BlueScreenView to find out more information about the involved drivers, as well as reinstall and update those drivers.
It’s also a good idea to check your RAM card for hardware failure, roll back Windows 10 to a stable checkpoint using System Restore, uninstall new software if System Restore fails, and check your computer for malware.
Furthermore, you should clear up your disk space, repair any corruption in the hard drive and operating system, reset BIOS settings to factory mode, update BIOS to the newest version, as well as run a clean Windows 10 boot.
And, if everything fails, get ready for a factory reset on Windows 10. But we hope you don’t need to go that far, though. Were these solutions useful for you? Let us know in the comment section below.
